![]() COMMUNICATION
COMMUNICATION
WX3100-T0
Dual-Band Wireless AX1800 Gigabit Extender
 Quick Start Guide
Contents
Package Contents
 |
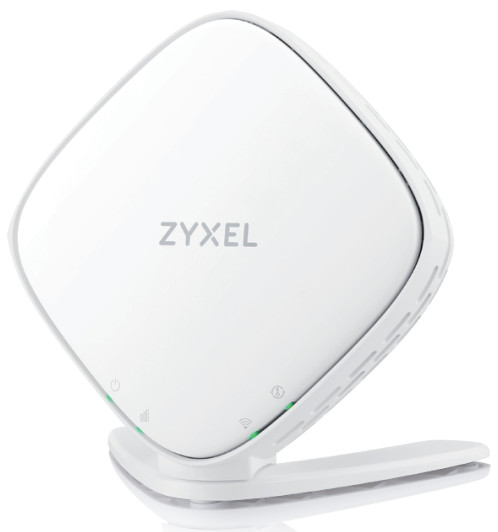
Device |
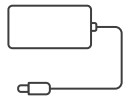 |
Power Adapter |
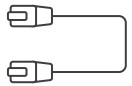 |
Ethernet Cable |
 |
Quick Start Guide |
 |
Declaration of Conformity Safety Warnings |
Support Information
![]() https://service-provider.zyxel.com/global/en/tech-support
https://service-provider.zyxel.com/global/en/tech-support
 https://zyxelsp.com/tech-support
See the User’s Guide at www.zyxel.com for more information, including customer support and safety warnings.
EU Importer
Zyxel Communications A/S
Gladsaxevej 378, 2. th. 2860 Søborg, Denmark.
https://www.zyxel.com/dk/da/
UK Importer
Zyxel Communications UK Ltd.
2 Old Row Court, Rose Street, Wokingham,
RG40 1XZ, United Kingdom (UK)
https://www.zyxel.com/uk/en/
US Importer
Zyxel Communications, Inc.
1130 North Miller Street Anaheim, CA 92806-2001
https://www.zyxel.com/us/en/
Copyright © 2023 Zyxel and/or its affiliates. All Rights Reserved.
Setting Up the WX3100
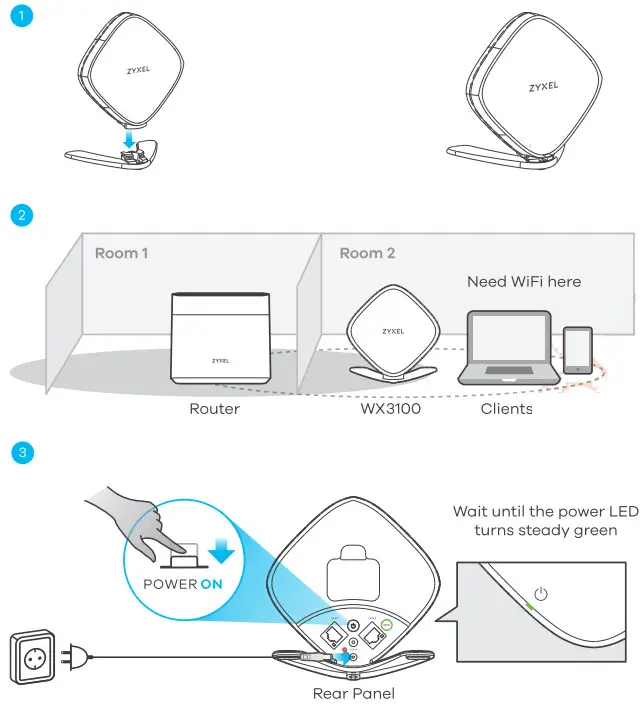
- Attach the bracket to the bottom of the WX3100 as shown.
- Place the WX3100 where you want to extend your wireless network.
- Plug in the power adapter and turn on the WX3100. Wait for about 2 minutes. The Power C) LED lights up steady green.
MPro Mesh Network Scenario 1: With MPro Mesh Router
In this scenario, you have a Zyxel router that supports MPro Mesh. If you do not, go to MPro Mesh Network Scenario 1: With Non-MPro Mesh Router and Two WX3100s.
Note: To check if your Zyxel router supports MPro Mesh, scan the QR code in the last page to see the MPro Mesh Router supported list.
Note: To set up your WX3100 with the MPro Mesh app, scan the QR code in the last page.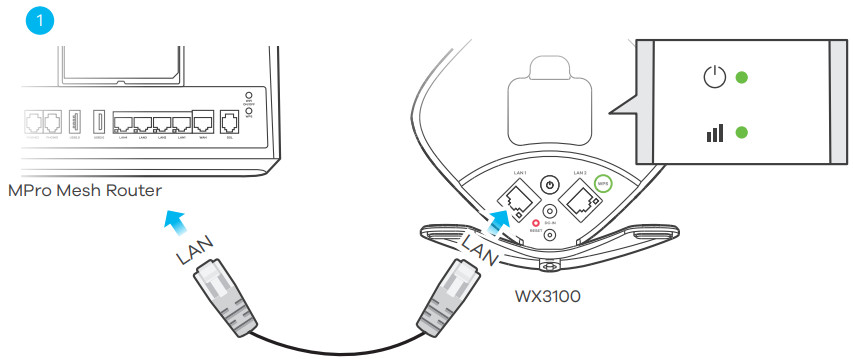
- Use the included Ethernet cable to connect the WX3100 LAN port to the MPro Mesh Router LAN port. Wait until the POWER and LINK LEDs are steady green.
- Unplug the Ethernet and power cable from the WX3100.
- Place the WX3100 where you want to extend your WiFi network.
- Plug in the power adapter. Make sure your LINK LED is steady green (preferred) or amber.
For more details on the LEDs, please refer to the LED table.
Note: You do not need to plug in the Ethernet cable in this step. - To add more extender to your network, repeat from step 1.

| Green On – Power is on or the MPro Mesh configuration process is done. Blinking – The WX3100-2 is starting up or under the MPro Mesh configuration process. Red On – The WX3100-2 detects a system error. Blinking (Fast) – The WX3100-2 is upgrading firmware. Blinking (Slow) – The Easy Mesh process has failed. |
|
| With Wireless Connection Green On – The WiFi connection to the WX3100-1 is good. Amber On – The signal is too strong. Suggest moving the WX3100-2 away from the WX3100-1. Red On – The signal is too weak. Move the WX3100-2 closer to the WX3100-1. With Wired Connection Green On – The Ethernet cable is connected to the WX3100-2 LAN port. |
|
| Green On – 2.4G/5G WiFi is ready. Blinking – The WX3100-2 is transmitting/receiving WiFi data. Off – 2.4G/5G WiFi is disabled. |
|
| Amber Blinking – The WPS is in process. Off – The WPS process is done. |
MPro Mesh Network Scenario 2: With Non-MPro Mesh Router and Two WX3100s
The WX3100 connected to the Non-MPro Mesh Router with an Ethernet cable is hereafter referred to as the first WX3100 (WX3100-1)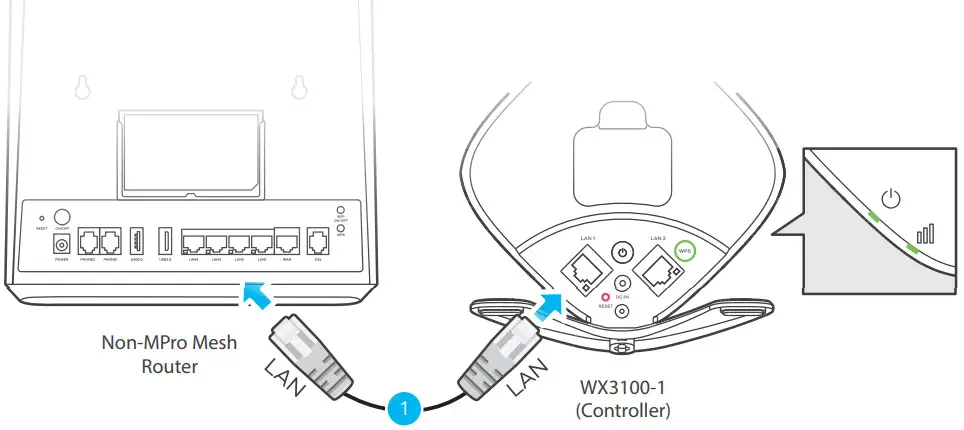
- Use the included Ethernet cable to connect the first WX3100 (WX3100-1) LAN port to the Non-MPro Mesh Router LAN port. Wait until the POWER and LINK LEDs are steady green.
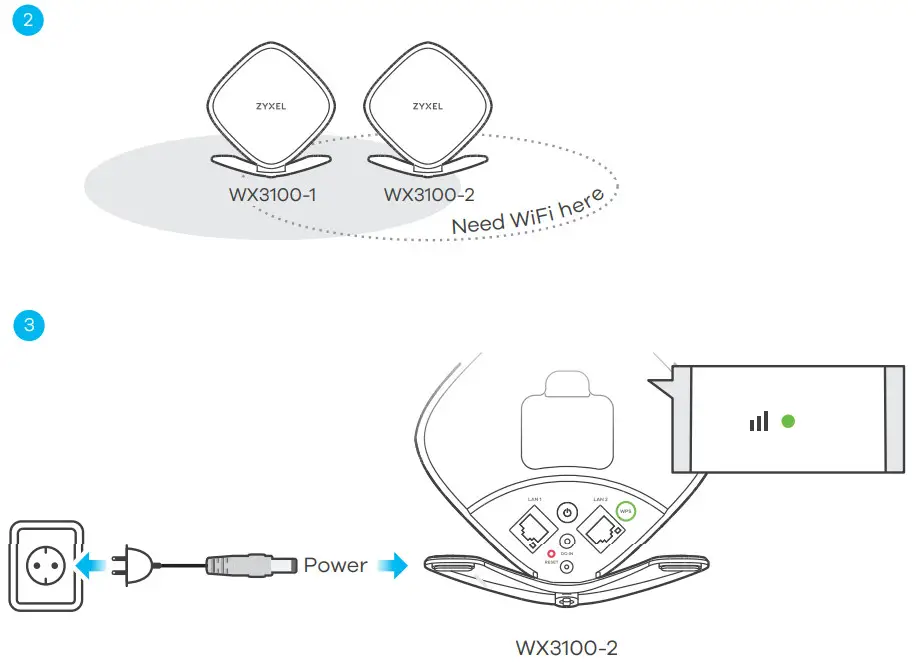
- Place the second WX3100 (WX3100-2) where you want to extend your WiFi network.
- Wait until the POWER and LINK LEDs on WX3100-2 are steady green (preferred) or amber to indicate that the auto-pairing is done. Move the WX3100-2 closer to the WX3100-1 if the LINK LED is red.
- Scan the QR code at the last page to install the MPro Mesh App to manage your WX3100-1.
| Green On – Power is on or the MPro Mesh configuration process is done. Blinking – The WX3100-2 is starting up or under the MPro Mesh configuration process. Red On – The WX3100-2 detects a system error. Blinking (Fast) – The WX3100-2 is upgrading firmware. Blinking (Slow) – The Easy Mesh process has failed. |
|
| With Wireless Connection Green On – The WiFi connection to the WX3100-1 is good. Amber On – The signal is too strong. Suggest moving the WX3100-2 away from the WX3100-1. Red On – The signal is too weak. Move the WX3100-2 closer to the WX3100-1. With Wired Connection Green On – The Ethernet cable is connected to the WX3100-2 LAN port. |
|
| Green On – 2.4G/5G WiFi is ready. Blinking – The WX3100-2 is transmitting/receiving WiFi data. Off – 2.4G/5G WiFi is disabled. |
|
| Amber Blinking – The WPS is in process. Off – The WPS process is done. |
Managing Your WX3100 Using the MPro Mesh App
 |
 |
|
| https://play.google.com/store/apps/details?id=zyxel.com.multyproneo | https://apps.apple.com/us/app/mpro-mesh/id1479660357 |
Download the MPro Mesh app to manage your WX3100.
Note: To manage your Mesh network, connect the MPro Mesh app to the Controller (WX3100-1 in Scenario 1 or MPro Mesh Router in Scenario 2).
 https://www.zyxel.com/library/sp/MPro_Mesh_supported_model_list.pdf
Scan this QR code to see a list of Zyxel devices that support MPro Mesh.
 https://www.zyxel.com/library/sp/compact_user_guide_wx3100.pdf
Scan this QR code to see steps for setting up your WX3100 with the MPro Mesh app.
![]()