Contents
ZMJH S005-B3 Heated Toilet Seat with Night Light

PRODUCT INFORMATION
NAMES OF PARTS
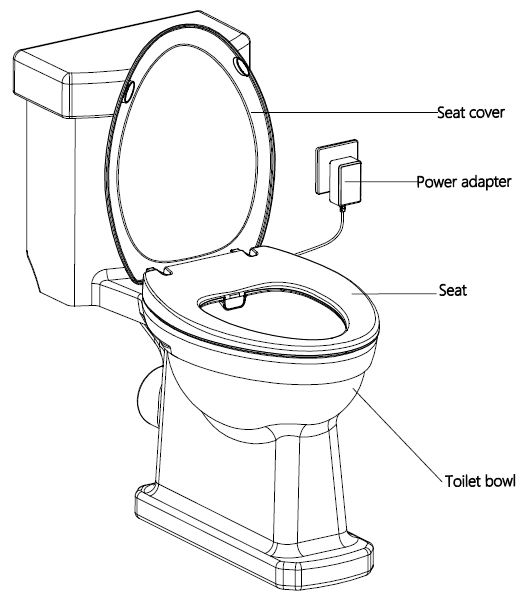
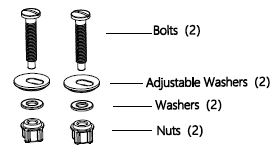
Parts List
- Main body
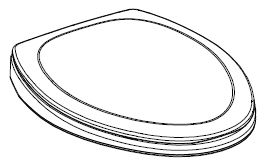
- Seat Components
- Owner’s Manual

- Power Adapter

PRODUCT DIMENSIONS
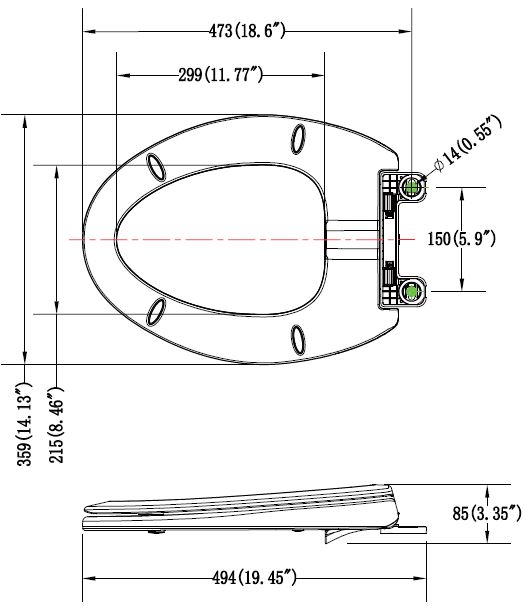
For the adjustable range of installation, please refer to the marked area. The length is 18.35″-18.9″ and the width is 5.35″-6.45″
PRECAUTIONS
- Please make sure you read the instructions carefully and install it properly.
- The water pressure limit is from 0.08 to 0.8MPa (11.6-116PSI). Please use as instructed.
PRE-INSTALLATION
- Take the components out of the plastic bag. Insert the bolts into the adjustable washers as illustrated.

- Open the hinge covers.
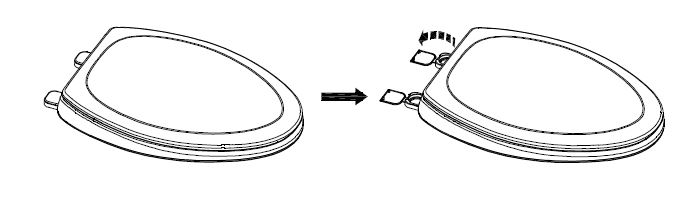
- Insert the bolts with the adjustable washers into the hinge mounting holes.

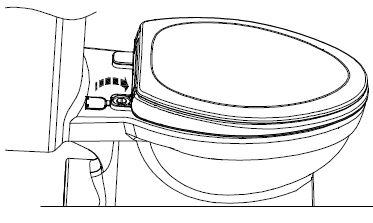
INSTALLATION PROCEDURE
- Insert the bolts with the adjustable washers into the hinge and then into the toilet mounting holes.

- Adjust the seat cover according to the position of the toilet bowl to correspond

- Hold the bolt with a slot screwdriver to prevent it from turning while tightening the nut and washer by hand until snug. Then tighten a bit more with the screwdriver.

- Close the hinge covers.
PRODUCT OPERATION
Nightlight Setting
- Plug into an outlet, and the nightlight works;
- Turn the nightlight on/off by pressing the button twice successively.

Seat Temperature Setting
- Plug into an outlet, the seat temperature works at 38°;
- Turn the seat temperature on/off by pressing the button continuously for 2S,
- To adjust the seat temperature, gently press the button. Each time the button is pressed, the button will be lit, representing different levels of temperature;
- Temperature adjustment cycle: Low in blue/ Mid in purple/ High in red.
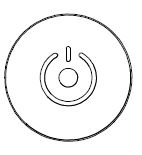
Tips: Temperature setting (Low:36°/Mid:38°/High:40°)
CLEANING
Clean the bidet with a sponge or soft cloth with diluted kitchen detergent or glass cleaner. Do not use harsh petroleum products or anything abrasive. Avoid using chlorine or bleach for cleaning.

MAINTENANCE
Self-diagnosis and Troubleshooting

Caution
Do not attempt to disassemble or repair the unit.
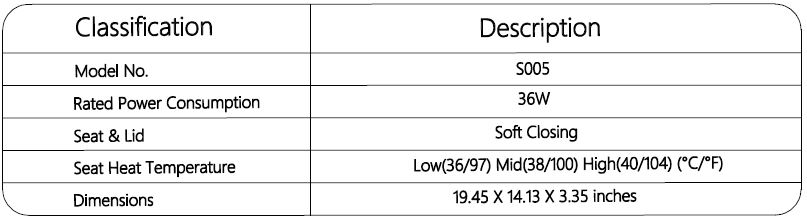
SPECIFICATIONS
Contact Us
Any questions contact: [email protected].