Contents
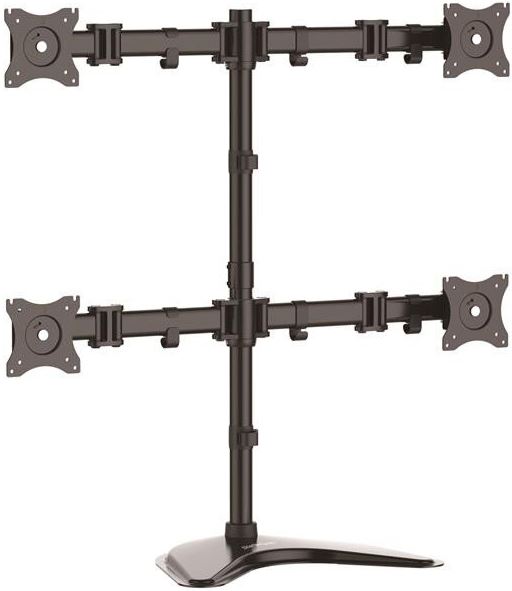
WALI GMF004 Quad Monitor Stand
WARNING!
- If you do not understand these directions, or if you have any doubts about the safety of the installation, please call a qualified technician.
- Check carefully to make sure there are no missing or defective parts.
- Improper installation may cause damage or serious injury.
- Do not use this product for any purpose that is not explicitly specified in this manual.
- Do not exceed weight capacity. We cannot be liable for damage or injury caused by improper mounting, incorrect assembly or inappropriate use.
TIPOVER WARNING
- SERIOUS OR FATAL CRUSHING INJURIES CAN OCCUR FROM TIPOVER.
- TO HELP PREVENT TIPOVER:
- NEVER ALLOW CHILDREN TO CLIMB, STAND, HANG, OR PLAY ON ANY PART OF MONITOR OR STAND.
- USE TIPOVER RESTRAINT OR ANCHOR STAND TO WALL.
- USE OF TIPOVER RESTRAINTS MAY ONLY REDUCE, BUT NOT ELIMINATE RISK OF TIP OVER.
- SMALL PARTS- NOT FOR CHILDREN UNDER 3 YEARS. ADULT SUPERVISION IS REQUIRED.
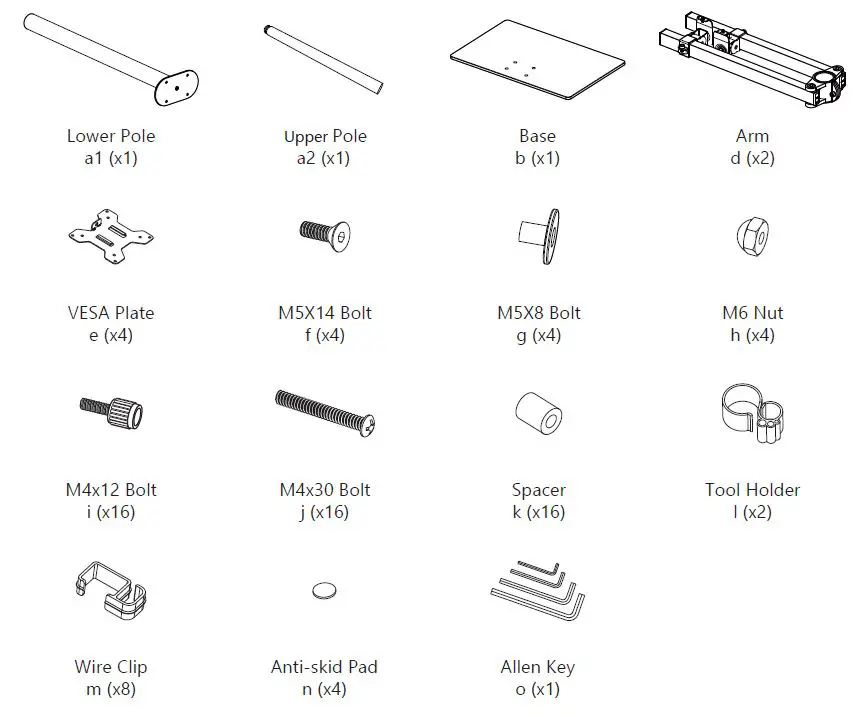
Supplied Parts List
Installation Instructions
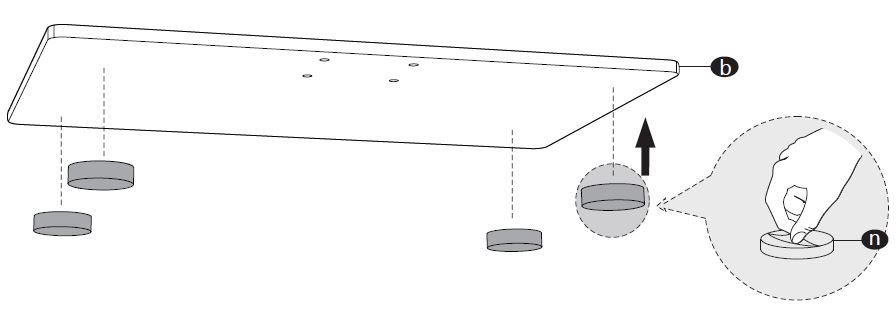
Step 1
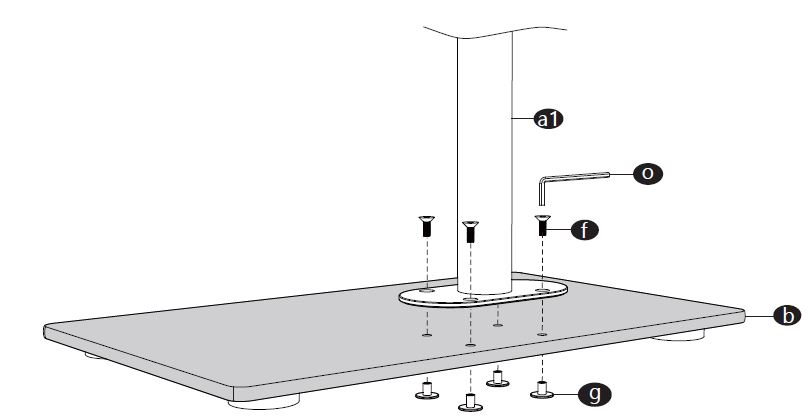
- Tear off the protect paper to attach Anti-Skid Pad n to the bottom designated position of Base b as image shown.
Step 2
- Install the Lower Pole a1 to the Weighted Base b using M5x14 Bolts f and corresponding M5x8 Bolts g , and tighten using the Allen Key o .
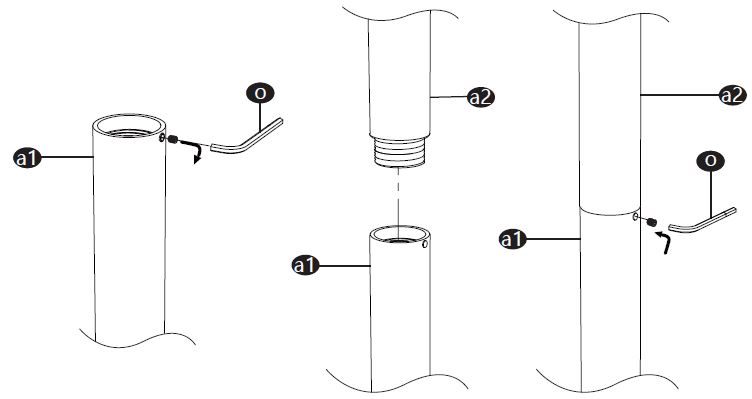
Step 3
- Loosen the screw on the Lower Pole a1 with Allen key 2mm 0 . Connect Lower Pole to Upper Pole a1 and tighten the screw with Allen key 2mm 0 to fix the two poles.
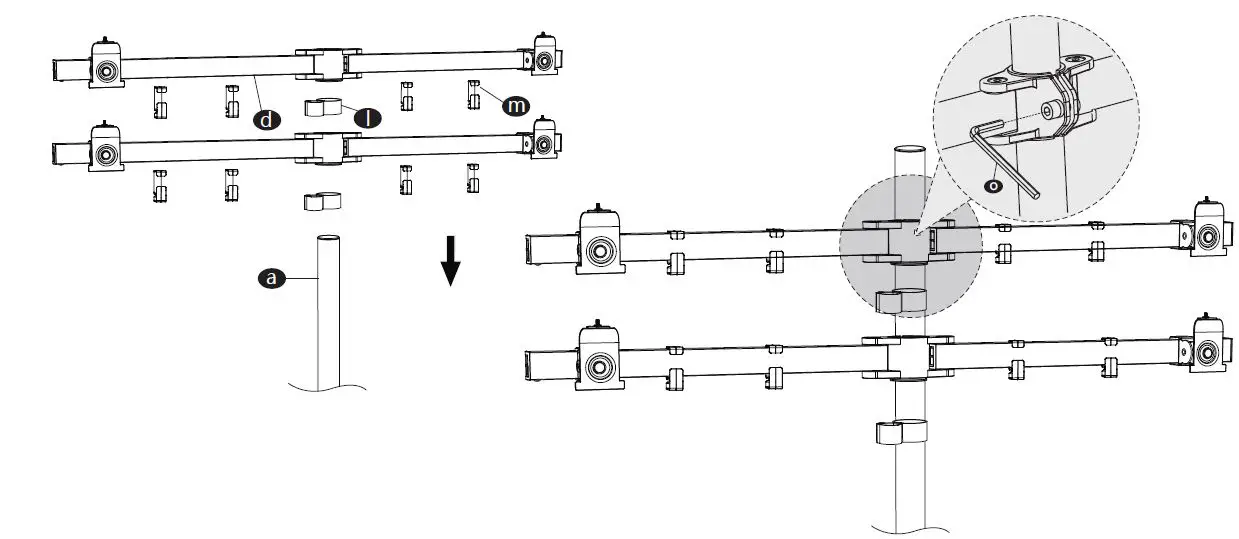
Step 4
- Put the Wire Clips 1 and Monitor Arms d through the Upper Pole a1 & a2 , adjust the preferred height and tighten using Allen Key 6mm o .
Step 5
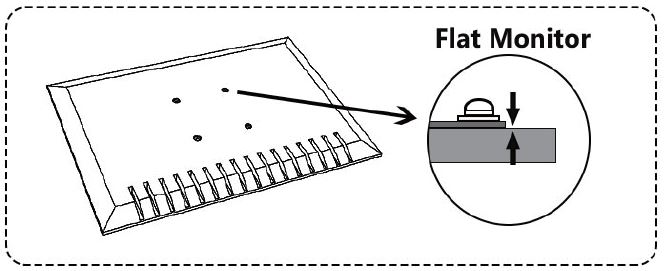
Select TV Screws
- Only one screw size fits your TV
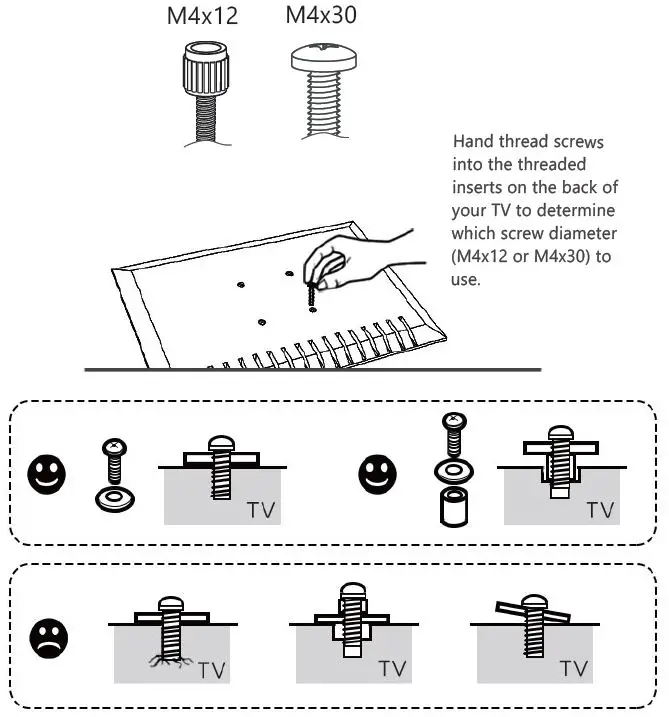
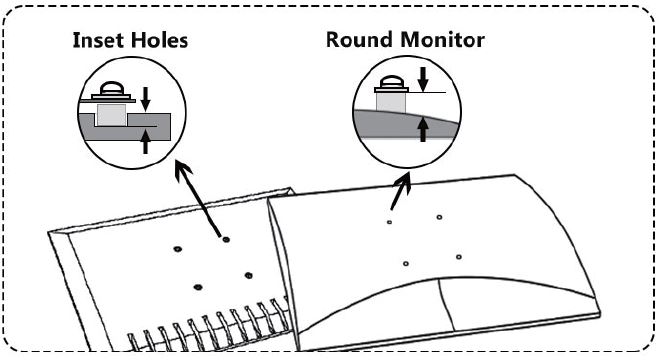
Step 5.2 Select Spacers ( if needed)
- NOT NEEDED
NEEDED FOR
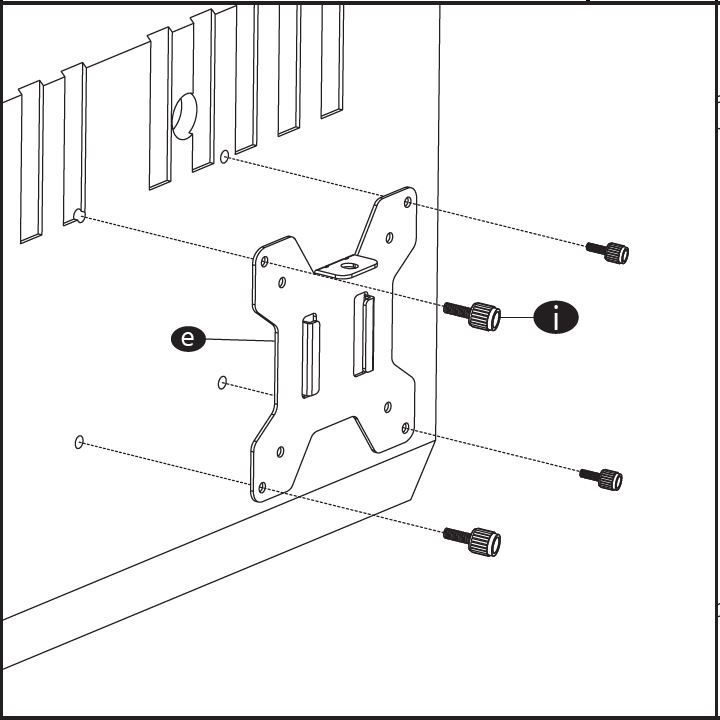
Step 5.3a
- For Monitor with Flat Back
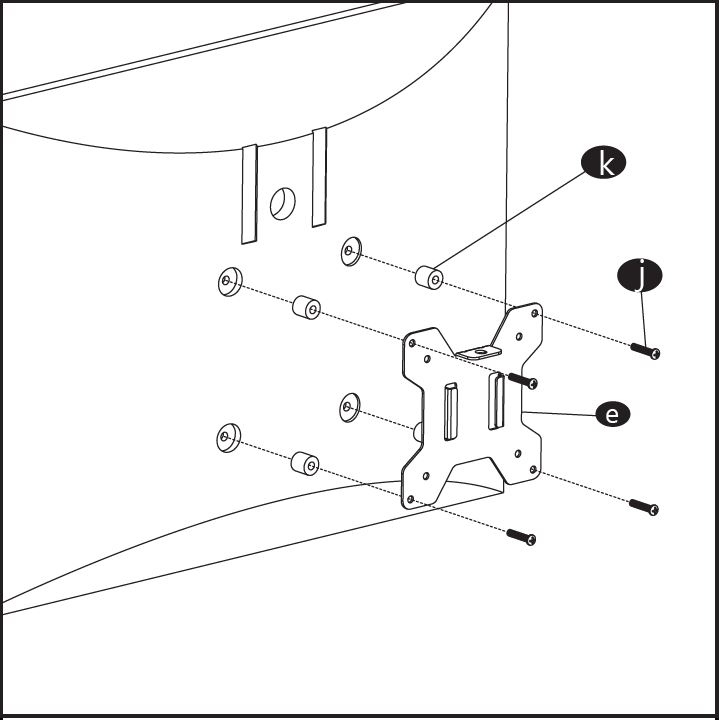
Step 5.3b
- For Monitor with Curved or Recessed Back
Step 6
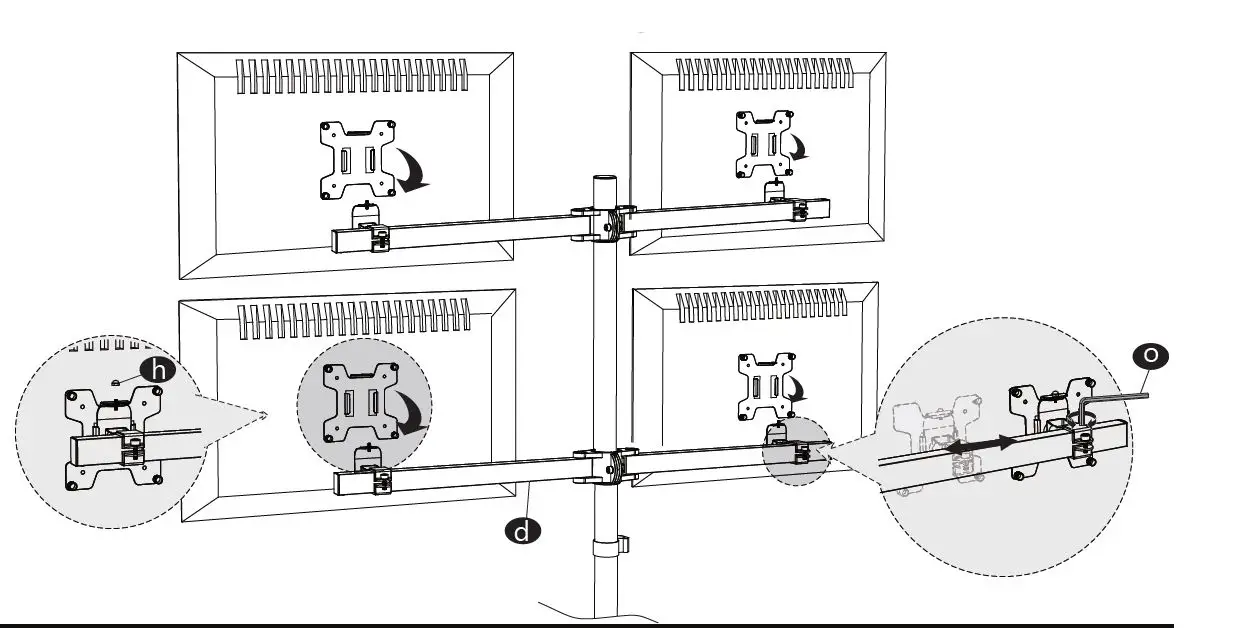
- Place the assembled TV/Monitor onto Arm d , tighten the VESA Plate with M6 Nut h for stability. Adjust the VESA Plate using Allen Key o to move it laterally along the Arm d .
Step 7
- Swivel: Manually adjust the swivel angle. (Swivel 0°/+90°, no tools needed)

- Rotate: Manually adjust the rotation angle. (Rotate 360°, no tools needed)

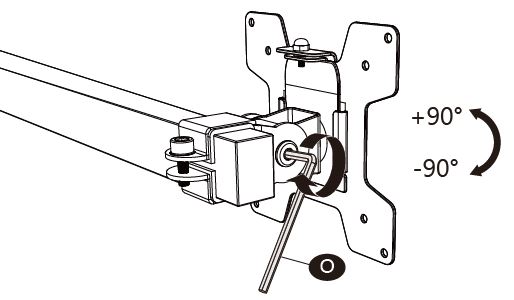
- Tilt: Adjust the VESA Plate tilt using Allen Key o . ( Tilt +90°/-90°)
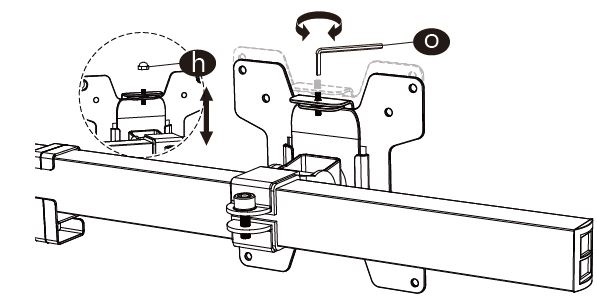
Align: If monitors are not aligned, remove M6 Nut h and turn the bolt counter-clockwise with included Allen key o to adjust VESA plate height. Install the M6 Nut h after the adjustment.
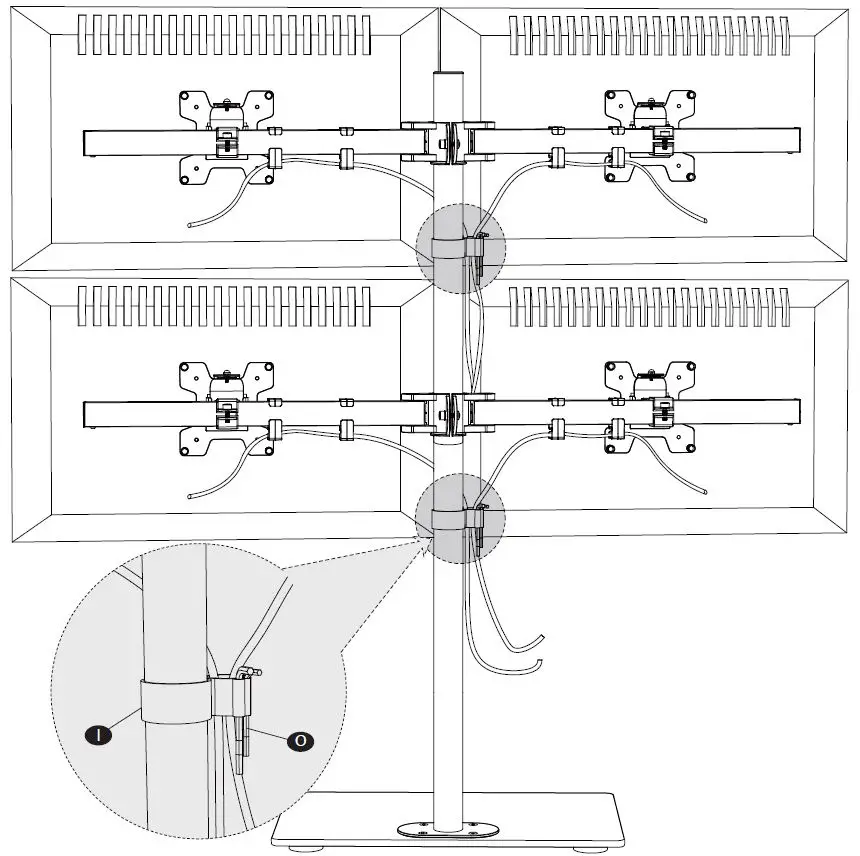
Step 8
- Guide the cable through the clip holder and store the Allen Key o in the holder.
- Notice: Please make sure the M6 nut h is installed before you rotate the monitor.