Contents
V-TAC Carport

Accessories
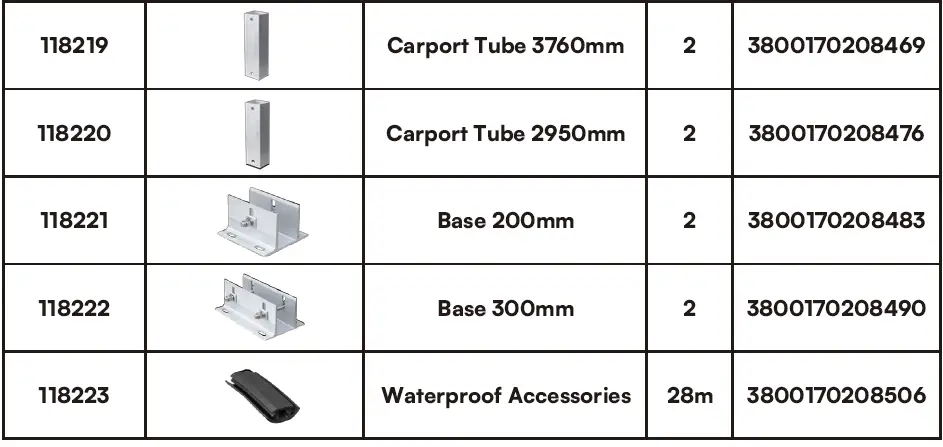
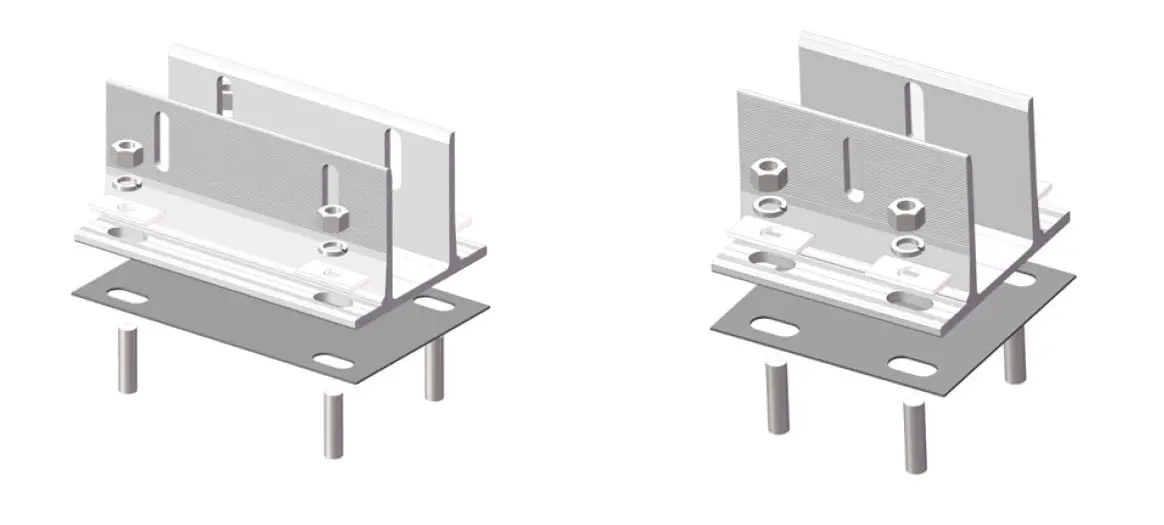
- Base (300mm)
- Base (200mm)
- Carport Tube (2500mm)
- Carport Tube (3760mm)
- Carport Tube (2950mm)
- H Jacket (150mm)
- H Jacket (220mm)
- Crossbar Rail (5900mm)
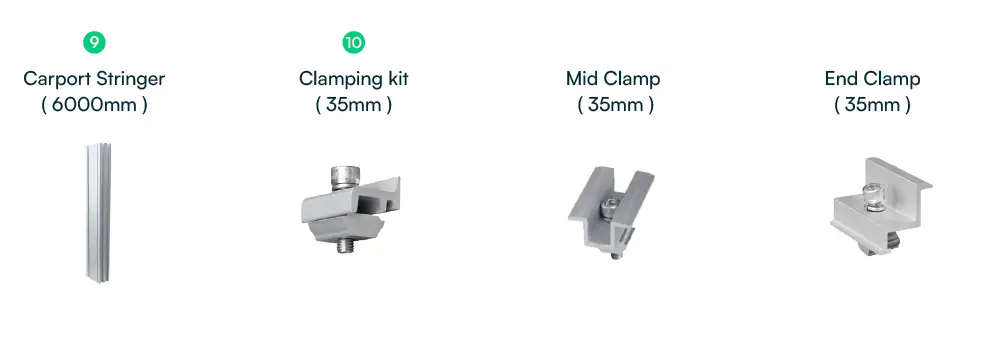
- Carport Stringer (6000mm)
- Clamping kit (35mm)
- Mid Clamp (35mm)
- End Clamp (35mm)
Installation Steps
- Step 1: Disassemble the screws of the base to fix it on the ground.
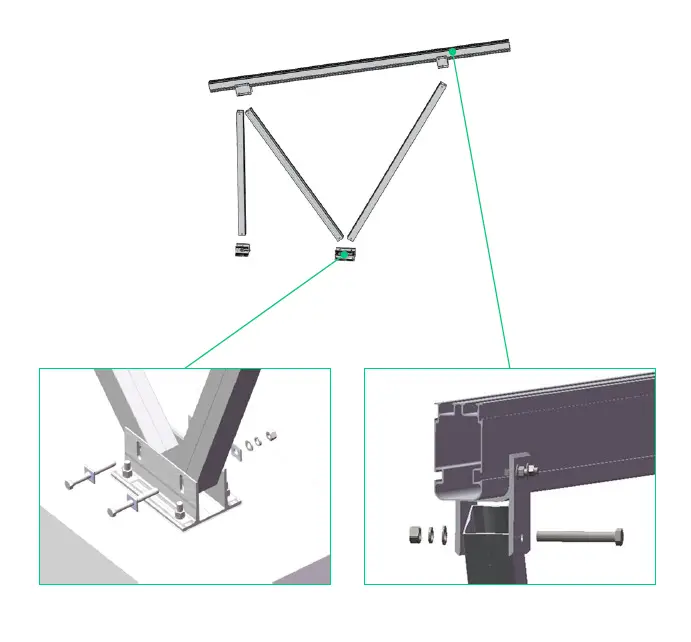
- Step 2: Use the screws of the base to fix the end carport tubes. Meanwhile, fix the H-Jackets on the carport stringer, then connect the H-Jackets with the other end of carport tubes.
- Step 3: The other side should be installed using the same method as in step 2.
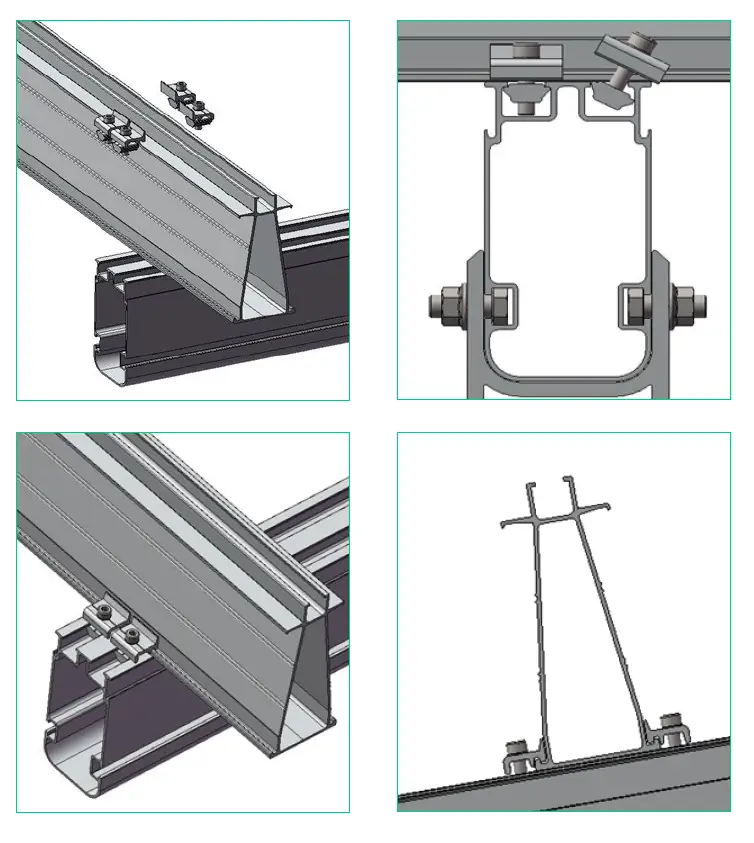
- Step 4: Use the clamping kit to install the Crossbar Rail and Stringer.
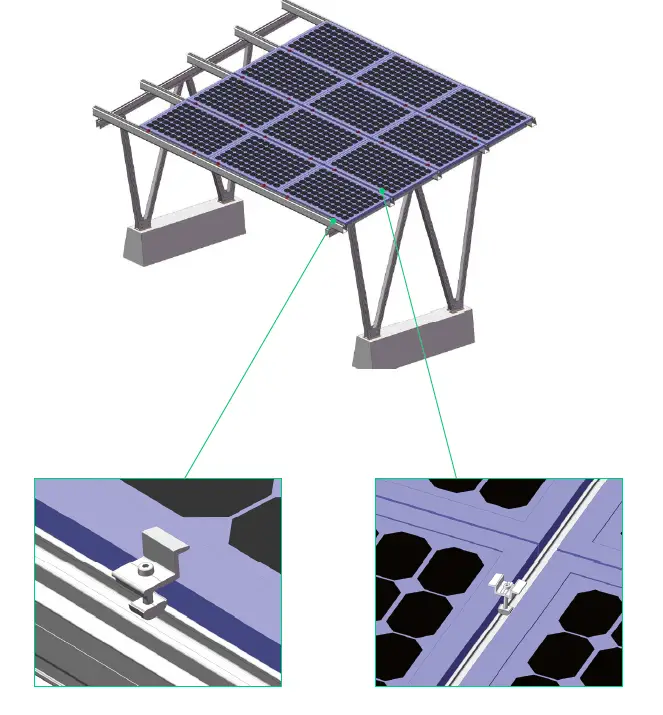
- Step 5: Use mid-clamps and end-clamps to fix solar panels on the Crossbar Rail.
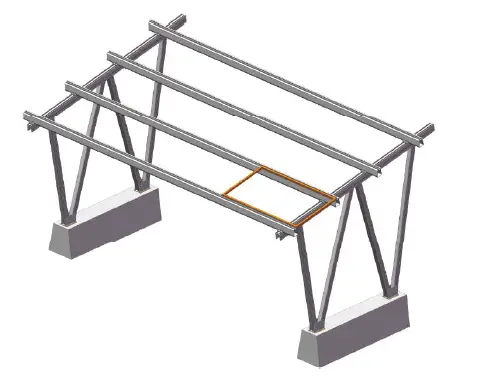
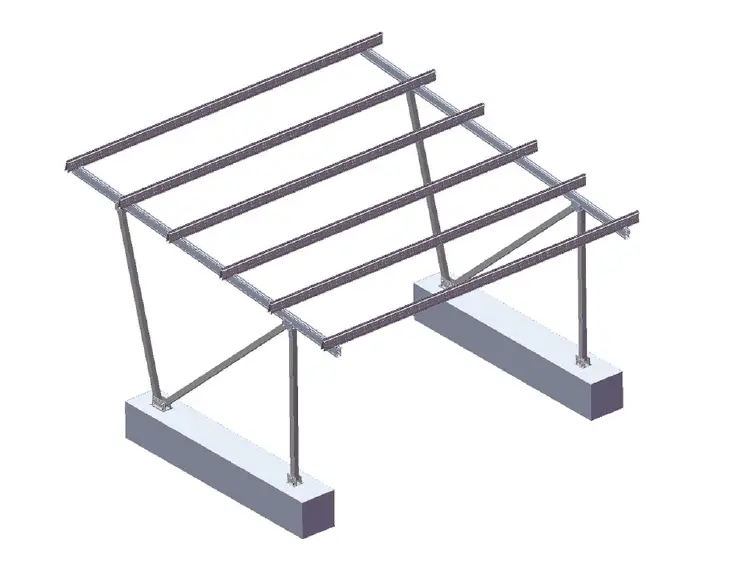
Diagrammatic Drawing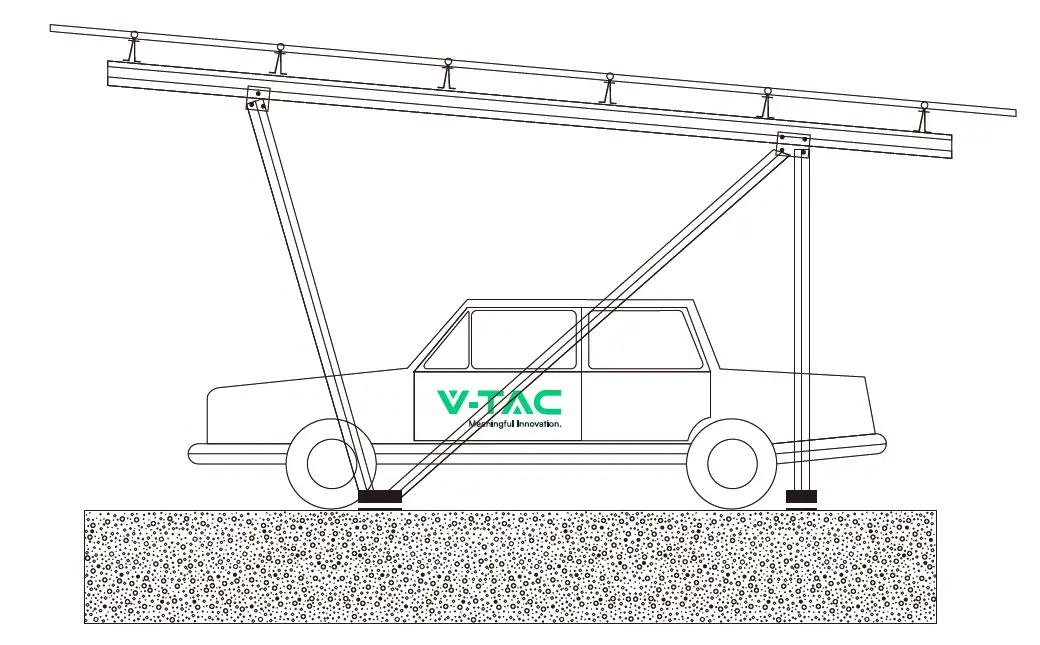
Product List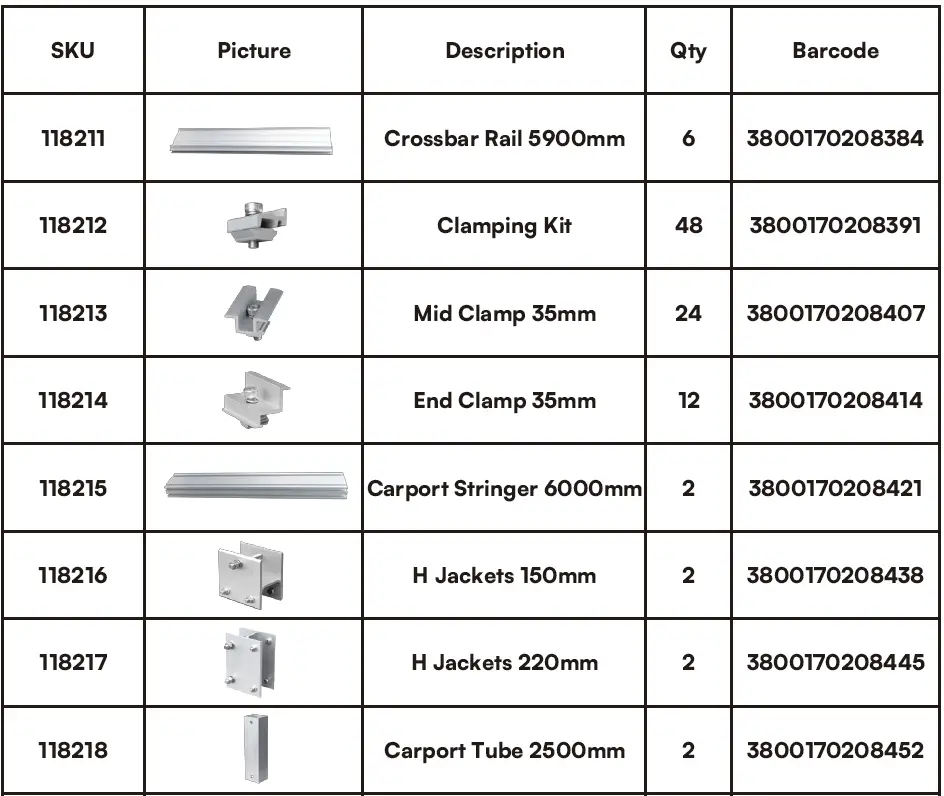
Carport Structure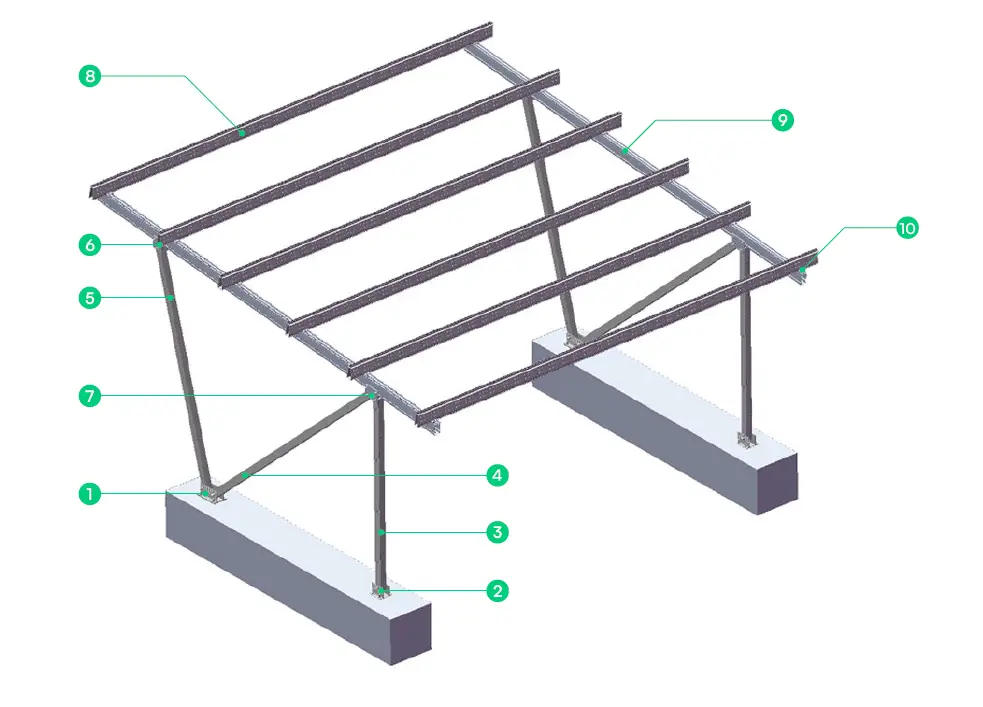
Accessories
Installation Steps
- Disassemble the screws of the base to fix it on the ground.
- Using the screws of base to fix the end carport tubes, meanwhile, fix the H-Jackets on the carport stringer,then connect the H-Jackets with the other end of carport tubes.
- The other side should install as the same method.
- Using the clamping kit to install the Crossbar rail and Stringer.
- Using mid clamps and end clamps to fix solar panels on the crossbar rail.