Contents
Tyba TY-A-MUSE Muse D64 Dante Audio System
DISCLAIMER
Tyba Home Limited makes no representations or warranties with respect to this manual and, to the maximum extent permitted by law, expressly limits its liability for breach of any warranty that may be implied to the replacement of this manual with another. Furthermore, Tyba Home Limited reserves the right to revise this publication at any time without incurring an obligation to notify any person of the revision. The information provided in this documentation contains general descriptions and/or technical characteristics of the performance of the products contained herein. This documentation is not intended as a substitute for and is not to be used for determining the suitability or reliability of these products for specific user applications. It is the duty of any such user or integrator to perform the appropriate and complete risk analysis, evaluation and testing of the products with respect to the relevant specific application or use thereof. Neither Tyba Home Limited nor any of its affiliates or subsidiaries shall be responsible or liable for misuse of the information that is contained herein. If you have any suggestions for improvements or amendments or have found errors in this publication, please notify us. All pertinent state, regional, and local safety regulations must be observed when installing and using this product. For reasons of safety and to help ensure compliance with documented system data, only the manufacturer shall perform repairs to components. Failure to observe this information can result in injury or equipment damage.
Copyright © 2022 by Tyba Home Limited All rights reserved. No part of this publication may be reproduced, distributed, or transmitted in any form or by any means, including photocopying, recording, or other electronic or mechanical methods, without the prior written permission of the publisher. For permission requests, write to the publisher, addressed “Attention: Permissions Coordinator,” at the address below. Tyba Home Limited, Unit 3, Jubilee Way, Faversham, Kent, ME13 8GD, UK +44 (0) 20 3907 6877 www.tybahome.com.
TRADEMARKS
- Tyba Home Limited has made every effort to supply trademark information about company names, products, and services mentioned in this manual. Trademarks shown below were derived from various sources. All trademarks are the property of their respective owners.
- General Notice: Some product names used in this manual are used for identification purposes only and may be trademarks of their respective companies.
- Apple and AirPlay are trademarks of Apple Inc., registered in the U.S. and other countries.
Product Modifications
| Date Version Modifications | ||
| 19/05/2022 | 1.0 | Initial release |
Document Revisions
| Date Version Document Changes | ||
| 19/05/2022 | 1.0 | Initial draft |
| 29/07/2022 | 1.1 | Updated Terminology |
| 05/01/2023 | 1.2 | Added AirPlay 2 Support |
Description of the User
- This User Guide is intended for professional installers such as electricians or system integrators.
Explanation of Safety Warnings
DANGER
- Danger indicates a hazard with a high level of risk which, if not avoided, will result in death or serious injury
WARNING
- Warning indicates a hazard with a medium level of risk which, if not avoided, could result in death or serious injury.
CAUTION
- Caution indicates a hazard with a low level of risk which, if not avoided, could result in minor or moderate injury.
NOTICE
- Indicates information considered important, but not hazard-related.
Retaining Instructions
- Read and understand this manual and its safety instructions before using this product. Failure to do so can result in serious injury or death.
- Ensure that each person who uses the product has read these warnings and instructions and follows them.
- Tyba Home Limited is not liable for cases of material damage or personal injury caused by incorrect handling or non-compliance with the safety instructions. In such cases, the warranty will be voided.
Product Description
Intended Use and Reasonably Foreseeable Misuse
Muse is intended to be used as an audio streaming server, providing multiple streams of playback distributed using Dante or AES67. Muse is not intended to be used for any function outside those described. Muse should be used with the following software, original accessories and components only:
- Muse Manager for Windows & macOS.
- Genuine Audinate-certified Dante products.
- Muse control system drivers or third-party API.
System Overview
- Muse is an audio streaming server providing multiple streams of playback distributed over Dante or AES67. Muse is a source product designed to be used alongside other Dante certified devices. Muse Manager software is used to manage all elements of the Muse system.
Technical Data
| Parameter Description | |
| Product Name | Muse |
| Product Code | TY-A-MUSE |
| Streaming
Audio Formats Sample Rate |
AirPlay 2 | TIDAL | Deezer | Internet Radio
AAC | ALAC | WAV | FLAC | MP3 | AIFF | OGG 44.1kHz | 48kHz | 96kHz | 192kHz |
| Audio Output | Dante | 4, 16 or 64 streams |
| Storage
Control Software Updates |
Internal 220GB | USB3 | NAS
HTTP Control API | Crestron Driver OTA |
| LAN
Dante USB |
(2) 10/100/1000Mbps BaseT Ethernet
(2) 10/100/1000Mbps BaseT Ethernet (4) USB3 |
| Power | 12VDC |
| Dimensions | W 440mm | H 44mm | D 262mm | 1RU |
| Weight | 2.8kg |
| Warranty | 1-Year Limited Warranty |
| Certification | CE | UKCA | FCC | IC |
| Content Management | Muse Manager |
Product Compliance
This product complies with all relevant Directives associated with CE, UKCA, IC & FCC. The Declaration of Conformity and further certification documentation can be found at www.tybahome.com/downloads.
Safety Instructions
CAUTION
- Read and understand this manual and its safety instructions before using this product. Failure to do so can result in minor or moderate injury.
How to Use the Product Safely
- When using this product, ensure all guidance is followed regarding technical specifications, installation, setup, and operation. Never use this product with anything other than Tyba’s genuine accessories.
Graphical Symbols
| Symbol Meaning | |

|
The CE Marking on the product is the manufacturer’s
a declaration that the product complies. The UKCA Marking on the product is the manufacturer’s declaration that the product complies. |

|
The FCC Marking on the product is the manufacturer’s
a declaration that the product complies. The WEEE Marking on the product is the manufacturer’s confirmation that the product is not recyclable. |


Installation
CAUTION
- The product should only be installed by a qualified and trained person.
Connections and Physical Details

| Key Description | |
| 1 | Power Input 12VDC 5A |
| 2 | USB3 |
| 3 | Network Interface LAN 1 & LAN2 |
| 4 | Dante Network Interface Primary & Secondary |
| 5 | Power Button |
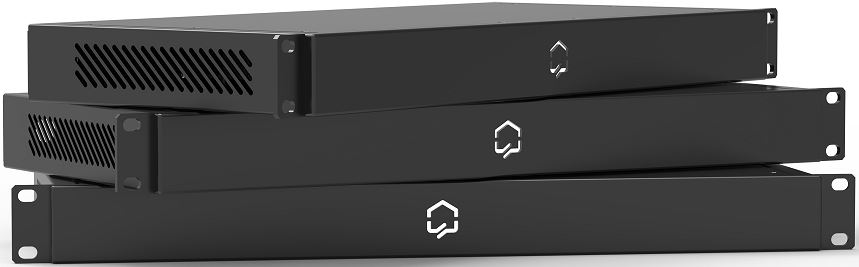
Rack Mounting
- Muse is designed to be mounted in a standard 19” rack. Equipment can be stacked directly above and below Muse if required.
Setup
NOTICE
- It is recommended that setup is carried out by a qualified and trained person.
Powering On
- Once Muse is powered using the supplied power supply, press the power button on the rear panel. The LED logo on the Muse front panel will light up white and the device will begin to start up. If the device is new it will start up in DHCP mode.
Connecting
To set up Muse you will need to locate Muse on your local network and then use the Muse web interface to complete the setup. To locate Muse on your local network choose from one of the following options:
- Using a web browser, locate Muse using the Muse server. local
- Scan the local network using an IP scanner to find the IP address that Muse has been assigned by your DHCP server.
- Connect to your router and find the IP address that Muse has been assigned by your DHCP server.
NOTICE
- A network with DHCP enabled is required for initial setup.
- Once the IP address or hostname has been located, use a web browser to browse to the address. You will be prompted for a username and password: Username: muse
- Password: museadministration
Settings Overview
- Now that you are connected to Muse and have launched the web interface you are able to configure the device as required.
- The settings available on the device are as follows:
System
| Setting Description | |
|
System
Firmware |
Overview of system information including OS Version, server state, CPU usage, temperature, free memory and
the system start date Firmware update manager |
| Logs | Provides the system logs |
| Time Zone | The time zone that the Muse system is located |
| Factory Reset | The date and time of the device, select from automatic or manual |
Network
| Setting Description | |
| LAN 1
LAN 2 |
Primary network interface. Choose from DHCP or Static
address Secondary network interface. Choose to enable and DHCP or Static address |
Audio
| Setting Description | |
| Device | The audio output used by Muse |
| Streams | The streams availability, names, and services available on each stream |
| Normalization | Applies gain control to tracks to ensure the audio level of all tracks is consistent |
Storage
| Setting Description | |
| Storage Type | Storage location. Internal, USB, or NAS |
| Capacity | The available capacity of the storage location |
System
The system section provides useful information on the health and state of the Muse system.
Firmware
The firmware section provides the current version of firmware running on the system as well as a method to update the firmware over the air. It is important to keep the system up to date. Click the Update Firmware button to start and confirm you are happy to proceed. Muse will begin the update procedure. The update process can take anywhere from 1 minute to 15 minutes depending on the size of the update and your internet speed. After a successful update, Muse will restart and the new firmware version will be displayed in the firmware section.
NOTICE
- It is important that you do not power off Muse while an update is in progress. An internet connection is a requirement when carrying out a firmware update.
Logs
- The logs section provides the ability to download the complete system logs to be supplied to [email protected] in case of any system errors.
Time Zone
The time zone section provides the ability to set the required time zone, this is used by Muse for various functions so it is important it is correct.
Network
The network section provides the ability to configure the network setup for the Muse system. By default Muse uses the primary LAN 1 interface set as DHCP. Should you wish to set Muse to a static IP address you can change the configuration type to Static and fill in the required fields. Once you have entered the static IP, subnet, gateway and DNS address, press Apply. You will need to browse to the static IP address you have chosen in order to connect to the Muse web interface or you can refresh the Muse hostname to connect again. Muse also has a second network interface, LAN2. This interface can be optionally setup for load balancing or data segregation.
Audio Device
The device section provides the ability to change the sample rate in which the system operates. It is important that you set the sample rate to match the sample rate you have set for Muse in Dante Controller.
Streams
The stream section provides a breakdown of all of the available Muse streams. By default, each stream is named “Muse” followed by the stream number. You can change the name of the stream to better identify the stream. The stream names will be displayed in Muse Manager and are used as the broadcast name for streaming services such as AirPlay 2.
AirPlay 2
To enable AirPlay 2, tick the corresponding box next to each of the streams you require AirPlay 2 support. Click Apply at the bottom of the section. The AirPlay 2 service will appear on your network for the streams selected using the stream names provided. Applying changes to streams will cause Muse services to restart, during this time audio playback will be affected.
NOTICE
- If a Muse AirPlay 2 stream is added to a Home within the Apple Home app then the name of the stream within Muse can no longer be edited. To gain control of the stream name within Muse, remove the Muse stream from the Home within the Apple Home app.

- Use of the Works with Apple badge means that an accessory has been designed to work specifically with the technology identified in the badge and has been certified by the developer to meet Apple performance standards
Normalization
- When enabled, normalization will require a scan of the Muse library to apply replay gain to the tracks stored on Muse. After the scan has been completed, all tracks on Muse will be normalized and should playback at the same audio level.
Internal Storage
- When set to Internal, Muse will locate the audio files on the internal storage.
USB Storage
- When set to USB, Muse will locate the audio files on the USB storage. If using USB storage is it important that your USB drive is formatted and set up by Muse. Connect the USB drive and follow the format option to prepare your drive for use with Muse.
NOTICE
- Formatting the USB drive will wipe the contents.
Network Storage
- When set to Network, Muse will locate the audio files on a network storage location. Only NFS shares are supported. You will be prompted to supply the IP address as well as the path to the NFS share location.
Maintenance
CAUTION
- The product is maintenance-free. Repair should only be carried out by a qualified and trained person.