TerraTrike Rogue Wheel and Sprocket Instruction Manual
Contents
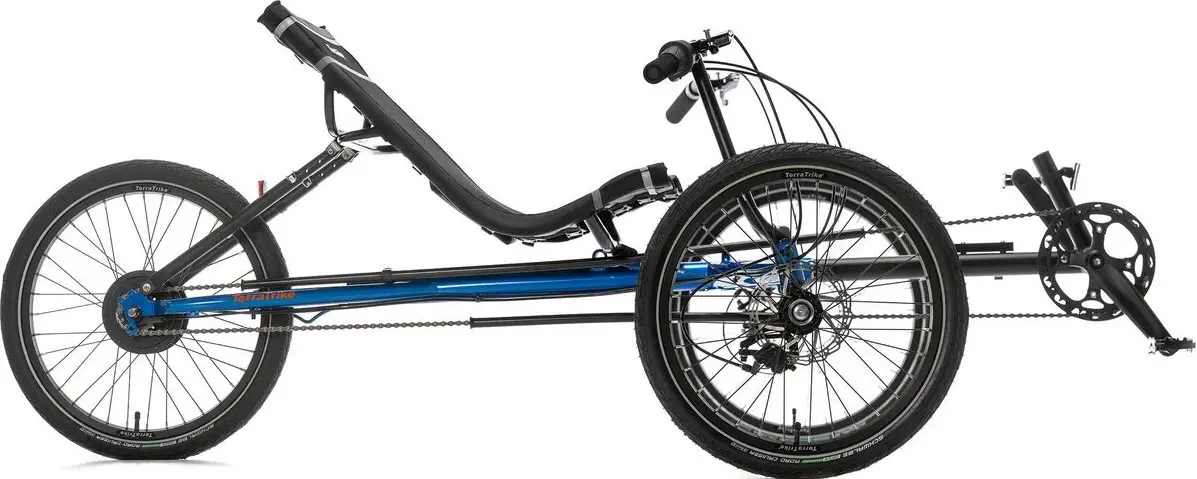
Alignment
Inflate tires before performing alignment. The Rogue alignment measurement is approximately 30¼” (center tread to center tread), though slight variance is possible. Most importantly, make sure the alignment remains neutral with a rider seated in the trike.
Direct Steering Stack Assembly
Assemble the steering stack as shown. Grease the steerer tube before inserting into head tube. Remove any excess grease from steerer tube before installing handlebar. Grease axle before installing wheel. Torque axle to 23-25Nm.
Right Hand assembly depicted. Some components can be purchased individually as well as in pairs, see parts list below.
Parts List
| 1 | M6x18 Bolt | TT000415 |
| 2 | Direct Steer Hubmount Cap | TT000161 |
| 3 | Twist Handlebar – RH | TT000655 |
| Twist Handlebar – LH | TT000646 | |
| Twist Handlebar – Pair | TT000271 | |
| M6x16 Bolt (not pictured) | TT000294 | |
| 4 | M20 Washer | TT000254 |
| 5 | Direct Steer Hubmount – RH | TT000828 |
| Direct Steer Hubmount – Pair | TT000829 | |
| TT000653 | ||
| 6 | Bushings (pre-installed) | TT000809 |
Chain Tube Setup
Mount the chain tube assemblies as shown below. Ensure the chain tubes do not rotate in the clamps after tightening the pinch bolts.
Upper:
Lower:
Parts List
| Upper Assy. | Chain Tube, 102cm LDPE | TT000540 | |
| Chain Tube Clamp, Rov/Rann/Mav | TT000152 | ||
| M5x18 Pan Head (phillips) SS | N/A | ||
| Lower Assy. | Chain Tube, 56cm LDPE | TT000548 | |
| Chain Tube Clamp, Traveler | TT000422 | ||
| Spacer, 20mnn L, 8mm AD x lOmm OD | TT000123 | ||
| M5x18 Pan Head (Phillips) SS | N/A | ||
| M8x4Omm BHCS SS | TT000278 |
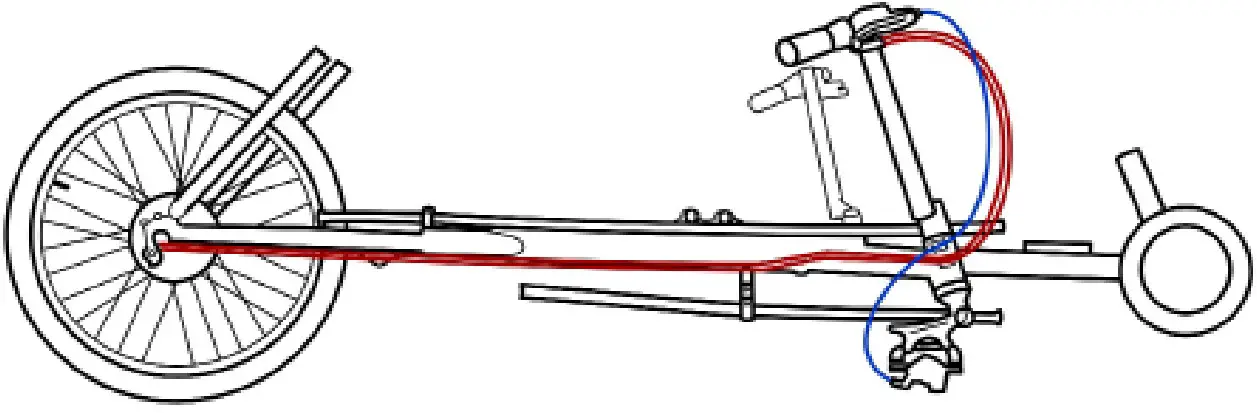
Chain Routing
Cable Routing RH
Brake Cable
Shift Cable
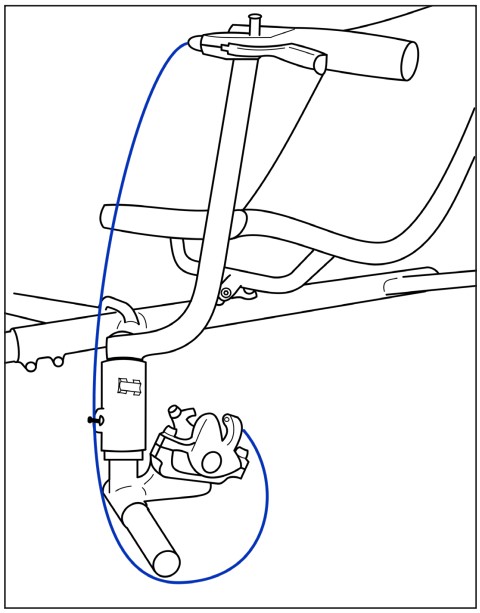
Cable Routing LH
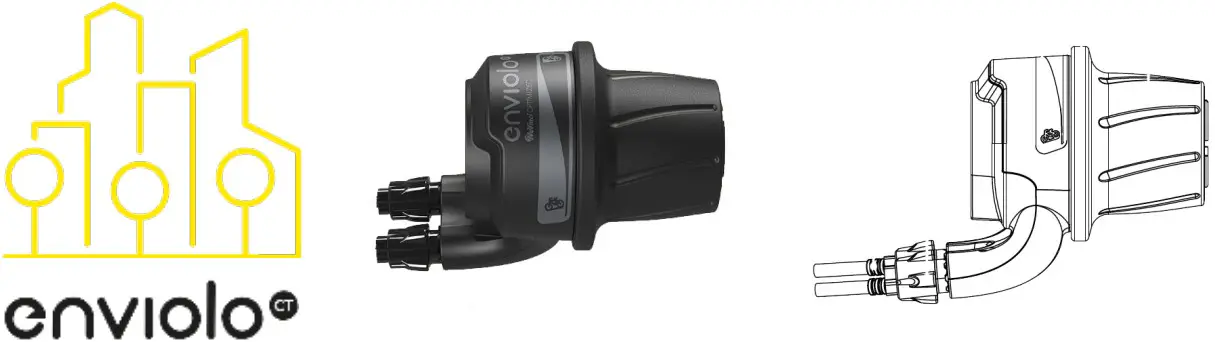
Installation of Enviolo System
(Refer to https://support.enviolo.com/hc/en-us/sections/360003243600-Assembly-documentation)
NOTE: Depictions of the Envelop Shifter may vary, but the installation process is the same.
The ROGUE comes stock with the Envelop CT system. Setup process is the same for all Enviolo shifters.
Route cable housing from the controller to the manual hub interface. Make sure that the cable housing lengths are sufficient to allow an extreme turning angle. Secure cable housing to the cable guides on mainframe. Avoid tight bends when installing the shift cable housing.
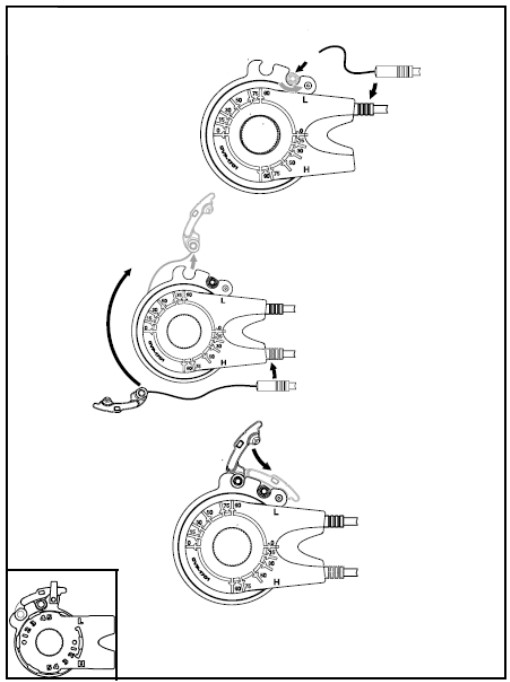
Thread both barrel adjusters completely clockwise (in) to provide maximum installation slack. Pull the under drive shift cable (1) firmly at the rear axle location until it stops, checking to make sure that the shift indicator goes completely flat (envelop TR and SP controllers), or that the grip rotates fully in the counterclockwise direction shown (envelop CT, CA and CO controller, viewed from the right side of the trike).
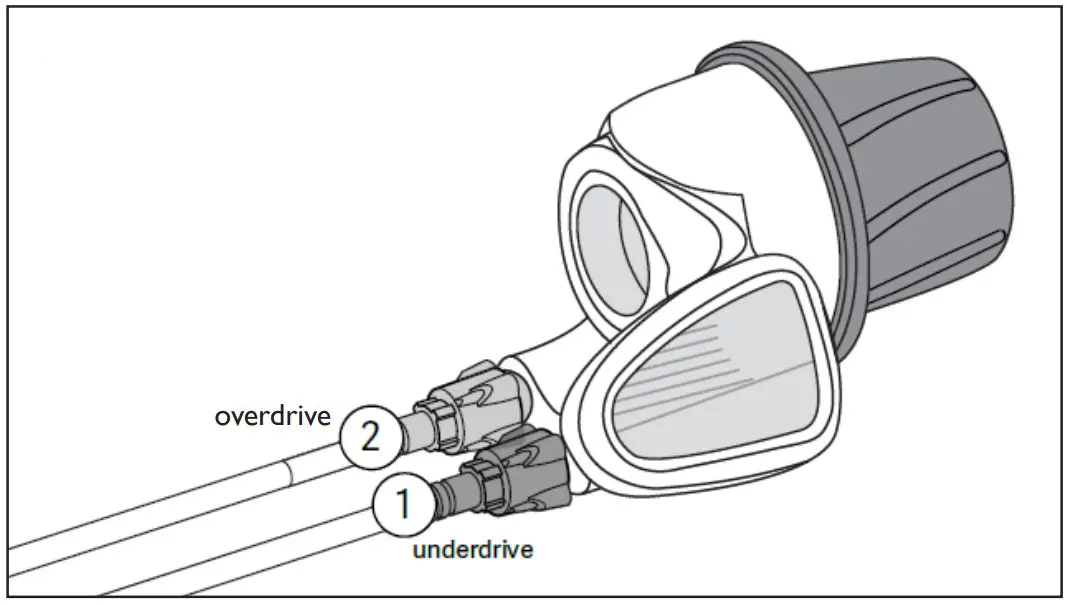
Pull the overdrive shift cable (2) firmly at the manual hub interface until it stops, checking to make sure that the shift indicator goes into a steep hill (enviolo TR and SP controllers), or that the grip rotates fully in the clockwise direction shown (enviolo CT, CA, CO controllers, viewed from right side of bicycle).

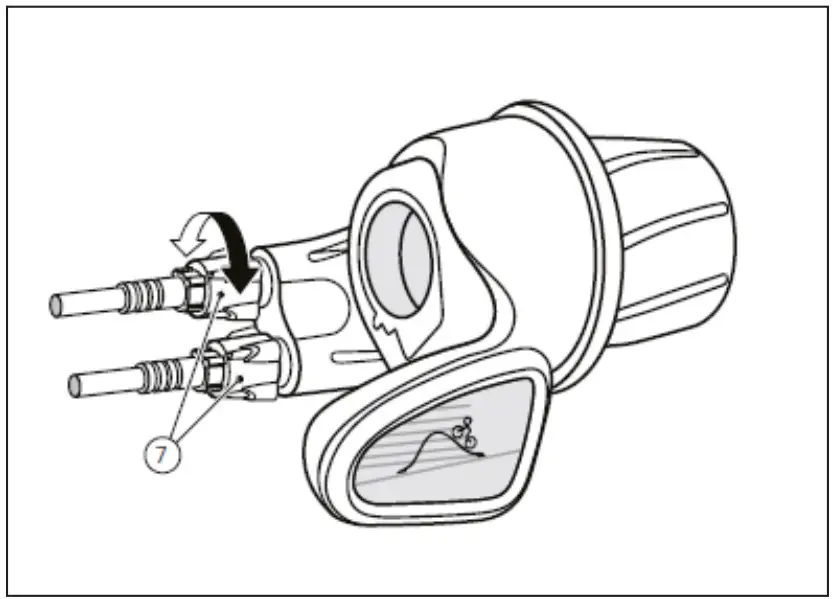
Cable slack can be adjusted with the barrel adjusters (7) at the controller.
Place the rear wheel into the rear frame, making sure not to obstruct shift cables.
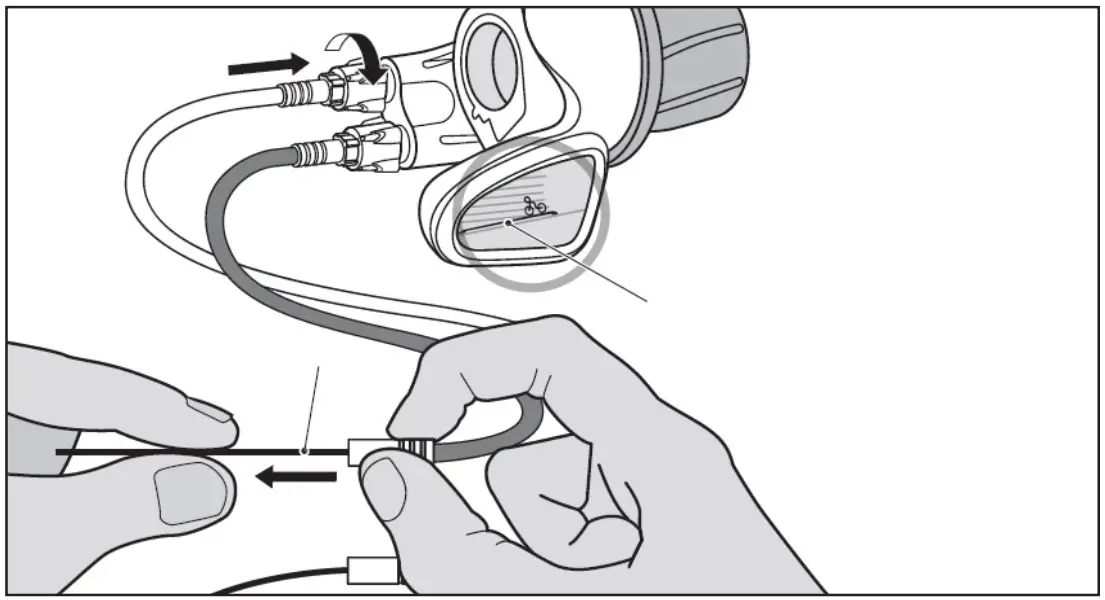
Ensure cable housing is properly seated in controller. Double check overdrive and underdrive cable lengths before installing into shift interface. Overdrive (latch cable stop) 114mm from end of cable housing to latch cable stop. Underdrive (barrel cable stop) 120mm from end of cable housing to stop.
www.TerraTrike.com | 800.945.9910
800.945.9910 | www.TerraTrike.com
4460 40th St. SE | Grand Rapids, MI 49512 USA
![]()