SVS 3000 Series Home Theater System

Congratulations on choosing the SVS 3000 In-Wall Subwoofer, a groundbreaking achievement in architectural subwoofer design. The following steps will guide you through the quick and easy installation process.
We strongly recommend reading the 3000 In-Wall Subwoofer Owner’s Manual to get the best possible performance. You’ll find useful information about amplifier placement, connections, DSP functions and more.
Contents
Unbox It
After unboxing the 3000 In-Wall Subwoofer System you will have the following items in front of you. Please confirm all pieces are available before continuing.
- [3000 In-Wall Subwoofer]
x2 for Dual System

- [Removable Magnetic Grille]
x2 for Dual System

- [Subwoofer Cutout Template]

- [3000 In-Wall Subwoofer Amplifier]

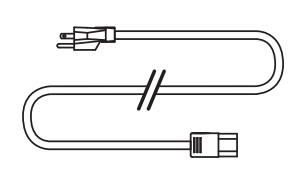
- [Detachable Power Cord]
- [Subwoofer Banana Plug Pair]
x2 for Dual System

- [Amplifier Rack Mount Kit]

Install the Subwoofer
Placement of the 3000 In-Wall Subwoofer can affect performance. If possible, it is recommended to aim for corner placement on the same wall as the front speakers, or anywhere along the front stage in between or outside the main speakers.
Cut the Hole
The 3000 In-wall subwoofer is designed to fit between standard 16” on-center stud spacing. Be sure to check for stud placement or other obstructions when choosing where to place the subwoofer.
Use the supplied Subwoofer Cutout Template as a guide for subwoofer placement, and follow the included instructions for preparing the wall for installation.

Connect Banana Plugs
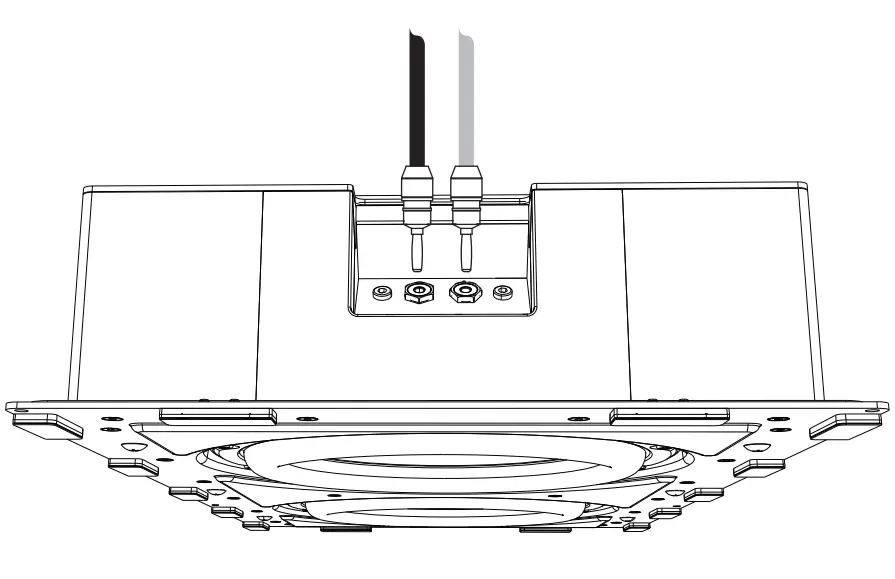
The In-wall rated speaker wire for the subwoofer should be accessed through the subwoofer cutout from either above or below. Strip the jacket from the speaker wire ends to reveal the bare speaker wire.
Pay close attention to the polarity and color of the speaker wire and terminals. The red terminal is positive (+). The black terminal is negative (-). Unscrew the gold terminal from the banana plug and insert the exposed bare speaker wire into the bottom of terminal body. Then, fold the bare copper speaker wires over the inner teeth of the terminal body.
Reassemble the gold banana plug to the terminal body and give the speaker wire a good pull to ensure it does not come loose. Repeat for the other speaker wire.

Connect the Subwoofer
If the speaker wire is coming from above, align the subwoofer so the terminals are at the top of the cabinet. If the speaker wire is coming from below, flip the subwoofer so the terminals are at the bottom.
The subwoofer is designed to work with terminals at the top or bottom, the top woofer will show the SVS logo in the correct position. Be sure to pay attention to the polarity of the Banana plugs and the subwoofer binding posts.
While balancing the subwoofer with one hand, insert the banana plugs into the subwoofer binding posts with the other hand.
Insert the Subwoofer
You can now insert the subwoofer into the cutout.
Be sure to pay attention to the speaker wire position when installing the subwoofer to avoid pinching or cutting the speaker wire.

Standard Mounting
In most installations the 6 Dog Leg Mounting screws can be used to lock the subwoofer to the wall. Each of the 6 screw locations should be tightened to engage out and lock the dog screws.
High torque drills should be set to a low or medium clutch setting so not to over drive the screws.

Mounting Near Studs
In some instances, the subwoofer will be too close to a stud to engage the dog screws.
In this case, the subwoofer front baffle has 8 screw holes to affix the front baffle frame of the subwoofer to the stud directly (hardware not included).

Install the Amplifier
The best location for your 3000 In-Wall Subwoofer Amplifier is close to the other electronics in the playback system so line level and power can be connected easily.
It is also important that the Amplifier can easily connect to pre-installed in-wall rated speaker wire connected to the 3000 In-Wall Subwoofer.
Amplifier Placement
The 3000 In-Wall Subwoofer Amplifier can be placed on a shelf or installed in a standard 19” equipment rack. If installing the amplifier on a shelf, the included rack-mount ears are not required. If installing the amplifier in a rack, attach the rack-mount ears before installation.
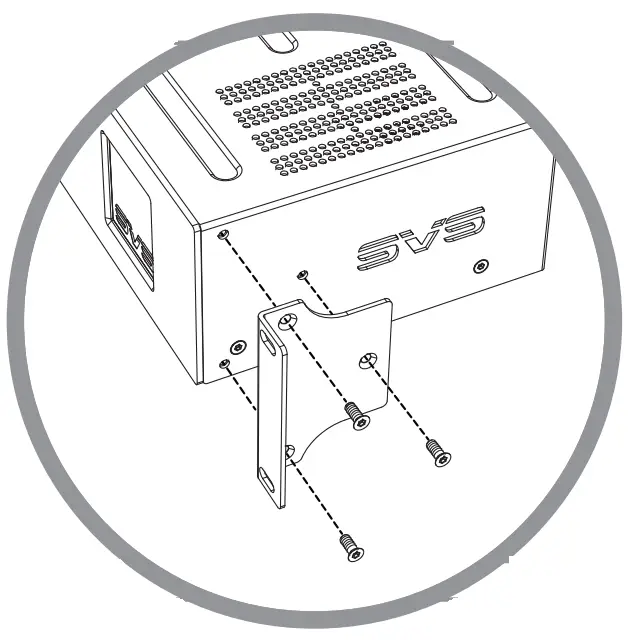
Attaching the Rack Mount Kit
On each side of the 3000 In-Wall Subwoofer Amplifier, attach the rack mount kit by inserting the 3 screws in each rack ear by guiding each directly into the correlating screw holes on the side of the amplifier.
Don’t overdo it, simple hand-tightening is enough. Repeat for the second rack-mount ear.
Rack Mounting
Once the rack-mount ears are secured, the amplifier can be installed in a standard 19-inch electronics rack where 2U rack space is available (mounting hardware not included). Removing the feet from the bottom of the amplifier will ensure plenty of clearance for neighboring electronics.

Notes for Optimal Performance
- It is best to leave free air space on all sides if possible to provide optimal air flow and ventilation.
- Place the amplifier in a horizontal position, away from direct sunlight and heat sources such as hot air ducts or radiators.
- Do not place objects on top of the amplifier, place the amplifier on thick carpet, or obstruct ventilation in any way.
