Contents
SolarEdge Home Hub Inverter Three Phase

Product Information
The SolarEdge Home Hub Inverter is a three-phase inverter designed for residential solar energy systems. It is suitable for use in Europe, APAC, and South Africa. The inverter comes with a range of accessories and features LED indications for status and fault monitoring.
Product Features
- Three-phase inverter
- Quick installation
- Suitable for residential solar energy systems
- Includes wall mount bracket for easy mounting
- Comes with DC connection SolarEdge Home Antenna box
- Includes Network Antenna bracket and Ferrite Bead
- Includes Cable lugs for secure connections
Product Usage Instructions
Step 1: Unpacking and Mounting
- Watch the Unpacking and Mounting Video for guidance.
- Use the provided wall mount bracket to mount the inverter. Make sure not to rest the inverter vertically on the connectors.
- Ensure proper airflow by not blocking it.
- Optional: Choose an appropriate antenna location.
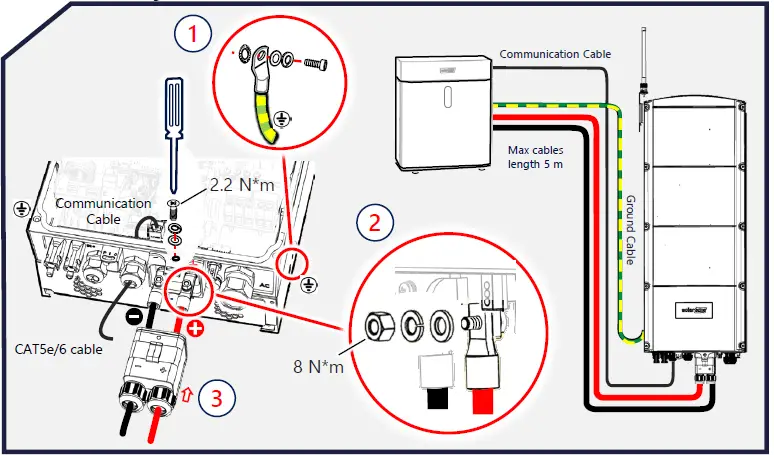
Step 2: Wiring
CAUTION! Disconnect power before installation or service to avoid electric shock.
- Read the Safety and Handling instructions provided with the product before proceeding.
- Connect the grounding wire first.
- Follow the wiring diagram to connect the AC and DC cables.
- Use the provided ferrule and crimping tool for secure connections.
- Ensure proper cable lengths and torque wrench settings as specified in the manual.
- Connect the SolarEdge Home Network according to the provided instructions.
- If using a battery, follow the Battery Connection instructions.
- Connect the communication cables as required.
- Ensure compliance with local regulations for grounding and circuit breaker selection.
Step 3: Commissioning the Inverter
- Refer to the provided LED Indications for monitoring system status and faults.
- For remote status, fault indications, and system performance, refer to the Remote Monitoring guide at https://www.solaredge.com/products/pv-monitoring#/.
- Follow the instructions below to commission the inverter using
SetApp
NOTE: Make sure to run SetApp and follow the instructions on the screen for proper commissioning.
- Press and hold the P button for 2 seconds, then release.
- SetApp will launch.
- Follow the instructions displayed on the screen to complete the commissioning process.
SolarEdge Home Hub Inverter Three Phase
What’s in the Package

WARNING!
This symbol denotes a hazard. It calls attention to a procedure that if not correctly performed or adhered to could result in injury or loss of life. Do not proceed beyond a warning note until the indicated conditions are fully understood and met
CAUTION!
Denotes a hazard. It calls attention to a procedure that, if not correctly performed or adhered to, could result in damage or destruction of the product. Do not proceed beyond a caution sign until the indicated conditions are fully understood and met.
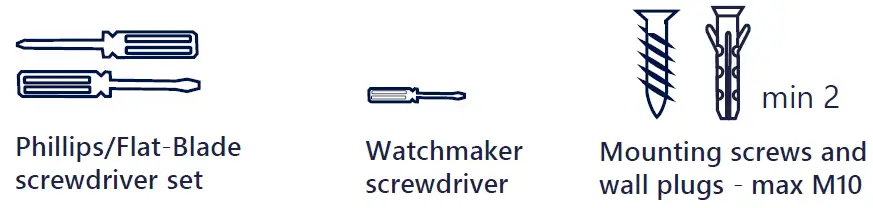
Tools and Materials

Installation Instructions
- Mounting


- Wiring


- SolarEdge Home Network Connection

- Battery Connection
- Chaining Multiple Inverters

- Backup Interface Connection (The Backup Interface can also be connected wirelessly)

- Meter Connection (The meter can only be connected if Backup Interface is not used. Inline meter can also be connected wirelessly)

- LAN Connection

- Commissioning the Inverter

- LED Indications
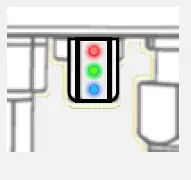
- Red: fault
- Green: power production,
- Blinking Green: Grid connection ok
- Blue: communication ok
- For more indications refer to: https://www.solaredge.com/leds

- For remote status, fault indications, and system performance, refer to Remote Monitoring at: https://www.solaredge.com/products/pv-monitoring#/

Mounting Video
 Wiring Video
 Datasheet
 Installation Guide

solaredge.com
Werner-Eckert-Strasse 6/81829 Munich/Germany SolarEdge Technologies Gmbh Subject to change without notice.
© SolarEdge Technologies, Ltd.
All rightsreserved. September 2022.