Contents
SIM LAB 75-100 Integrated Triple Monitor Mount

BEFORE YOU START
Thank you for purchasing this Sim-Lab product! On the following pages, you will find detailed instructions on assembly. This requires only a set of simple tools and some of your time. Please check the bill of materials before starting (page 10) and make sure all the parts are delivered.
Inserting Slot-Nuts

- You got excited, finished the build, put the caps on, but forgot to install one element. Do not worry. It happens to everyone. In this diagram, you can see how to insert a Slot-Nut directly into the slot from the side.
- You can also use one of your smaller Hex wrenches to help wiggle the Slot-Nut in place.
Breaking tabs

- Sometimes tabs from corner brackets need to be broken off in order to fit as instructed. Place a flathead screwdriver behind the tab and tilt upwards.
- Always make sure to point away from you while doing so.
- To know when to do this, we will show the following symbol
 next to the brackets.
Tools needed

Installation Instructions


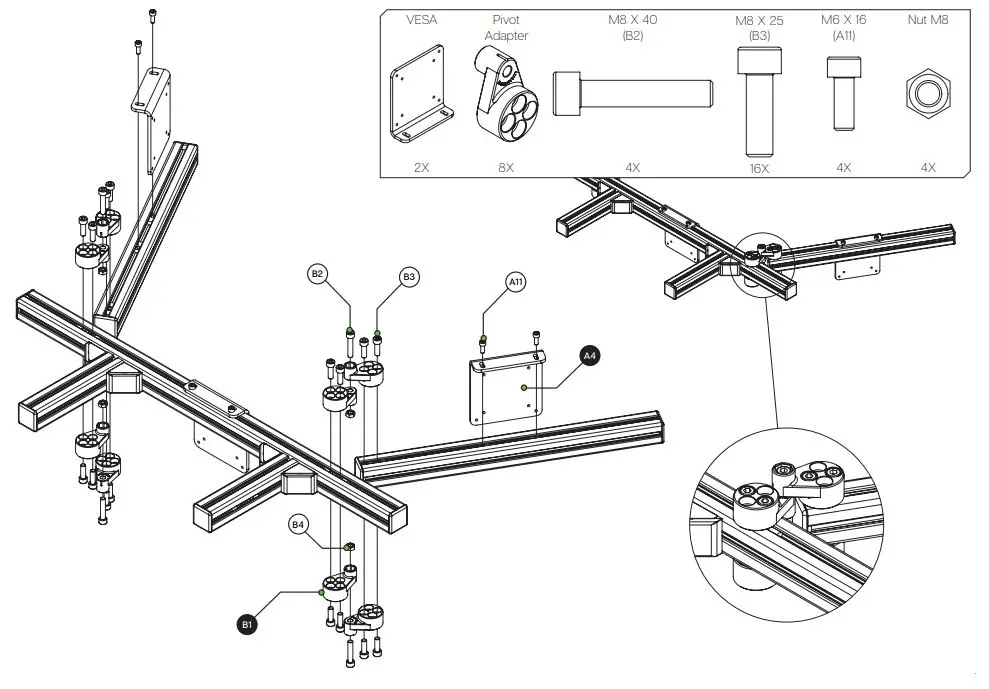
TIP: Attach the VESA bracket (A4) to your monitor before installing it on the monitor mount profile.


Parts
| BOX A – INTEGRATED MONITOR MOUNT TRIPLE PROFILE KIT | |||
| # | Part | QTY | Note |
| P1 | 40X40 Length=850mm | 1 | |
| P2 | 40X40 Length=500mm | 2 | |
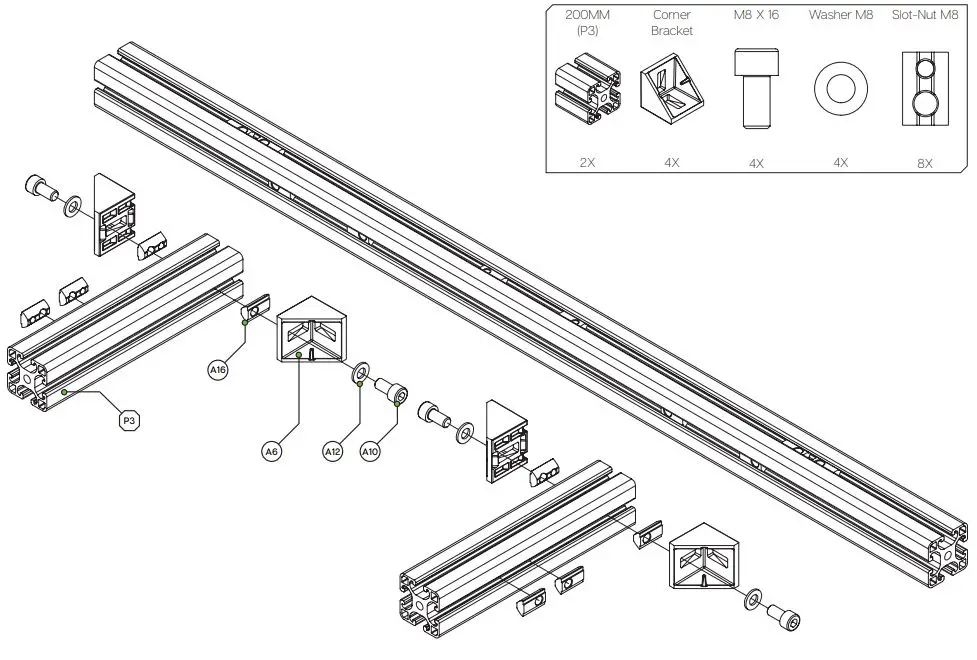
| P3 | 40X40 Length=200mm | 2 | |
| HARDWARE KIT | |||
| A4 | VESA bracket L-shape | 3 | |
| A5 | Integrated monitor bracket | 2 | |
| A6 | Corner bracket 40×40 | 4 | |
| A7 | Corner bracket 40×40 cap | 4 | |
| A8 | Profile 40×40 end-cap | 8 | |
| A9 | Bolt M8 X 25 DIN 912 | 10 | |
| A10 | Bolt M8 X 16 DIN 912 | 8 | |
| A11 | Bolt M6 X 16 DIN 912 | 6 | |
| A12 | Washer M8 DIN 125-A | 18 | |
| A13 | Screw Philips M4 X 16 DIN 7985 | 12 | Use to attach monitor to VESA bracket. |
| A14 | Screw Philips M4 X 10 DIN 7985 | 12 | Use to attach monitor to VESA bracket. |
| A15 | Spacer male/female M4 X 10 | 12 | Use as spacers for VESA bracket when the bracket doesn’t clear the monitor. |
| A16 | Slot-Nut M8 | 26 | |
| A17 | Slot-Nut M6 | 6 | |
| Disclaimer: for some entries on this list, we supply more than required as spare materials. Don’t worry if you have some leftovers, this is intentional. | |||
| B1 | Xero-Play triple pivot adapter | 8 | |
| B2 | Bolt M8 X 40 DIN 912 | 4 | |
| B3 | Bolt M8 X 25 DIN 912 | 16 | |
| B4 | Nut M8 | 4 | |
| B5 | Slot-Nut M8 | 16 |
Mounting suggestion
- We advise to divide three bolts over two profile slots.

- If you still have some questions regarding assembly of this product or about the manual itself, please refer to our support department. They can be reached at [email protected]
- Alternatively, we now have a Discord server where there are quite some experienced Sim-Lab customers hanging out. They might just help you along if you ask them nicely 😉 www.sim-lab.eu/discord
- If you feel like printing this manual, please consider the environment before doing so. For the best results, make sure you print at 100% scale without borders.
Product page on the Sim-Lab website:
