Contents
SIIG Full HD Wireless HDMI KVM Extender

Features
- 802.11 ac 2.4G/5G Hz 2T2R WiFi MIMO module Auto Channel Selection
- Transmission distance up to 150m / 500ft (no wall and little interference)
- Build-in ED ID , HDCP 2.2 / 1.3 compliant
- TX loop-out resolution up to 4K@60Hz
- RX output resolution up to 1080p@60Hz
- upports 2.0 stereo audio
- Supports USB KVM function
- supports USB Touch panel
- Supports 20-60KHz IR extended function
Package contents
- HDMI KVM Transmitter (TX)
- HDMI KVM Receiver (RX)
- USB 2.0 hub
- Power adapter 5V/1 A x2
- USB-A to Micro-B cable for Power x 2
- USB-A to Micro-B cable for KVM
- IR Emitter Cable (For TX)
- Quick start guide
Layout
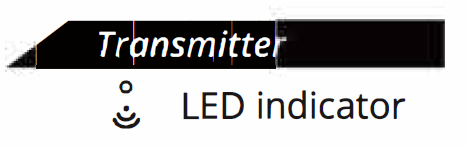
- Red: TX system is booting on
- Blue: TX & RX connected
- Purple: Video source No connection or bad connection
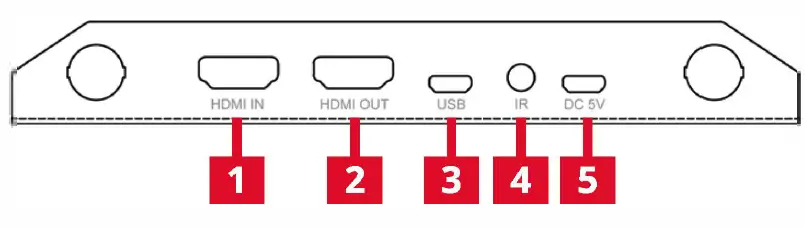
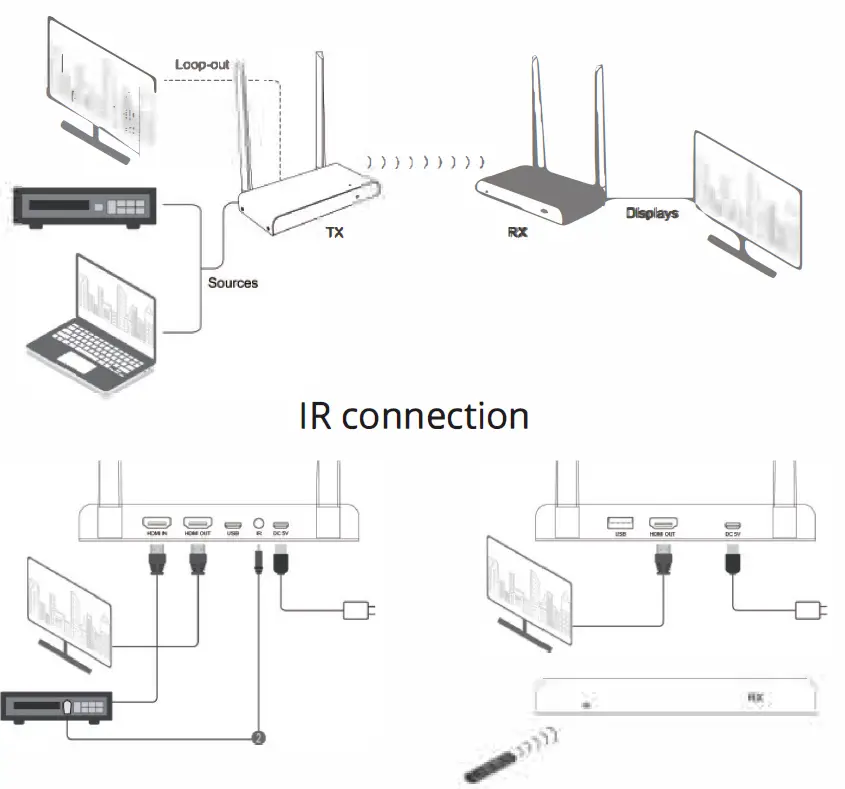
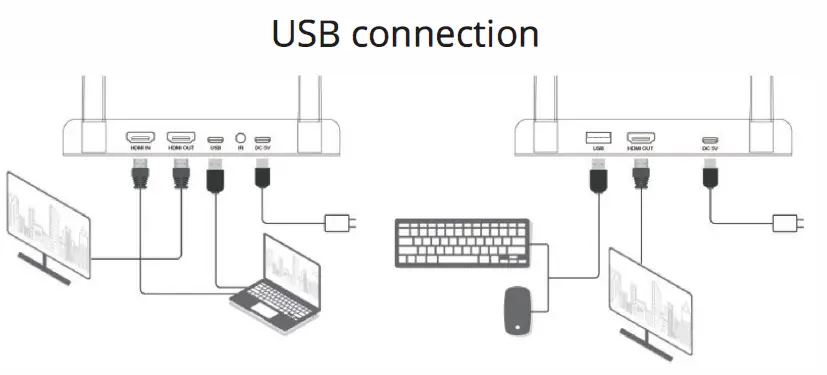
- HDMI IN: Connect with HDMI source
- HDMI OUT: Connect with TV/display
- USB: USB 2.0, connect with PC for keyboard/mouse signal extend (must be connected)
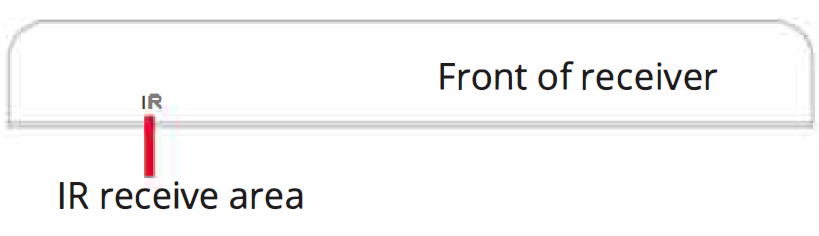
- IR: IR out for IR emitter cable (Reset button is inside the IR 3.5mm hole)
- DC 5V: Connect with power adapter 5V/1 A

- Flashing Blue: Waiting for TX connection
- Static Blue: TX & RX connected
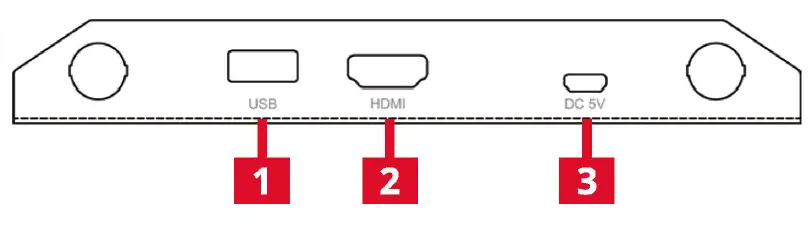
- USB: USB 2.0, connect with Keyboard /Mouse/ Touch panel, support USB 2.0 hub extend
- HDMI: Connect with TV/display
- DC SV: Connect with power adapter 5V/1A
Note:
- Except the power have to connect, the Micro USB port of Transmitter also have to connect, otherwise the HDMI out of Transmitter can’t output video.
- USB keyboard do not support Num /Caps/ Scroll Lock LED display
- USB keyboard do not support multimedia function keys e. g. Play/ Pause, Volume + / -, Mute
- If want to use USB 2.0 hub to connect keyboard/mouse, must be connect the USB 2.0 hub to Receiver’s USB port first, and then insert USB keyboard, mouse or wireless dongle.
- Do not insert keyboard, mouse or wireless dongle to USB 2.0 hub first, may cause the USB connection not recognize, keyboard and mouse will not working.
TX & RX Wireless pairing
If the transmitter and receiver still no connection, please follow the below step for pairing.
- Power on the transmitter & receiver
- Connect a display to receiver’s output
- Wait till the Receiver boot finished, the standby screen of Receiver appears.
- Press the transmitter’s reset button and hold for 5 seconds till the LED is flashing fast (Reset button is inside the IR 3.5mm hole)
- Wait around 30 seconds, the transmitter and receiver will be paired automatically
Application
Support
For more info or tech support https://www.siig.com/support
Jan, 2023 Copyright© 2023 by SIIG, Inc. All rights reserved.