![]() CW2000R Outdoor Camera
CW2000R Outdoor Camera
User Guide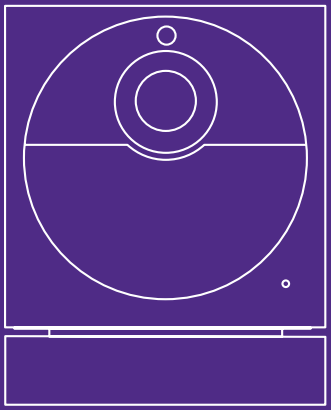
![]() For the best experience
For the best experience
Charge your camerabefore setup
To charge camera:
Plug the included USB cable into the micro USB port on the back of your camera and connect the other end to a standard USB port.
Contents
What’s included
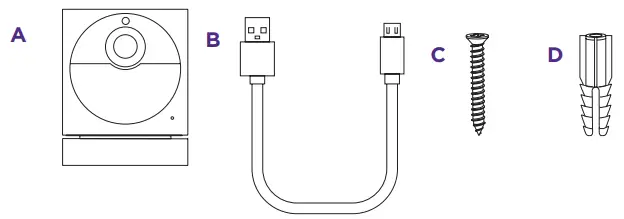
A. Roku Outdoor Camera* with removable magnetic mounting base
B. Camera charging USB cable
C. 24mm M3 screws (x2)
D. Drywall anchors (x2)
What you’ll need
- Phillips screwdriver
- Your smartphone
NOTE: You’ll need to have a Roku Outdoor Camera base station set up before you set up your camera. Your base station can support multiple outdoor cameras.
Visit go.roku.com/cameras for more information.
* For outdoor use only.
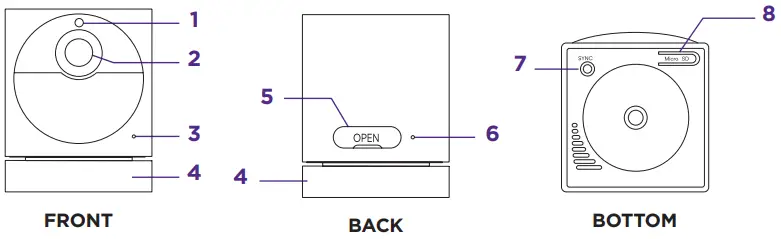
- Light sensor
- Lens
- Microphone
- Removable magnetic mounting base
- On/off switch and USB charging port
- Status light
- Sync button
- MicroSD slot (Card sold separately)
Let’s get started
STEP 1: Open the Roku Smart Home app
Sign in with your Roku account.
You’ll need
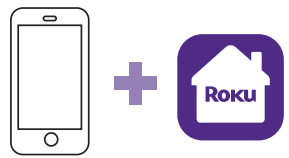 Smartphone & app
Messaging & data ates may apply. https://go.roku.com/sh-app
STEP 2: Install your camera
In the Roku Smart Home app, tap the “+” button, then “Add Device” to find “Outdoor Camera.” Follow the instructions to finish setup.
| WALL MOUNT | CEILING MOUNT |
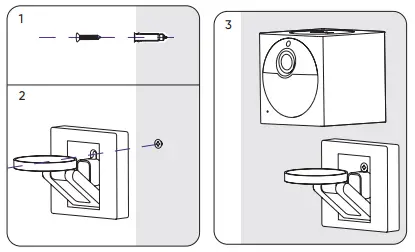 |
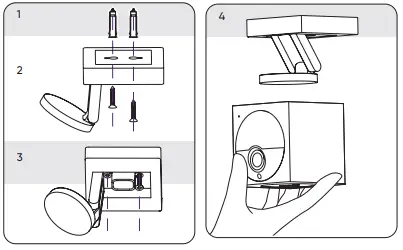 |
What’s that light mean?
| Status Light | Status |
| YELLOW – Solid | Powered on and beginning setup |
| YELLOW and BLUE – Flashing | Pairing to base station |
| BLUE – Flashing | Connecting to Wi-Fi® |
| BLUE – Solid | Connected and working |
| RED – Flashing | Charging |
| RED – Solid | Fully charged |
| NO LIGHT | Powered off or sleeping |
Status lights are located on the camera and base station.
More features are waiting
Unlock the full potential of your camera with a
Roku Smart Home Subscription.
Learn more at go.roku.com/rokusmarthome
Need help?
| Setup videos | |
| Common questions | |
| Tips and tricks |
![]() © 2023 Roku, Inc. All rights reserved. Roku, the Roku logo, and the Roku Smart Home logo are the trademarks or registered trademarks of Roku, Inc.
© 2023 Roku, Inc. All rights reserved. Roku, the Roku logo, and the Roku Smart Home logo are the trademarks or registered trademarks of Roku, Inc.