![]() Item No. : P750
Item No. : P750
Quick Start Guide
Apply to: Reolink Duo 3 PoE
![]() @ReolinkTech
@ReolinkTech
Contents
What’s in the Box

Camera Introduction


NOTE: Actual camera appearance and components are subject to the model you purchased.
Connection Diagram
Before initial setup, follow the steps below to connect your camera.
- Connect the camera to a PoE injector with an Ethernet cable.
- Use the power adapter to power on the PoE injector and connect it to your router.

NOTE: You can power the camera with a PoE switch, PoE injector, Reolink PoE NVR or a DC 12V power adapter(not included in the package).
Set up the Camera
Download and launch the Reolink App or Client software, and follow the onscreen instructions to finish initial setup.

Mount the Camera
Installation Tips
- Do not face the camera towards any light sources.
- Do not point the camera towards a glass window. Or, it may result in poor image quality because of the window glare by infrared LEDs, ambient lights or status lights.
- Do not place the camera in a shaded area and point it towards a well-lit area. Or, it may result in poor image quality. To ensure best image quality, the lighting condition for both the camera and the capture object shall be the same.
- To ensure better image quality, it’s recommended to clean the lens with a soft cloth from time to time.
- Make sure the power ports are not directly exposed to water or moisture and not blocked by dirt or other elements.
- With IP waterproof ratings, the camera can work properly under conditions like rain and snow. However, it doesn’t mean the camera can work underwater.
- Do not install the camera at places where rain and snow can hit the lens directly.
- The camera may work in extreme cold conditions as low as -25°C. Because when it is powered on, the camera will produce heat. You may power on the camera indoors for a few minutes before installing it outdoors.
- Try to keep the left lens level with the right lens.
Mount the Camera to the Wall
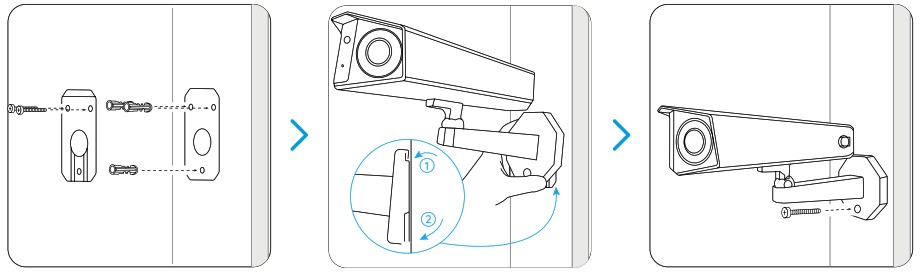
Drill holes in accordance with the mounting hole template. Secure the mounting plate to the wall with the upper two screws and hang the camera on it. Then lock the camera in position with the lower screw.
NOTE: Use the drywall anchors inclued in the package if needed.
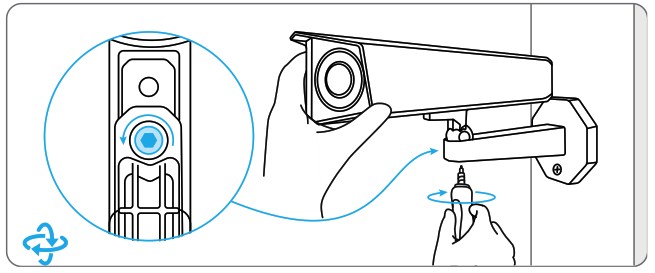
To get the best field of view, loosen the adjustment screw on security mount and turn the camera.
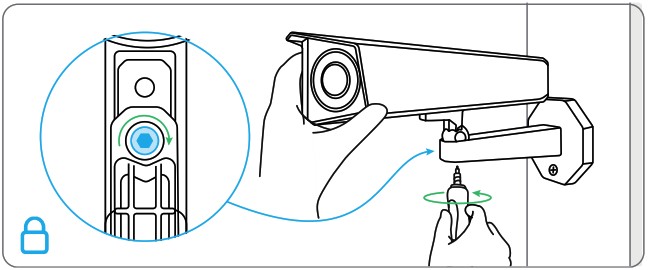
 Stiffen the adjustment screw to lock the camera.
 Mount the Camera to Ceiling
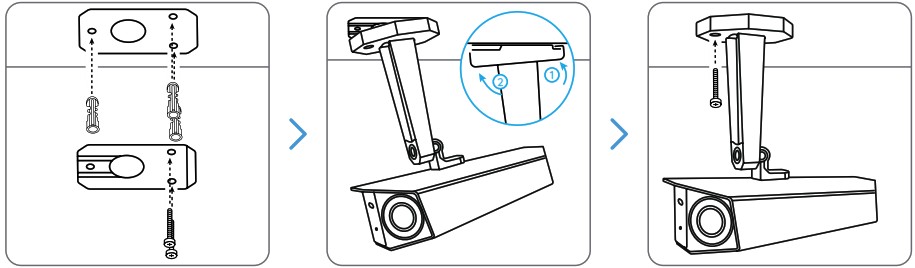 Drill holes in accordance with the mounting hole template. Secure the mounting plate to the ceiling with the upper two screws and hang the camera on it. Then lock the camera in position with the lower screw.
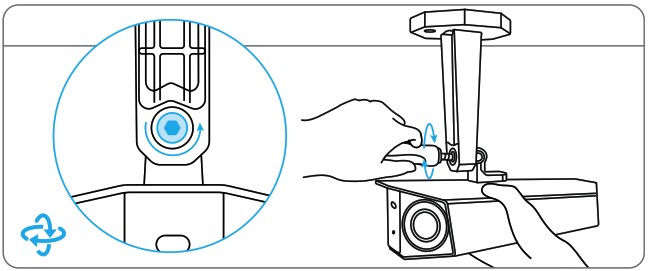 To get the best field of view, loosen the adjustment screw on security mount and turn the camera.
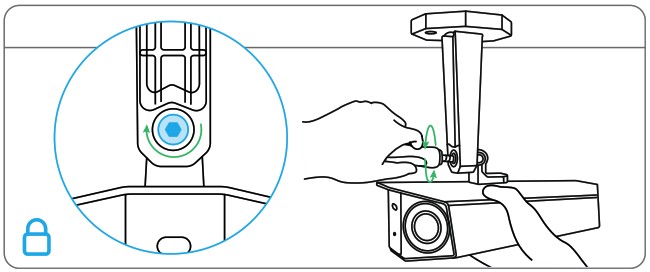 Stiffen the adjustment screw to lock the camera.
Troubleshooting
Camera is not Powering on
If your camera is not powering on, pleasetry the following solutions:
- Make sure your camera is powered on properly. The PoE camera should be powered by a PoE switch/injector, a Reolink NVR or a 12V power adapter.
- If the camera is connected to a PoE device as listed above, connect it to another PoE port and check again.
- Try again with another Ethernet cable.
Picture is not Clear
If the picture from the camera is not clear, please try the following solutions:
- Check the camera lens for dirt, dust or spiderwebs, please clean the lens with a soft, clean cloth.
- Point the camera to a well-lit area, the lighting condition will affect the picture quality a lot.
- Upgrade the firmware of your camera to the latest version.
- Restore the camera to factory settings and check out again.
Specification
Notification of Compliance
ISED Compliance Statements
This Class B digital apparatus complies with Canadian ICES-003.
![]() Simplified EU Declaration of Conformity
Simplified EU Declaration of Conformity
Reolink declares that this device is in compliance with the essential requirements and other relevant provisions of EMC
Directive 2014/30/EU and LVD 2014/35/EU.
![]() Correct Disposal of This Product
Correct Disposal of This Product
This marking indicates that this product should not be disposed with other household wastes. throughout the EU. To prevent possible harm to the environment or human health from uncontrolled waste disposal, recycle it responsibly to promote the sustainable reuse of material resources. To return your used device, please use the return and collection systems or contact the retailer where the product was purchased. They can take this product for environmentally safe recycling.
FLAT/RM 705 7/F FA YUEN COMMERCIAL BUILDING 75-77 FA YUEN
STREET MONG KOK KL HONG KONG
Ul. Dluga 33 102 Zgierz, Polen
Beacon House Stokenchurch Business Park,
Ibstone Rd, Stokenchurch High Wycombe,
HP14 3FE, UK
December 2023
QSG1_A
58.03.006.0096