Contents
REGENCY Half Height Bun Pan Rack

ASSEMBLY INSTRUCTIONS
TOOLS NEEDED: An Adjustable Wrench OR 10mm and 14mm Socket are required for assembly.

INCLUDED PARTS
- A(2) Pan Slide Frames
- B(4) Crossbars
- (2) Top (Long)
- (2) Bottom (Short)
- C(4) 5″ Casters
- D(4) U Brackets
- E(8) Bolts
- (4) 10mm (Top)
- (4) 14mm (Bottom)
FINAL PRODUCT

Need Help?
Scan here to follow along with the full assembly video!

ASSEMBLING THE PAN RACK
- Insert the (2) Long Crossbars into the top holes of the Pan Slide Frames.

- Attach U Brackets (2 for each Crossbar) to the outside of the Pan Slide Frames using the 10mm Bolts. Hand-tighten the bolts* and repeat the process for the other side.

- Insert the (4) Casters** into the bottom of the Frames. The locking casters should be installed in the same end of the rack so they can easily be set.
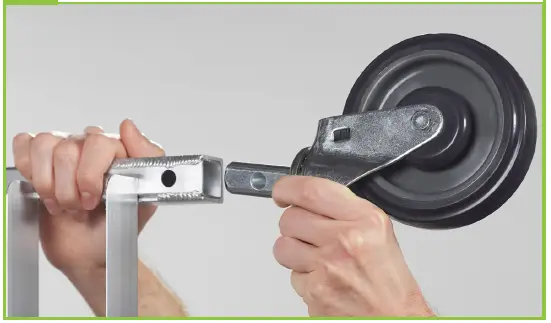
- Once the casters are properly aligned, the remaining (2) Short Crossbars can be installed on the bottom of the rack using the 14mm Bolts.***

- Put a bun pan in both the top and bottom of the rack to ensure your bun pan is square.

- Tighten each bolt with a wrench. Your bun pan rack is now ready to use.

- NOTE: Be sure to not over-tighten the bolts, or you may damage the Frame and/or Crossbars.
- NOTE: Make sure the hole in the caster post is aligned with the hole in the collar.
- NOTE: The bottom Crossbars do not require U Brackets, they can be bolted on directly through the hole in the collar.