Contents
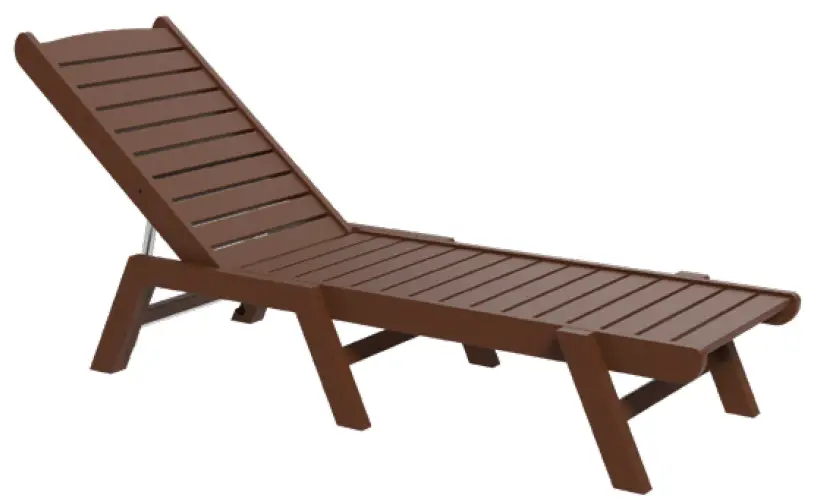
Polybird P70 Chaise Lounge
TOOLS AND HARDWARE
TOOLS

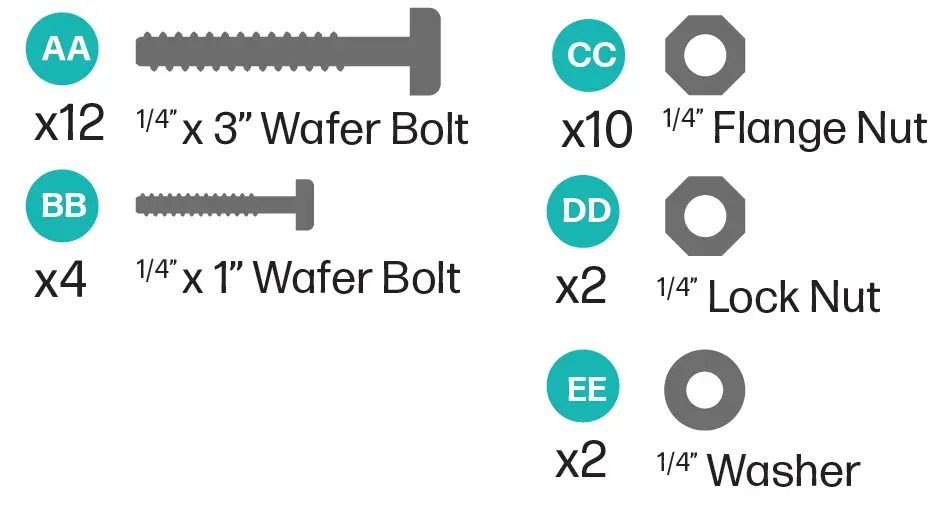
HARDWARE
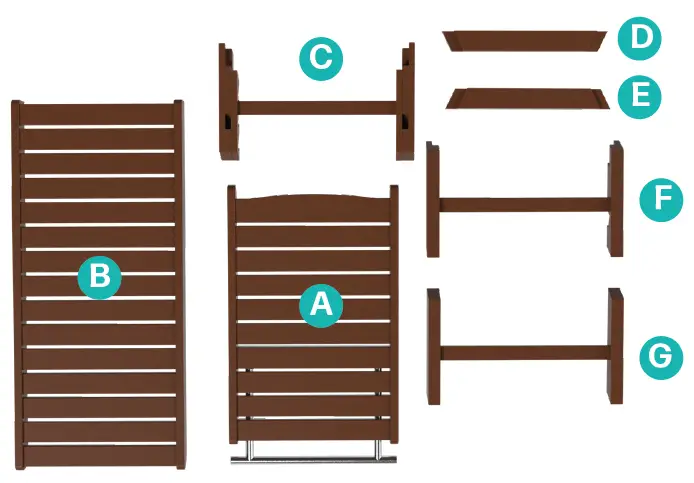
PARTS
Installation Instructions
Note before starting: wait until the whole piece is assembled to tighten the bolts completely.
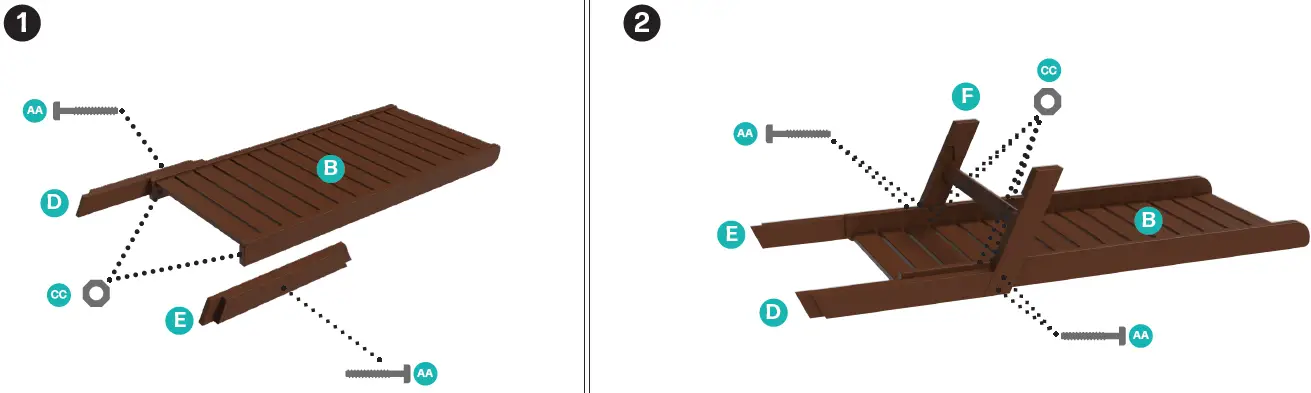
- Attach chaise extenders D & E to seat B using one 1/4” x 3” wafer bolt (AA) and finishing the end with one 1/4” flange nut (CC) on each side.
- Flip chaise assembly from step one upside down. Attach legs F to edge of extenders D & E using two 1/4” x 3” wafer bolts (AA) on each side. Finish bolt ends with two 1/4” flange nuts (CC) on each side.
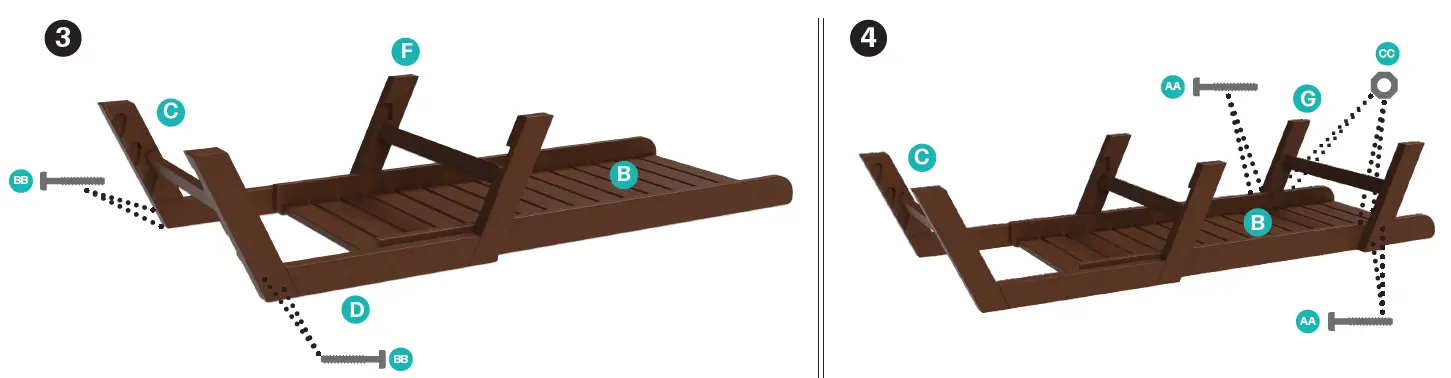
- Attach legs C to the opposite ends of D & E using two 1/4” x 1” wafer bolts (BB) per side, as shown.
- Attach legs G towards the front of seat B using two 1/4” x 3” wafer bolts (AA) on each side. Finish bolt ends with two 1/4” flange nuts (CC) on each side.
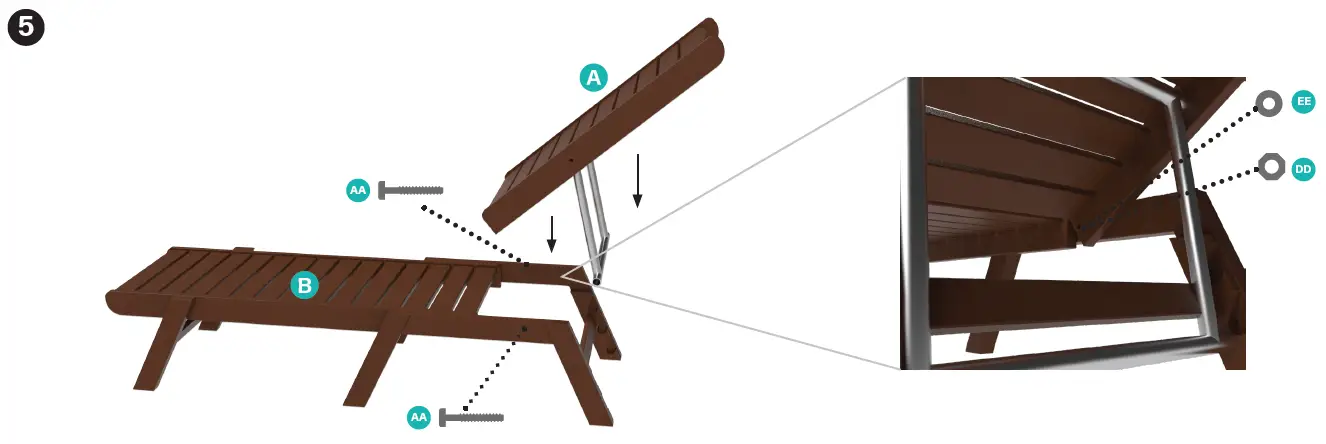
- Flip over chaise assembly from step 4 and attach seat back A seat B using one 1/4” x 3” wafer bolt (AA) on each side and finishing the bolts with one 1/4” washer (EE) and then one 1/4” lock nut (DD) on each side, as shown.
We hope you enjoy your new piece of furniture for years to come!