Contents
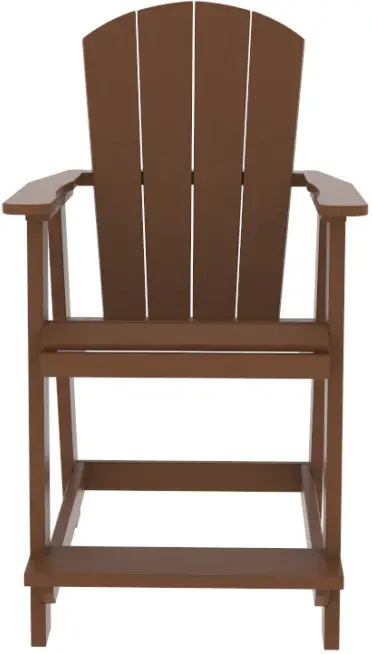
Polybird P4 Balcony Chair
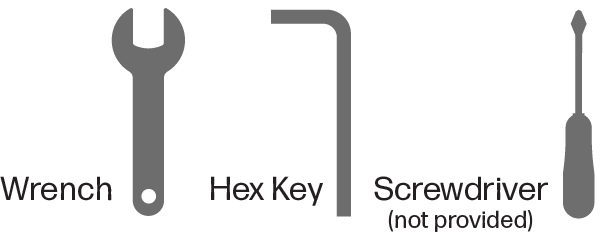
TOOLS
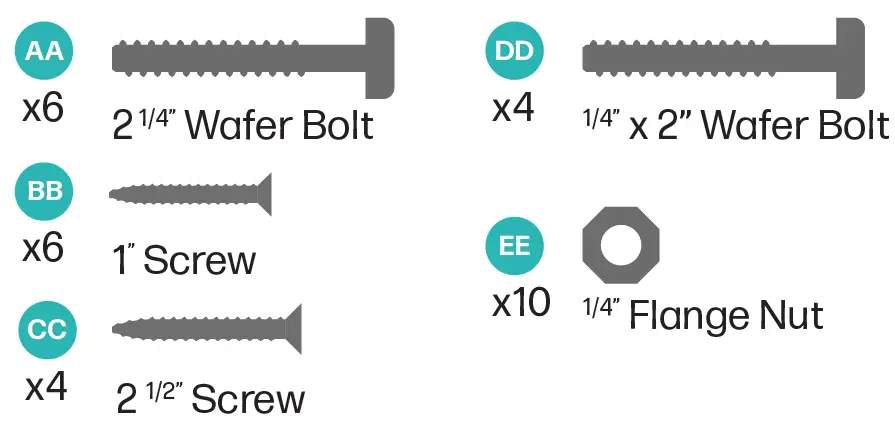
HARDWARE
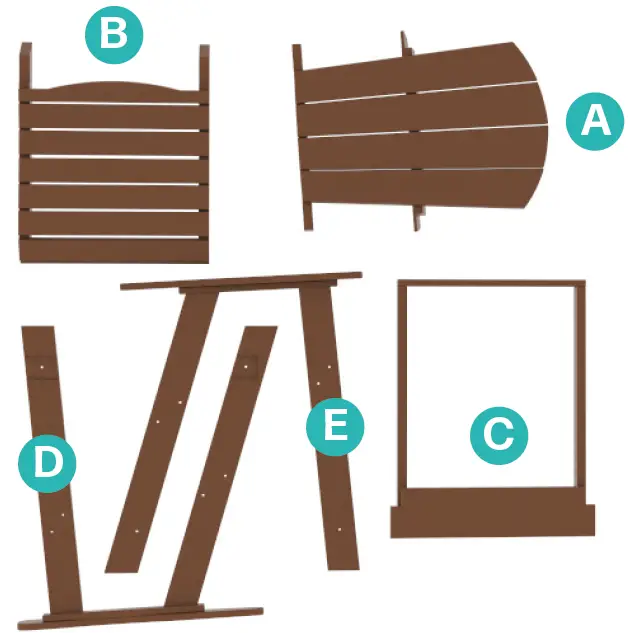
PARTS
Installation Instructions
Note before starting: wait until the whole piece is assembled to tighten the bolts completely.
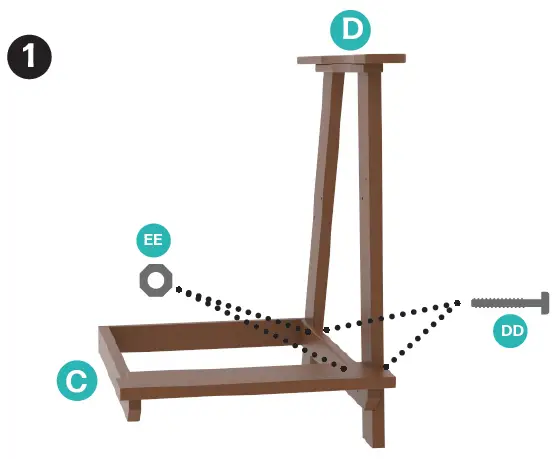
- Attach legs (D & E) to footrest (C). Starting with D from the outside, insert two 1/4” x 2” wafer bolts (DD). Fasten two 1/4” flange nuts (EE) to the end of the bolts on the inside. Repeat for leg E.
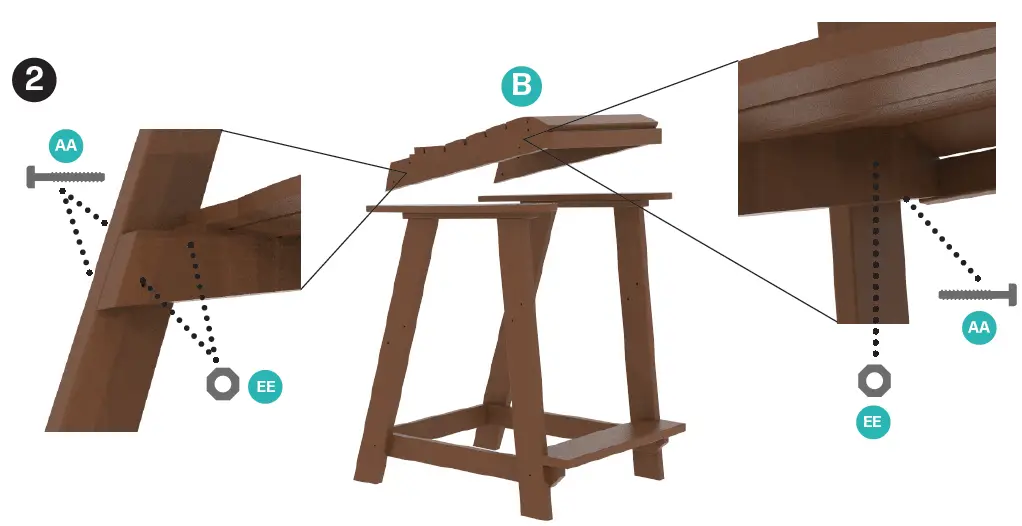
- Attach seat (B) to assembly from step 1. Using six 2 1/4” wafer bolts (AA) and working from the outside in, attach B with four bolts on the seat back and two on the seat front. Finish bolts with six 1/4” flange nuts (EE).
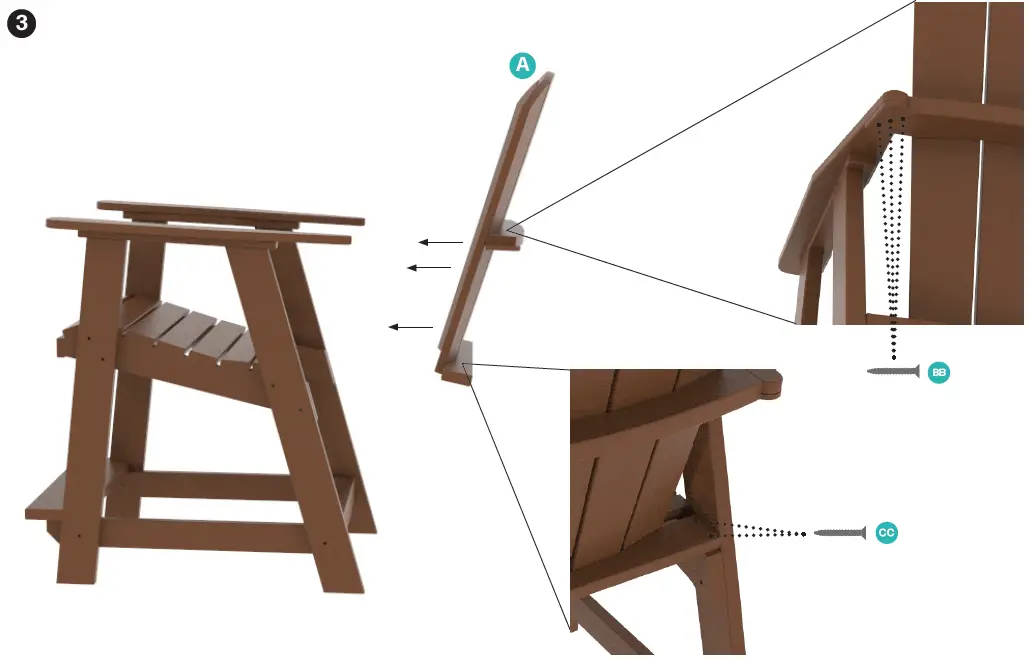
- Align chair back (A) with chair assembly from step 2. Attach at the back of the seat using four 2 1/2” screws (CC). Attach under the arm rests using six 1” screws (BB).
FAQ
- What do I do if I’m missing a part or hardware?
- Contact the manufacturer for replacement parts.
- Can I use a power drill for assembly?
- Yes, but be careful not to over-tighten and strip the screws.
- Should I tighten the bolts as I go?
- No, wait until the entire piece is assembled before fully tightening the bolts.
We hope you enjoy your new piece of furniture for years to come!