Contents
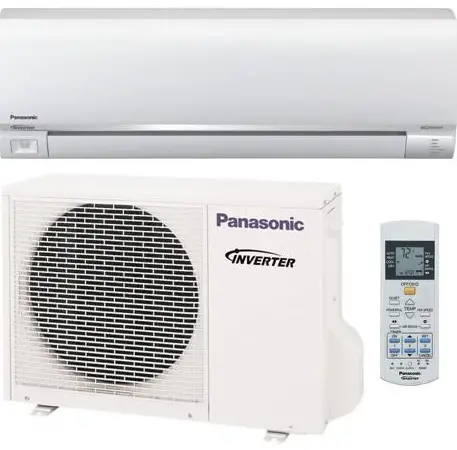
Panasonic S-18PU3HB Indoor Unit Air Conditioner
Product Information
Specifications
- Model No. Indoor Unit: S-18PU3HB, S-2124PU3HB, S-3448PU3HB
- Model No. Outdoor Unit: U-18PZ3H5, U-21PZ3H5, U-24PZ3H5, U-34PZ3H5, U-43PZ3H5, U-48PZ3H5, U-43PZ3H8, U-48PZ3H8
- Temperature Range: 32°F (89.6°C) to 18°F (64.4°C)
- Cooling Capacity: 30,000 BTU/hr
- Heating Capacity: 43,000 BTU/hr
Product Usage Instructions
- Installation
Before operating the unit, please read these operating instructions thoroughly and keep them for future reference. Before installation, the installer should read the Installation Instructions and request the customer to keep them for future reference. - Remote Control Usage
Use the remote control within 8 meters from the remote control receiver on the indoor unit.
Inserting Batteries into the Remote Control
- Pull out the back cover of the remote control.
- Insert AAA or R03 batteries.
- Close the cover.
Basic Operation
To start/stop the operation
- Press the OFF/ON button.
Setting the Clock
- Press the CLOCK button, then press UP or DOWN to set the time. Press and hold for approximately 5 seconds to switch between 12-hour (am/pm) or 24-hour format.
- Press the SET button to confirm.
Selecting Mode
Press the MODE button to select the desired mode
- FAN – Fan mode
- AUTO – Automatic mode
- HEAT – Heating mode
- DRY – Dehumidifying mode
- COOL – Cooling mode
Adjusting Temperature
To adjust the desired temperature
- Press the TEMP UP or TEMP DOWN button to select the desired temperature. The selection range may vary depending on the mode selected (not applicable to FAN mode).
Frequently Asked Questions (FAQ)
- Q: How far can I use the remote control from the indoor unit?
A: You can use the remote control within 8 meters from the remote control receiver on the indoor unit. - Q: What are the available modes?
A: The available modes are FAN, AUTO, HEAT, DRY, and COOL. - Q: How do I set the clock?
A: To set the clock, press the CLOCK button on the remote control, then use the UP or DOWN button to adjust the time. Press and hold for approximately 5 seconds to switch between 12-hour (am/pm) or 24-hour format. Press the SET button to confirm. - Q: How do I adjust the temperature?
A: To adjust the temperature, press the TEMP UP or TEMP DOWN button on the remote control to select the desired temperature. The selection range may vary depending on the mode selected (not applicable to FAN mode).
Operating Instructions 14-Air Conditioner
- Before operating the unit, please read these operating instructions thoroughly and keep them for future reference. Before installation, the installer should: Read the Installation Instructions, then request the customer keep them for future reference.
Quick Guide
Inserting the batteries

- Pull out the back cover of remote control.
- Insert AAA or R03 batteries.
- Close the cover.
A Clock setting
- Press
 , then press
  to set the time.
- Press for approximately 5 seconds to show the time as 12-hour (am/pm) or 24-hour.
- Press
- Press to confirm.
B Basic operation
- Press
 to start/ stop the operation.
When the unit is ON , disappears from the remote control display.
 - Press
 to select the desired mode.
- Press TEMP UP,
 TEMP DOWN to select the desired temperature.
Selection range:- 16.0 °C ~ 30.0 °C / 60 °F ~ 86 °F.(Vary depending to Mode selection. Not applicable to FAN mode)
- Press
 for approximately 10 seconds to show the temperature as °C or °F.
Accessories Included
- Remote control
- AAA or R03 batteries × 2
- Remote control holder
- Screws for remote control holder × 2
- To be purchased separately: Timer Remote Controller
- (Part no.: CZ-RTC4)
- High-spec Wired Remote Controller
- (Part no.: CZ-RTC5B)
- Wired Remote Controller
- (Part no.: CZ-RTC6 series)
- Panel
- (Part no.: CZ-KPU3H)
The illustrations in this manual are for explanation purposes only and may differ from the actual unit. They are subject to change without notice.
Optional (For all indoor units)

- Timer Remote Controller
- (Part no.: CZ-RTC4)

- (Part no.: CZ-RTC4)
- High-spec Wired Remote Controller
- (Part no.: CZ-RTC5B)

- (Part no.: CZ-RTC5B)
- Wired Remote Controller
- (Part no.: CZ-RTC6 series)
Please read these remote controller Operating Instructions packed with the Remote Controller unit.
How to Use

- Note: When the LED indicator blinks, the “System Auto Configuration” is in progress. The process requires approx. 5 mins for new product first time start up and 15 sec for subsequent operation start up.

- To adjust fan speed

- The fan speed can be adjusted as desired by using remote control.

- Keeps the room ventilated.
- The air is discharge evenly through 4 output vents.

- The fl aps swings up and down automatically.
- Do not adjust the fl aps by hand.

- There are 5 options for manual airflow direction.
- The airflow direction can be adjusted as desired by using remote control.
To enjoy fresher and cleaner environment

- nanoe™X automatically starts when the unit is turned on.
- Press
 to turn OFF this operation manually.
 - This operation can be activated even when the unit is OFF. Note that the fl ap and fan speed will operate according to the remote control setting.
- If a power failure occurs during this operation, this operation resumes immediately when power resumes.
To set the timer
- To turn ON or OFF the unit at a preset time.

- When ON timer is set, the unit may start early before the actual set time in order to achieve the desired temperature on time.
- If the timer has been cancelled manually, you can restore the previous setting by pressing
 .
. - If power failure, you can restore the timer again by pressing .
- The timer operation follows the clock setting on the remote control and will repeat daily when timer has been set. For clock setting, refer to Quick Guide.
To Learn More…
Operation mode
- FAN : To enables air circulation in the room.
- AUTO : Unit selects operation mode according to setting temperature, outdoor temperature and room temperature.
- HEAT : The unit will take some time to warm up.
- COOL : Provides efficient comfort cooling to suit your needs.
- DBRY : When the room temperature is more likely to reach the level that was set, the fan speed is set to ‘‘breeze’’ (light wind) automatically.
Energy saving temperature setting
- You may save energy when operating the unit within the recommended temperature range.
- HEAT : 20.0 °C ~ 24.0 °C / 68 °F ~ 75 °F.
- COOL: 26.0 °C ~ 28.0 °C / 79 °F ~ 82 °F.
Airflow direction
- In COOL/DRY mode
- If AUTO is set, the flap swings up/down automatically.
- In HEAT mode
- If AUTO is set, the horizontal flap is fixed at the predetermined position.
Auto restart control
- When power is resumed after a power failure, the operation will restart automatically with the last operation mode and airflow direction.
Operating conditions
- Use this air conditioner in the temperature range indicated in the table.
| Temperature °C (°F) | Indoor | Outdoor | |
| COOL | Max. | 32 (89.6) | 43 (109.4) |
| Min. | 18 (64.4) | -10 (14.0) | |
| HEAT | Max. | 30 (86.0) | 24 (75.2) |
| Min. | 16 (60.8) | -15 (5.0) | |
Cleaning the Air Conditioner
Cleaning has to be carried out at regular intervals to ensure the unit is at optimal performance. A dirty unit may cause malfunction. Consult an authorised dealer.
- Before cleaning, switch off the power supply and unplug the unit.
- Do not touch the aluminium fi n as the sharp parts may cause injury.
- Do not use benzine, thinner or scouring powder.
- Use soap ( pH 7) or neutral household detergent only.
- Do not use water hotter than 40 °C / 104 °F.
Air Filter Removal

Air Filter Installation
- Insert the air filter to the tabs of the intake grille.
- Slowly bring up the intake grille.
- Firmly press the latches to lock the intake grille.
Air filter maintenance
Cleaning is needed when: “FILTER” lights up on the indicator display at the panel.
- lt is recommended to clean the air filter every 6 weeks.
- After the air filter is cleaned, press
 to reset.
Optional (For all indoor units)

- Do not operate without an air filter.
- Vacuum, wash/rinse the air filter gently with water to avoid damage to the air filter surface.
- Do not dry the part with a hair dryer or a stove.
- Replace any damaged filter.
Internal Cleaning Function
- Internal Cleaning Operation
During Cool or Dry Mode operation with nanoeX function ON, when the unit operation is turned OFF, the unit will operate internal drying and activate nanoe™X. This is to suppress mold proliferation inside the unit
(airflow passage, fan and heat exchanger). Mold proliferation suppression effect may changed depending on the unit’s installation environment and operation time. - “nanoe™X” lights up on the indicator display at the panel during internal cleaning operation.

- This function will be operate when the unit was in Cool or Dry Mode operation with nanoeX function ON before the unit is turn off for more than 5 minutes.
- If the air conditioner operate less than 5 minutes, the internal cleaning operation will not perform.
- While the internal cleaning operation is running, the indoor temperature may increase occasionally.
- The internal cleaning operates approximate for 75 minutes.
- If you wish to start air conditioner operation during internal cleaning,
- press (wireless remote controller)
- press
 (CZ-RTC5B)
 - press
 (CZ-RTC6 series
 - If you wish to stop the internal cleaning operation,
- press twice (wireless remote controller)
- press
 (CZ-RTC5B)
 - press
 (CZ-RTC6 series)

- When the internal cleaning operation completed, the remote controller displayed as shown.
NOTES
- Internal cleaning functions can be operated only with the indoor unit equip with nanoe ™X feature.
- The internal cleaning function is set to operate automatically by default. If you wish to set to OFF, refer to the operating instructions of the remote controller which is adaptable to the nanoe™X function.
- If you wish to set the internal cleaning function to OFF with CZ-RTC6 series remote controller, use Panasonic H&C Control App. This app is compatible with remote controller model CZ-RTC6L and CZ-RTC6BLW (CZ-RTC6 is incompatible with this app).
- If you wish to set the internal cleaning function to OFF using wireless remote controller, consult an authorized dealer for setting.
Troubleshooting
The following symptoms do not indicate malfunction.
| Symptom | Cause |
|
|
| TIMER indicator is always ON. | When Timer has been set, the Timer setting repeats daily. |
| Operation is delayed a few minutes after restarting. | The delay is a protection to the unit’s compressor. |
| Indoor fan stops occasionally during heating operation. | To avoid unintended cooling effect. |
| Fan operation continues after unit is turn off. | It is normal when the internal cleaning is in operation for approximately 75 minutes. |
| Operation starts after power resumes. | Auto restart is in function and operates under previous setting. |
| Airflow continues even after operation has stopped. | To extract the remaining heat from the indoor unit (maximum 30 seconds). |
| The room has a peculiar odor. | This may be due to damp smell emitted by the wall, carpet, furniture or clothing. |
| Cracking sound during operation. | Changes in temperature caused the unit to expand and contract. |
| Water flowing sound during operation. | Refrigerant flow inside the unit. |
| Mist emerges from indoor unit. | During cooling operation, the discharged cold air may condense to water vapour. |
| Outdoor unit emits water or steam. |
|
| Unit switch to FAN operation and air become humid. | This happens when the room temperature reaches the set temperature, operation switches to FAN mode and the humidity increase. |
| During dry mode, cold air blow out. | The unit is running cooling operation with low fan speed to dehumidify the room. |
| Discoloration of some plastic parts. | Discoloration is subjected to the types of materials used in plastic parts. It is accelerated when exposed to heat, sun light, UV light or environmental factors. |
| Soft buzzing sound from indoor unit during nanoe™X operation. | It is normal when the nanoe™X generator is working. If you are concerned about the sound, cancel the nanoe™X operation. |
Check the following before calling for servicing.
| Symptom | Check |
| Operation in HEAT/COOL mode is not working efficiently. |
|
| Noisy during operation. |
|
|
|
| The unit does not work. |
|
| The unit does not receive the signal from the remote control. |
|
How to retrieve error codes
If the unit stops and the TIMER indicator blinks, use the remote control to retrieve the error code.
| Diagnostic display | Abnormality/Protection control | |
| Outdoor | E06 | Outdoor Unit Error In Receiving Signal from Indoor Unit |
| E12 | Automatic Address Setting Start Prohibition | |
| E14 | Duplication of Main Unit in Group Control | |
| E15 | The Total Capacity of Indoor Units is Too Low | |
| E16 | The Total Capacity of Indoor Units is Too High | |
| E20 | Indoor/Outdoor Communication Wire Connection Abnormal | |
| E24 | Outdoor unit communication error | |
| E29 | Outdoor unit communication error | |
| F04 | Outdoor Compressor Discharge Temperature Sensor (TD) Abnormal | |
| F06 | Outdoor Heat Exchanger (Liquid) Temperature Sensor (C1) Abnormal | |
| F07 | Outdoor Heat Exchanger (Center) Temperature Sensor (C2) Abnormal | |
| F08 | Outdoor Air Temperature Sensor (TO) Abnormal | |
| F12 | Outdoor Compressor Suction Temperature Sensor (TS) Abnormal | |
| F23 | Outdoor gas pipe temperature sensor trouble | |
| F24 | Outdoor liquid pipe temperature sensor trouble | |
| F31 | Outdoor Unit PCB EEPROM Abnormal | |
| H01 | Compressor Over Current Detected | |
| H02 | PAM/PFC Abnormal | |
| H03 | Primary Current CT Sensor Abnormal | |
| H31 | HIC Abnormal, DC Voltage Not Detected | |
| L04 | Duplication of Outdoor Unit Address | |
| L10 | Outdoor Unit Capacity Is Not Set Or Wrong Setting | |
| L13 | Indoor Unit Type Is Not Set Or Wrong Setting | |
| L18 | 4-Way Valve Operation Abnormal | |
| P03 | Compressor Discharge Temperature Abnormal | |
| P04 | High Pressure Switch Is Activated | |
| P05 | AC Power Supply Abnormal | |
| P07 | HIC (IPM) Temperature Abnormal | |
| P13 | Refrigerant Valve Abnormal | |
| P15 | Insufficient Refrigerant or Valve Closed | |
| P16 | Outdoor Compressor Over Current | |
| P22 | Outdoor Fan Motor Abnormal | |
| P29 | Outdoor Compressor Start-up Abnormal | |
| P31 | Indoor Unit Group Control Abnormal |
TRPOUBLESHOOTING
| Diagnostic display | Abnormality/Protection control | |
| Indoor | E01 | Remote Controller Error In Receiving Signal from Indoor Unit |
| E02 | Remote Controller Error In Transmitting Signal To Indoor Unit | |
| E03 | Indoor Unit Error In Receiving Signal from Remote Controller | |
| E04 | Indoor unit not receiving signal from the outdoor unit | |
| E08 | Duplication of Indoor Unit Address Setting | |
| E09 | Duplication of Main Remote Controller Setting | |
| E18 | Group Control Main Indoor Unit Error In Receiving Signal From Sub Indoor Unit | |
| F01 | Indoor Heat Exchanger Temp. sensor (E1) trouble | |
| F02 | Indoor Heat Exchanger Temp. sensor (E2) trouble | |
| F10 | Indoor Air temperature sensor (TA) trouble | |
| F29 | Indoor Unit PCB EEPROM Abnormal | |
| L02 | Indoor & Outdoor Unit Type Mismatch | |
| L03 | Duplication of Main Indoor Unit Address Setting in Group Control | |
| L07 | Group Control Wiring is Connected to Individual Control Indoor Unit | |
| L08 | Indoor Unit Address is Not Set | |
| L09 | Indoor Unit Capacity is Not Set | |
| P01 or P12 | Indoor fan motor abnormality | |
| P09 | Faulty wiring connections of indoor unit panel (cassette) | |
| P10 | Indoor Float switch abnormal | |
| P11 | Indoor Drain pump abnormal |
- Some error code may not be applicable to your model. Consult an authorised dealer for clarification.
When…
- The remote control is missing or a malfunction has occurred

- Press AUTO OFF/ON once.
- The LED indicator is lit.
- Auto operation starts. If Auto operation is not possible, the unit starts Cooling if the room temperature at the time is 24 °C or higher; otherwise, the unit starts Heating.
- Press AUTO OFF/ON again to turn off the unit.
Conducting a seasonal inspection after extended period of non-use
- Check the batteries.
- Check that there is no obstruction around the air inlets and outlet vents.
- After 15 minutes of operation, it is normal to have the following temperature difference between the air inlet and outlet vents:

The units will not be used for an extended period
- Activate HEAT mode for 2~3 hours to remove any moisture left in the internal parts thoroughly. This is to prevent moulid growth.
- Turn off the power supply and unplug the unit.
- Remove the batteries from the remote control.
NON SERVICEABLE CRITERIAS
TURN OFF THE POWER SUPPLY AND UNPLUG THE UNIT. Then consult an authorized dealer in the following conditions:
- Abnormal noise during operation.
- Water/foreign particles have entered the remote control.
- Water is leaking from the indoor unit.
- The circuit breaker switches off frequently.
- The power cord becomes unnaturally warm.
- The switches or buttons are not functioning properly.
Panasonic Corporation
- Website: https://www.panasonic.com
- © Panasonic Corporation 2022
- Printed in Malaysia