Contents
noctua NM-DDS1 Mounting Kit
Product Information
The product is a cooling system that requires the following mounting parts:
- NM-DDS1 cooler spacer
- NM-DDS2 cooler spacer
The product also comes with the NOCTUA NM-DD1 INSTALLATION MANUAL, which provides detailed instructions for installation.
Product Usage Instructions
-
- Scan the provided code to display multilingual manuals on your phone.
- To install the direct die spacers, follow these steps:
- First, unscrew the fastening bracket(s) from the cooler.
- Take the NM-DDS1 spacer and make sure that the side marked “this side up” is facing away from the cooler’s contact surface.
- Take the NM-DDS2 spacer and repeat step b.
- Use the supplied longer screws to reinstall the fastening bracket(s) with the supplied spacer(s) underneath, as shown below:
- NM-DDS1 – Use 4x NM-SSC6 screws
- NM-DDS2 – Use NM-SSC7 screws
Ensure that all screws are securely tightened.
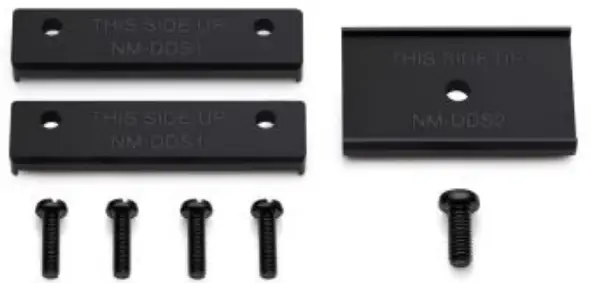
Required mounting parts
NM-DDS1 cooler spacer
NM-DDS2 cooler spacer
4x NM-SSC6 screws
NM-SSC7 screws
Caution
Caution: Direct die cooling is done at your own risk! While high-quality delidding tools and direct die frames like those from der8auer have been thoughtfully engineered to minimise the risk of damaging the CPU or other hardware components, direct die cooling will always bear a certain risk of damaging components e.g. due to cracked edges on the bare CPU dies or short circuits from liquid metal compound. Delidding will also void the processors’ warranty. Therefore, using the NM-DD1 is strictly at the customer’s own risk and Noctua cannot be held responsible for any damage that may occur to CPUs or other hardware components when removing the heat spreader and using direct die cooling.
Installing the direct die spacers
First, unscrew the fastening bracket(s) from the cooler.
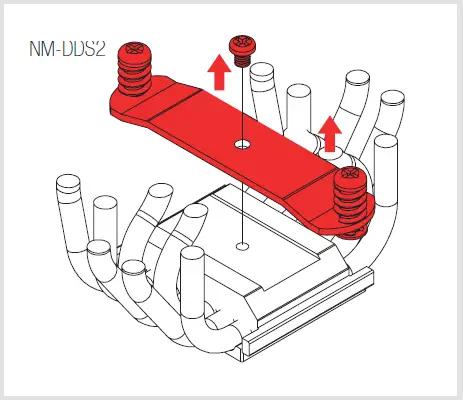
Use the supplied longer screws to reinstall the fastening bracket(s) with the supplied spacer(s) underneath, as shown below.
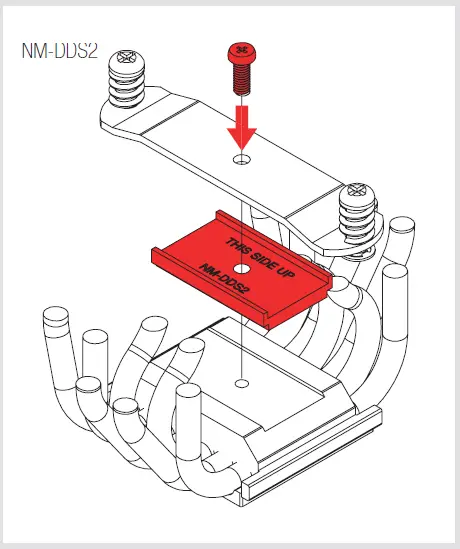
Caution: Make sure that the side marked “this side up” is facing away from the cooler’s contact surface.

Scan this code to display multilingual manuals on your phone.