![]()
Contents
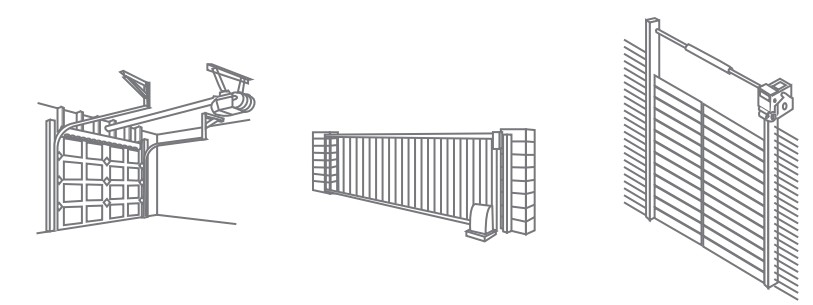
RGR551 Smart Garage Door Opener Remote
 RGR551-Accessories
manual
Step one:
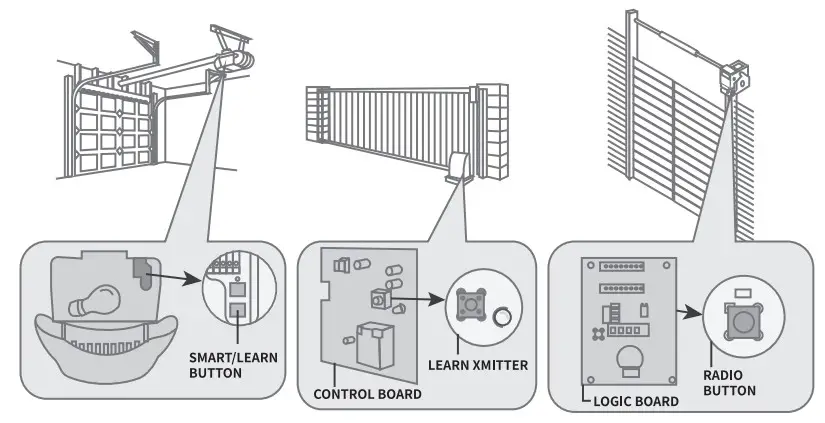
Follow user manual to pair the remote and your existing opener. It requires to activate the learn button.
- Open the remote shell and put in battery CR2032 (battery can not be shipped). Please use tool if you find it is hard to open the shell.
- Press and release the learn button on the garage door opener, the learn LED will light.
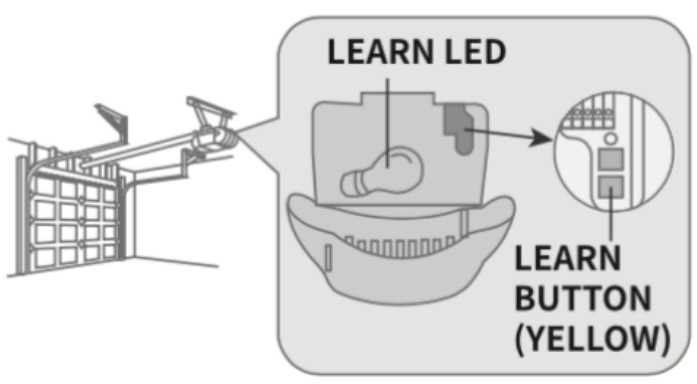
- Within 30 seconds, press and HOLD below remote control button(bottom right one) until the garage door opener light flashes or clicks are heard to indicate successful programming.
*only this bottom right button will work, as it is connected to the wire. 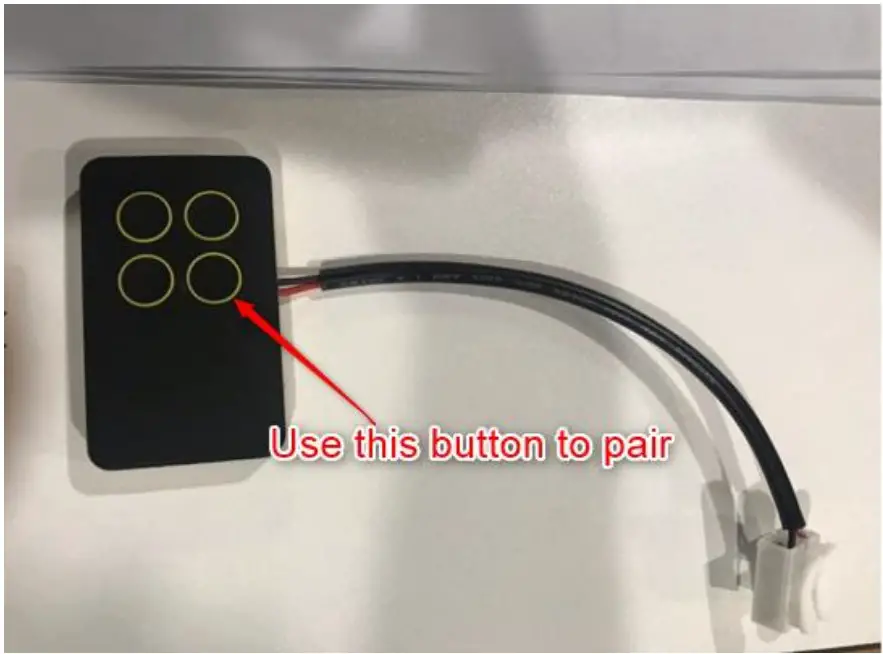 Step two
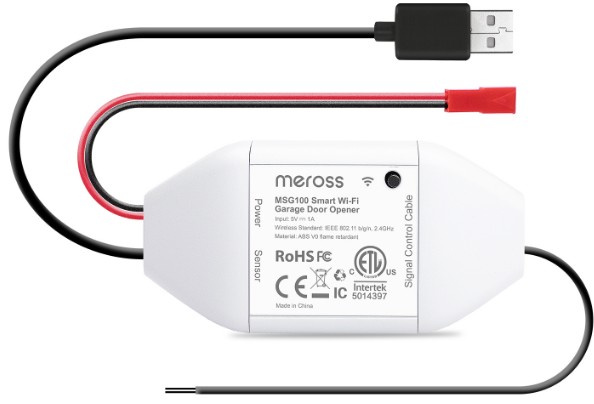
If the remote is working with your opener, connect it with your Smart garage opener ‘Signal Control Cable’. The wiring clip supplies easy connection. Then your smart garage door opener can control this remote button. That means your opener is compatible!
Note: The wires connect to the bottom right button, so only this button is working with MSG100. 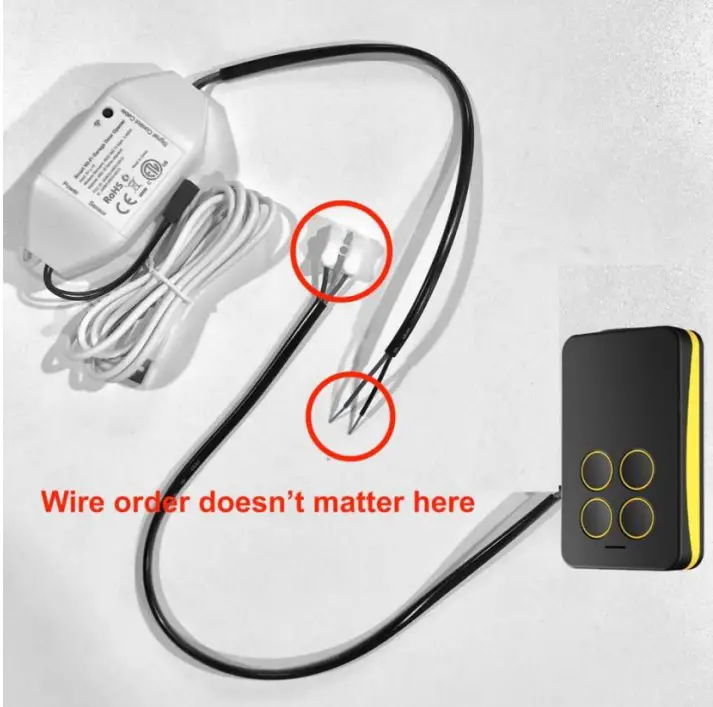
Step one:
Follow RGR910 user manual to pair RGR910 and your existing opener. It requires to activate the learn button. Attached user RGR910 followed. Please use button I (one) to pair.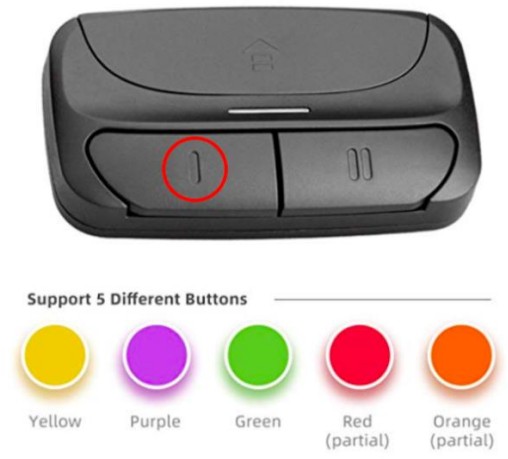
Step two:
If RGR910 is working with your opener , connect it with your Smart garage opener ‘Signal Control Cable’. The wiring clip supplies easy connection. Then your smart garage door opener can control the RGR910 button one. That means your opener is compatible!
Note: The wires connect to button one, so only button one is working.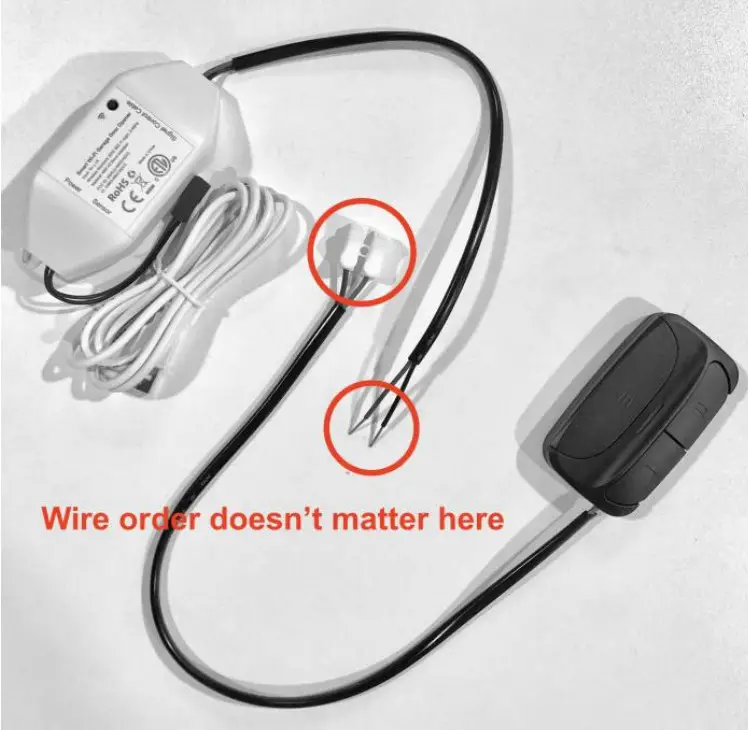
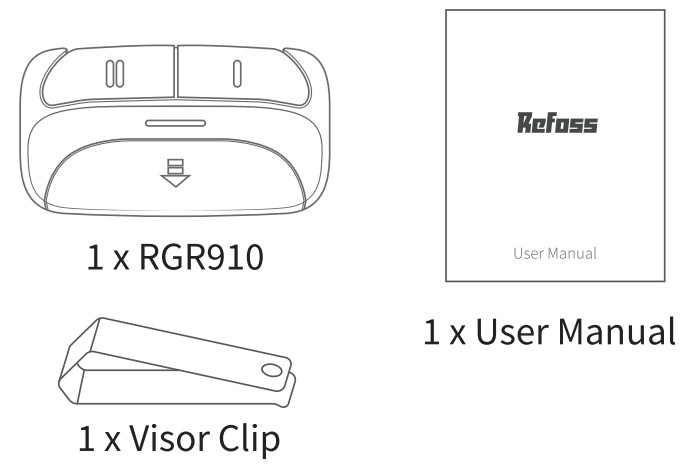
Package Content
 *If you find any partis missing in the package, please contact [email protected], we vill provide praper solution for you
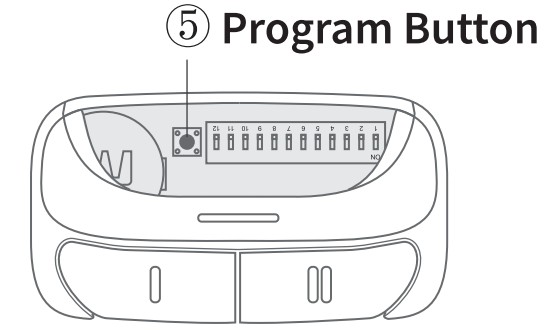
LED and Button Rules
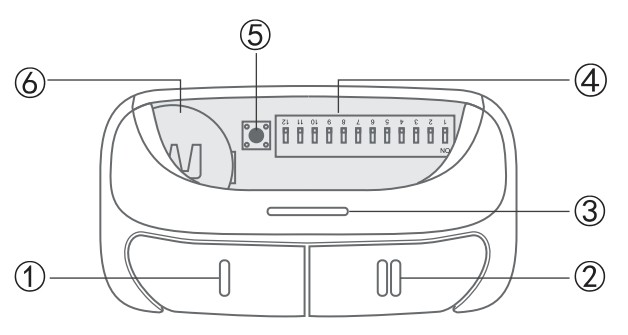
- Button 1
- Button 2
- Status LED
- DIP switches*
- Program Button
- Battery
Note: I your existing garage opener/remote/radio receiver uses DIP switch settings, please go to page 6.
Configuration Guide
For learn button ONLY
- Start with your garage door, villa door, or ‘commercial door closed.
- Remove the battery cover. Press and hold the program button until the status LED lights solid blue to entering into configuration mode. This mode willlast 1 min.

- Press the SMART/LEARN button on your existing door opener within that 1 min.
- Choose either button 1 or button 2 to pair. Press the chosen button and the status LED will flash. When the status LED stops flash, you can then press that button next time, repeat this process multiple times untila click s heard from the garage door opener, or the bulb on the garage door opener blinks, or the garage door opensfcloses, or a beep is heard from the door operator.
The required times of button presses. varies by different door brands/types.Times Brand Type/Color of Smart/Learn 1 time Linear MegaCode 318MHz 2 times Chamberlain Orange Button 1997-2005 390MHz 3 times Chamberlain Purple button 315MHz 4 times Chamberlain Green Button 390MHz 5 times Genie Overhead Door Intellicode 2005-Current 315MHz 6 times Genie overhead Door InteIlioode 1995-Current 390MHz 7 times Stanley 199r&itiPreynf31;MHz 8 times Chamberlain Yellow Button 011-Current 3120/315/390MHz 9 times Wayne Dalton Rolling Code 1999-Current 372.5MHz - Press the program button once to exit the configuration steps. You can use the configured button to control your door now. If your door does not response, please reconfigure the button once more. If it still ails, please contact us for further help.
For DIP switch ONLY
- Start with your garage door,villa door, or commercial door closed.
- Match the positions from the Refoss RGR910 with the DIP switches on your existing garage opener/remote/radio receiver.
- If your existing garage opener/remote/radio receiver has less than 12 switches, for instance 10 switches, please match switch 10 10in RGRI10 only and keep the rest switches n “-” positions.
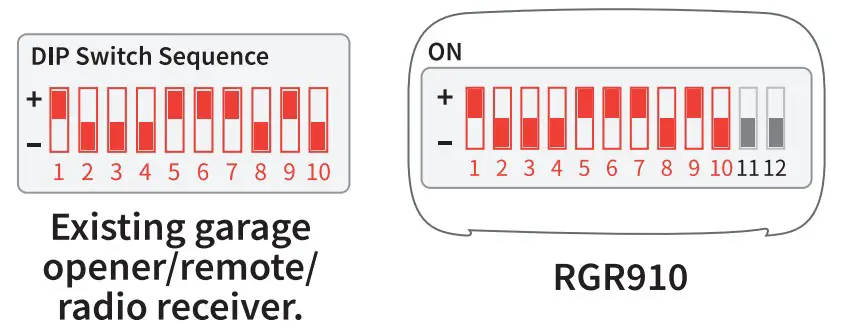
- Each switch of the Refoss RGR910 only has 2 positions, if your existing garage opener/radio receiver has 3 positions, you can set them in “+” or – first, do not use 0″ position. Then match your Refoss RGR910 again.
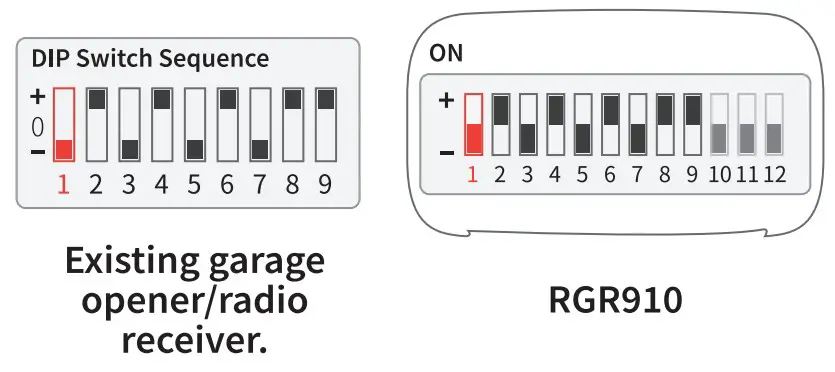 Note: For Chamberlain, Master Mechanic and Do It garage opener/remote/radio receiver, the first DIP switch must be set to the “-” position.
 - Remove the battery cover. Press and hold the program button until the status LED lights solid blue to entering into configuration mode. This mode willlast 1 min.
- Choose either button 1 o button 2 to pair. Press the chosen button and the status LED will lash. When the status LED stops. flash, you can then press that button next time, repeat this process multiple times. The required times of button presses varies by different door brands/types.
Timis Brand Type/Color of Smart/Learn 10 times Chamberlain 1421;119MHz 11 times Chamberlain 9 Code Switch 1983.1989 390MHz 12 times Genie 12 Code Switch 1985 390MHz 13 times M Linear Multi-Code 10 Code Switch 300MHz 14 times Chamberlain 8 Code Switch 390MHz 15 times Stanley Multi-Code 10 Code Switch 310MHz 16 times Genie 9 Code Swich 390MHz 17 times mo Linear Moor-O-Matic 8 Code Switch 310MHz 18 times Chamberlain 7 Code Switch 390MHz Value brand, please refer to the programing method of Chamberlain.
- Press the program button once to exit the configuration steps. You can use the configured button to control your door now. If your door does not response, please reconfigure the button once more. I fit stillfails, please contact us for further help.
Warranty
Refoss products are covered by a 12 months limited warranty from the date of its original purchase. If any problems occur, please contact us for help.
We can only provide aftersales service for products that are sold by Refoss or Refoss authorized retailers and distributors.![]()