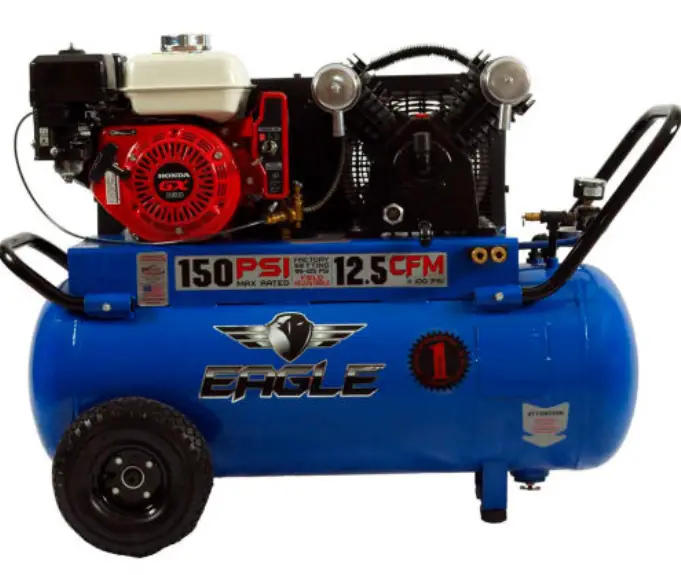
MaxAir P55GE25H1 25 25-Gallon Belt Drive Air Compressor
![]() Carefully read this instruction manual before attempting to operate this compressor.
Carefully read this instruction manual before attempting to operate this compressor.
Contents
SAFETY PRECAUTIONS
Please familiarize yourself with the following information to prevent damage to your compressor unit and injury to the operator.
![]() The air compressor motor and/or engine will get hot while in operation. Never touch the discharge tubing, engine, motor or compressor pump while in operation.
The air compressor motor and/or engine will get hot while in operation. Never touch the discharge tubing, engine, motor or compressor pump while in operation.
The compressor operates automatically while the power is connected and turned on, or the engine is running
![]() Compressed air from the unit may contain hazardous fumes. Air produced by this compressor is not suitable for breathing purposes. Always use a respirator when spraying paint or chemicals, or when sandblasting. Always wear safety glasses or goggles when using compressed air.
Compressed air from the unit may contain hazardous fumes. Air produced by this compressor is not suitable for breathing purposes. Always use a respirator when spraying paint or chemicals, or when sandblasting. Always wear safety glasses or goggles when using compressed air.
It is not practical or possible to warn you about all the hazards associated with operating or maintaining this equipment. You must use your own good judgment.
Extension Cords
The use of extensions cords is not recommended. Plug directly into a dedicated circuit. If the use of an extension cord is unavoidable then make sure your extension cord is in good condition. When using an extension cord, be sure to use one heavy enough to carry the current your product will draw. An undersized cord will cause a drop in line voltage resulting in loss of power and overheating. Table 1 shows the correct size to use depending on cord length and nameplate amperage rating. If in doubt, use the next heavier gauge. The smaller the gauge number,the heavier the cord.
| Table 1 — Minimum Gauge for Cord | ||||||
| Ampere Rating | Volts | Total length of cord in feet | ||||
| 120 V | 25 ft . | 50 ft . | 100 ft . | 150 ft . | ||
| More Than | Not More Than | AWG | ||||
| 0 | 6 | 18 | 16 | 16 | 14 | |
| 6 | 10 | 18 | 16 | 14 | 12 | |
| 10 | 12 | 16 | 16 | 14 | 12 | |
| 12 | 16 | 14 | 14 | Not Recommended | ||
![]() Never weld, drill or change WARNING the air receiver in any way.
Never weld, drill or change WARNING the air receiver in any way.
Any replacement parts should be purchased with the same specifications as the original equipment. Please contact the authorized dealer for replacement parts or specifications.
SAFETY VALVE
This valve is factory installed to prevent over pressurizing of the air receiver. It is factory set at a specific limit for your particular model, and should never be tampered with.
Adjustment by user will automatically void the warranty.
![]() Do not remove, make Adjustments to or substitute this valve!
Do not remove, make Adjustments to or substitute this valve!
INSTALLATION
INSTALLATION
Proper care, maintenance and lubrication ensures longevity. The compressor should always be level for proper lubrication. Do not over tighten foot bolts as excessive vibration may occur. Use only in a clean, dry, and well-ventilated area. The compressor has heat dissipation fins for proper cooling. Keep the fins and other parts that collect dust clean. Do not place rags or other materials on top of the compressor, as this obstructs cooling and can be a fire hazard.
BREAK-IN PROCEDURE
There is no break-in requirements for this model
BEFORE OPERATING THE AIR COMPRESSOR, PLEASE CHECK THE FOLLOWING CAREFULLY:
- Check to see that nuts and bolts are all snug.
- Check if the quantity and quality of oil is correct.
- If the intake filters are dirty, they should be replaced or cleaned.
COMPRESSOR LUBRICATION
![]() ALWAYS CHECK THE OIL LEVEL AND QUALITY BEFORE START–UP. DO NOT ADD OR CHANGE OIL WHILE THE UNIT IS RUNNING. USE ONLY RECOMMENDED NON-DETERGENT OIL
ALWAYS CHECK THE OIL LEVEL AND QUALITY BEFORE START–UP. DO NOT ADD OR CHANGE OIL WHILE THE UNIT IS RUNNING. USE ONLY RECOMMENDED NON-DETERGENT OIL
Recommended Oil:
Eagle Compressor Oil #EAOIL10 (1 litre) #EAOIL40 (4 litres)
Eagle compressor oil is a non-detergent mineral oil formulated with additives to help minimize carbon build-up, increase ring life and reduce oil consumption, for use at ambient temperatures of 0° to 30°C (32°F – 86°F).
Other Approved Oils:
Regular mineral oils can also be used in Eagle compressors.
Always use a non-detergent oil with the following specifications:
| AMBIENT TEMPERATURES AT POINT OF OPERATION | SAE VISCOSITY | ISO VISCOSITY |
| -16°C TO 0°C (3 .2°F – 32°F) | SAE 10W | ISO 32 |
| 1°C TO 26°C (33 .8°F – 78 .8°F) | SAE 20W | ISO 68 |
| ABOVE 27°C (80 .6°F) | SAE 30W | ISO 100 |
FILLING COMPRESSOR WITH OIL
- Remove the oil filler plug
- Slowly pour the proper oil into the pump crankcase.
- Always keep oil level in the middle of the sight glass.
ENGINE LUBRICATION (IF ENGINE DRIVEN)
Check engine Owner’s manual for lubrication and maintenance requirements.
OIL CHANGES
INITIAL OIL CHANGE DUE AT 100 HOURS
CHANGE OIL EVERY 300 HOURS OR 3 MONTHS, WHICHEVER COMES FIRST.
- Remove the oil drain plug. Allow oil to drain completely.
- Replace the oil drain plug.
- Refill with the recommended oil to the proper level.
MAINTENANCE
Before doing any maintenance or adjustments to your air compressor, the following safety precautions should be taken:
- TURN OFF AND UNPLUG POWER CORD.
- DRAIN AIR RECEIVER AND AIR LINES OF AIR PRESSURE.
CHECKING BELT TENSION (If Belt Driven)
Adjust belt(s) so when pressure is applied at the center, there is approximately 1/2″ slack (see diagram below)

If the belt is installed too tight,the motor might be overloaded. This will cause the motor to overheat. If the belt is installed too loosely, it will slip and excessive wear and vibration will occur.
HOW TO INSTALL NEW BELT IF REQUIRED (If belt driven)
- Disconnect power supply.
- Remove belt guard.
- Loosen motor bolts and slide motor toward compressor head just enough to allow old belt to be removed.
- Install proper replacement belt.
- Slide motor away from compressor head to provide recommended
tension as shown in diagram on page 5. - Align belt using a straight edge ruler against pulley’s edge.
- Fasten motor bolts.
- Ensure motor and compressor pulley’s are secure. Re-check alignment.
- Re-install belt guard and reconnect power supply.
- Belt tension should be checked after 20 hours of operation. Check tension monthly thereafter.
OPERATING YOUR AIR COMPRESSOR
A) GAS ENGINE DRIVEN (continous run only)
- Check entire unit for any damage.
- Check compressor and engine oil level, fill or add if necessary.
- Make sure gas tank is filled.
- Read entire engine manual
- Starting the engine.
a) Move fuel lever to the “On” position.
– If engine is cold, move choke lever to the “Closed” position
– If engine is warm, leave choke lever in “Open” position
b) Turn engine switch to “On” position.
c) Pull starter grip lightly until you feel resistance, then pull briskly, return starter grip gently – engine should start, if not repeat.
d) Once the engine starts running,slowly move the choke lever to the “Open” position.
e) With the engine running properly,the compressor fills the air receiver with compressed air, when maximum pressure (set by the pilot valve control) is reached,the engine and compressor will slow down to idle speed, and will return to full RPM when the cut-in pressure is reached. The unit will continue to cycle automatically until turned off. - Stopping the engine.
a) Turn engine switch to the “Off” position.
b) Turn the fuel lever to the “Off” position.
![]() Engine idle speed may need to be adjusted, even on your brand new unitto compensate for differences in altit ude. Please consult the engine operating manual.
Engine idle speed may need to be adjusted, even on your brand new unitto compensate for differences in altit ude. Please consult the engine operating manual.
B) ELECTRIC DRIVE WITH DUAL CONTROL
- Check unit for any damage.
- Check compressor oil level, fill or add if necessary.
- Pressure switch “Off/Auto” knob should be in “Off” position.
- Plug in power cord to proper electrical outlet.
- a) Stop/Start (pressure switch) control
1. Shut-off valve on pilot unloader should be closed (“knurled” knob on top of the pilot unloader should be turned all the way down).
2. Turn pressure switch “Off/Auto” switch to “Auto”. Electric motor should now start and fill air receiver(s) with compressed air till cut-out pressure is reached. Compressor should stop and remain stopped till air receiver pressure reaches the cut-in pressure. The unit will continue to cycle in this automatic operation until it is turned off.
b) Continuous run (Pilot unloader) control
1. Open the shut-off valve on pilot unloader (“knurled” knob on top of the pilot unloader should be turned all the way up).
2. Turn pressure switch “Off/Auto” switch to “Auto”, electric motor should now start and fill air receiver(s) with compressed air till full pressure is reached. To engage continous run,turn“knurled knob down. Your compressor will idle down and continue to idle once maximum pressure is acheived. When cut-in pressure is reached,the unloader valves will de-activate and unit will compress air. The unit will continue in this automatic operation until the
unit is stopped (“Off/Auto” switch turn to the “Off” position and/or electric power supply is disconnected) - You can switch at anytime from Stop/Start to Continuous Run and vice versa by opening or closing the valve on the pilot unloader.
C) ELECTRIC DRIVE
- Check unit for any damage.
- Check compressor oil level, fill or add if necessary.
- Pressure switch “Off/Auto” switch should be in “Off” position.
- Plug in power cord to proper electrical outlet. If compressor is not equipped with a male plug, hire an electrician to install one
- Stop/Start (pressure switch) control Turn pressure switch “Off/Auto” switch to “Auto”. Electric motor should now start and fill air receiver(s) with compressed air until cut- out pressure is reached. Compressor should stop and remain stopped until air receiver pressure reaches the cut-in pressure. The unit will continue to cycle in this automatic operation until the pressure switch is turned to the “Off” position.
![]() EXTRA CARE SHOULD BE TAKEN TO AVOID PERSONAL INJURE WITH AUTOMATICALLY CONTROLLED COMPRESSORS
EXTRA CARE SHOULD BE TAKEN TO AVOID PERSONAL INJURE WITH AUTOMATICALLY CONTROLLED COMPRESSORS
COMPRESSOR MAINTENANCE SCHEDULE
DAILY OR BEFORE EACH USE
- Check oil level
- %SBJODPOEFOTBUJPOGSPNBJSSFDFJWFSBGUFSFBDIVTF
- Check for any unusual noise or vibration
- Be sure all nuts and bolts are tight
WEEKLY
- Turn off power. Clean dust and foreign matter from cylinder head, motor, fan blades, intercooler and air receiver.
- $MFDLBJSGJMUFSBOESFQMBDFJGOFDDFTTBSZ
- Worn filters should be replaced.
- Check V-belts for wear.
MONTHLY
- Inspect unit for leaks.
- Tighten joints if leaks are observed.
- Check V-belts for proper tension.
- Check compressor pulley and motor sheave are aligned and securely fastened (see item 9).
QUARTERLY OR 300 HOURS (Whichever comes first)
- Inspect the air receiver for corrosion or other damage
- Change compressor oil.
- Replace air filter (more often if compressor is used near paint spraying operations or in dusty environments).
TROUBLE SHOOTING
| PROBLEM POSSIBLE CAUSE CORRECTIVE ACTION | ||
| Will Not Start |
|
|
| Low Pressure |
|
|
| Oil In discharge |
|
|
| Compressor Overheats |
|
|
| Compressor Loads and Unloads
or Stops and Starts Excessively |
|
|
| Insufficient Output Low discharge Pressure |
|
|
| Motor Stalls |
|
Replace unloader or check valve
|
| Water In Crankcase Oil Break- ing Up
Oil Gets dirty, Rusty Valves or Cylinder |
|
|
| Excessive Vibration |
|
|
| Compressor Knocks |
|
|
| Compressor uses too much oil |
|
|
| Piston rings not seated |
|
|
STANDARD WARRANTY
Seller warrants products of its own manufacture against defects in workmanship and materials under normal use and service as follows:
| AIR COMPRESSOR BRAND |  |
| COMPRESSORS: months from date of purchase. | 24 Months |
| PARTS: from date of sale | 90 Days |
Wood Industries, Inc. (WII) warrants repaired or replaced parts of its own manufacture against defects in materials and workmanship under normal use and service for ninety (90) days or the remainder of the warranty on the product being repaired, whichever is longer. With respect to products not manufactured by WII, WII will, if practical, pass along the warranty of the original manufacturer.
Notice of the alleged defect must be given to Seller in writing with all identifying details including serial number, model number, type of equipment and proof of purchase, within thirty (30) days of the discovery of same during the warranty period.
Wll’s sole obligation on this warranty shall be, at its option, to repair, replace or refund the purchase price of any product or part thereof, which proves to be defective, F.O.B. WII shop.
If requested by WII, such product or part thereof must be promptly returned to WII, freight prepaid for inspection.
This warranty shall not apply and WII shall not be responsible nor liable for:
a) Consequential, collateral or special losses or damages;
b) Equipment conditions caused by normal wear and tear, abnormal conditions of use, accident, neglect or misuse of equipment, improper storage or damages resulting during shipment;
c) Deviation from operating instructions, specification or other special terms of sale;
d) Labor charges, loss or damage resulting from improper operation, maintenance or repairs made by person(s) other than WII or WII authorized service representative;
e) Improper application of product.
In no event shall WII be liable for any claims, whether arising from breach of contract or warranty of claims of negligence or negligent manufacture, in excess of purchase price. THIS WARRANTY IS THE SOLE WARRANTY OF WOOD INDUSTRIES, INC. AND ANY OTHER WARRANTIES, EXPRESSED, IMPLIED IN LAW OR IMPLIED IN FACT, INCLUDING ANY WARRANTIES OF MERCHANTABILITY AND FITNESS FOR PARTICULAR USE, ARE HEREBY SPECIFICALLY EXCLUDED.

