![]() Assembly Instructions Wall-Mounted Toilet
Assembly Instructions Wall-Mounted Toilet
 THREE 52
Art.10520522
Version: 06/23
Contents
Three 52 Wall Mounted Toilet

These accessories are not in the installation kit.

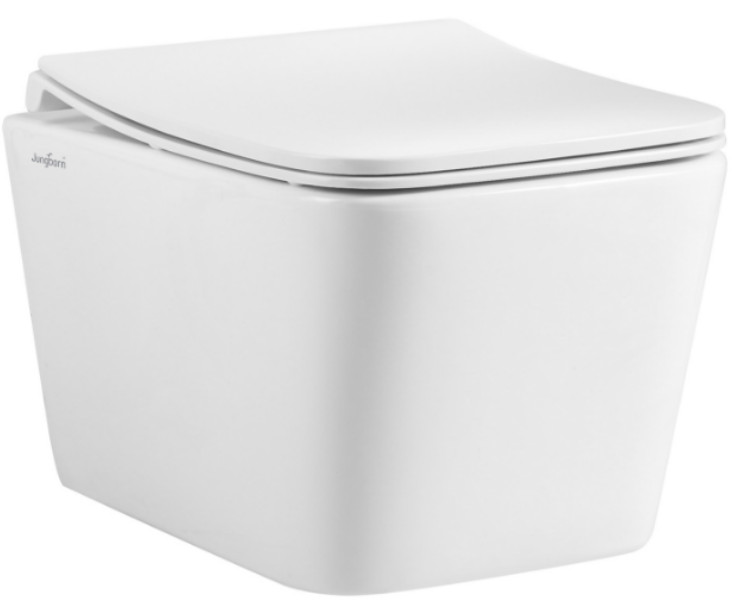
Read the instructions carefully before use and keep them for future reference! For daily cleaning use only commercial bath clea ners. Lime scale and soap residue can be removed with commercial lime remover or vinegar cleaners.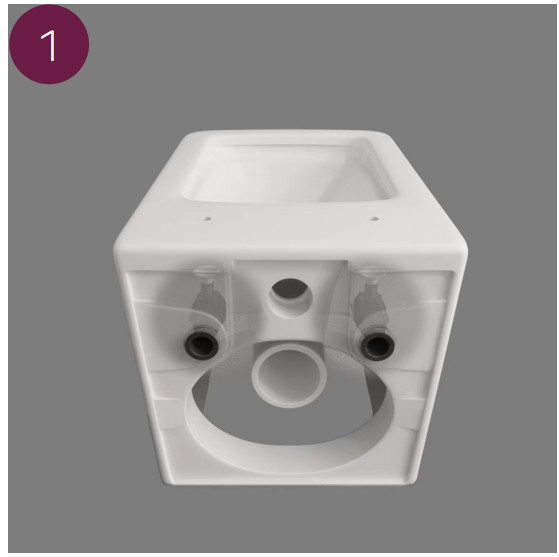 This is the toilet with some accessories installed.
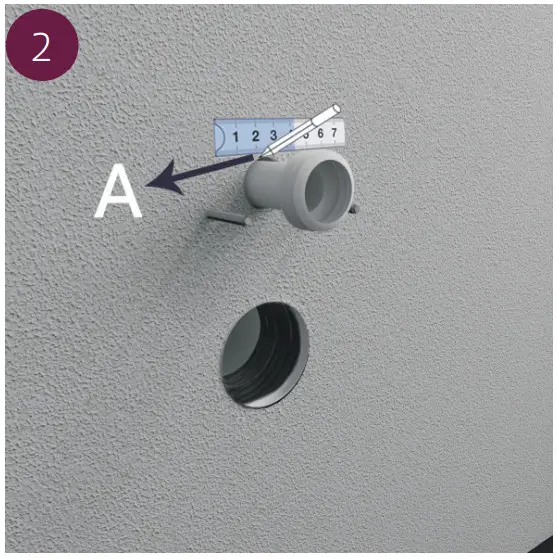 Measure the distance of inlet pipe on the wall and mark it with the letter A (inlet pipe is not included)
 Measure the distance of inlet pipe on the toilet and mark it with the letter B
 Cut the extra material of the inlet pipe
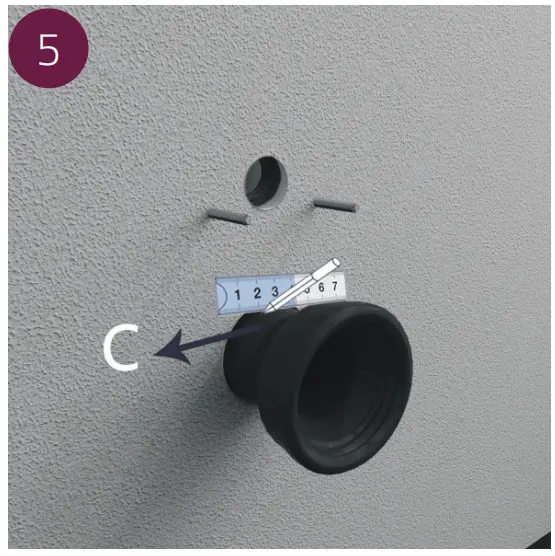 Measure the distance of outlet pipe on the wall and mark it with the letter C (outlet pipe is not included)
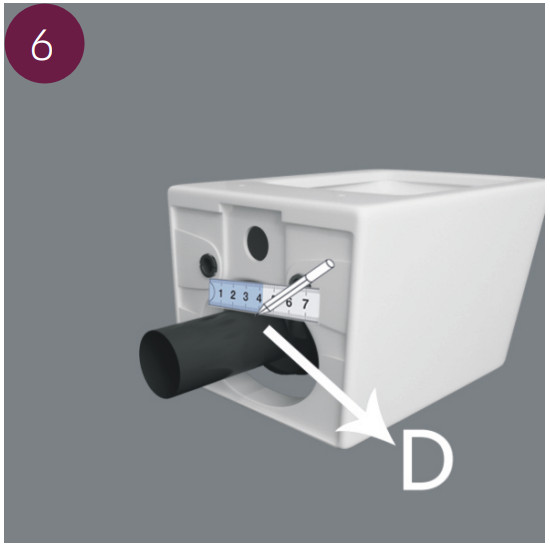 Measure the distance of outlet pipe on the toilet and mark it with the letter D
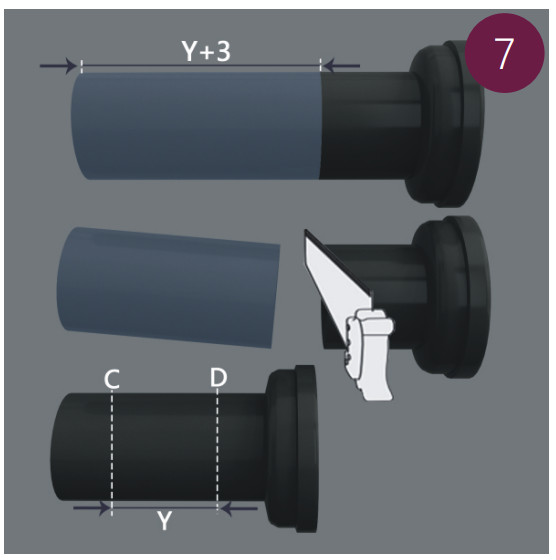 ut the extra material of the outlet pipe
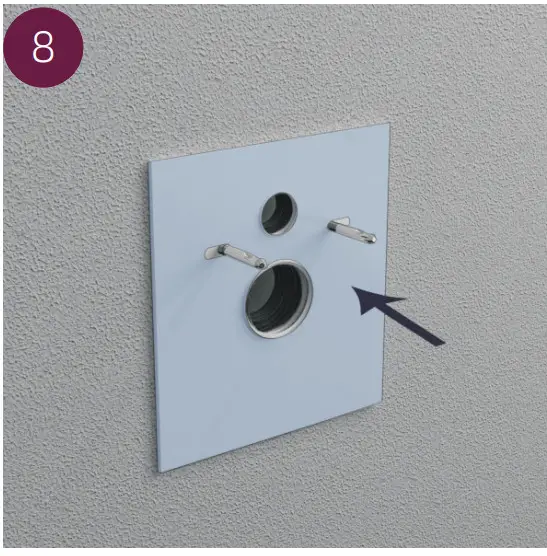 Hang the soundproofing pad on the wall(not included)
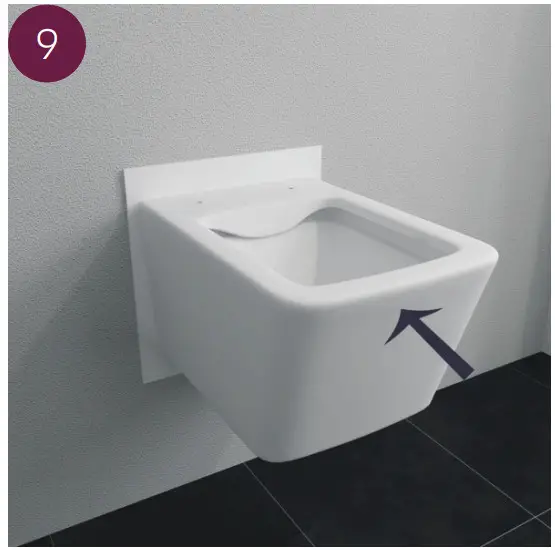 Hang the toilet on the wall
 Draw the line on the soundproofing pad based on the shape of the toilet
 Take the toilet off the wall
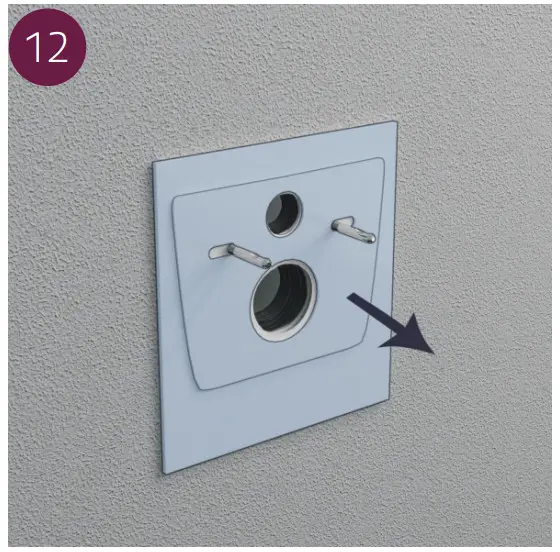 Take the soundproofing pad off the wall
 Cut the soundproofing pad along the line
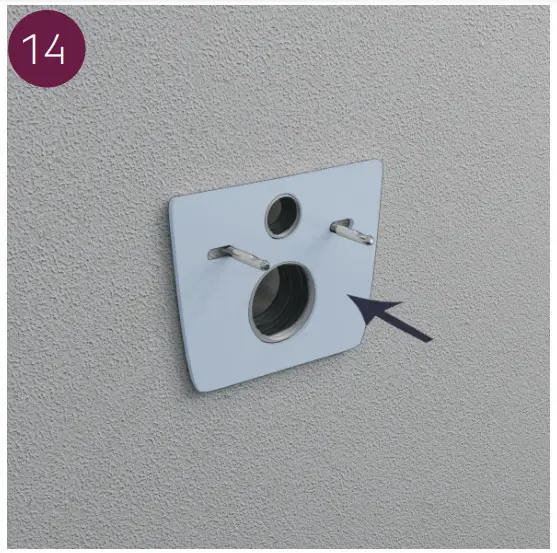 Hang the soundproofing pad on the wall
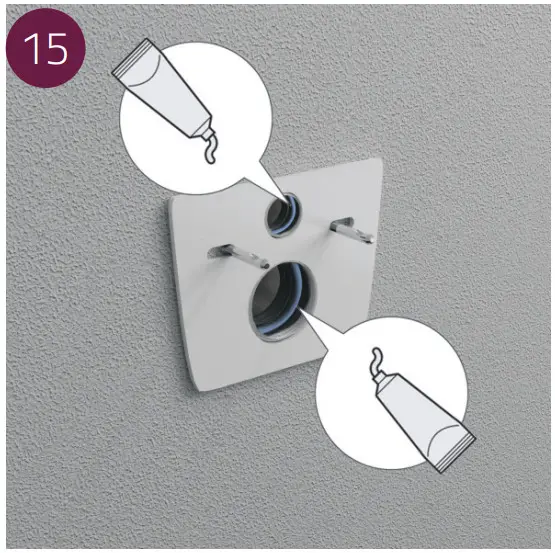 Apply the lubricating oil to the seal rings inside the wall for easier installation
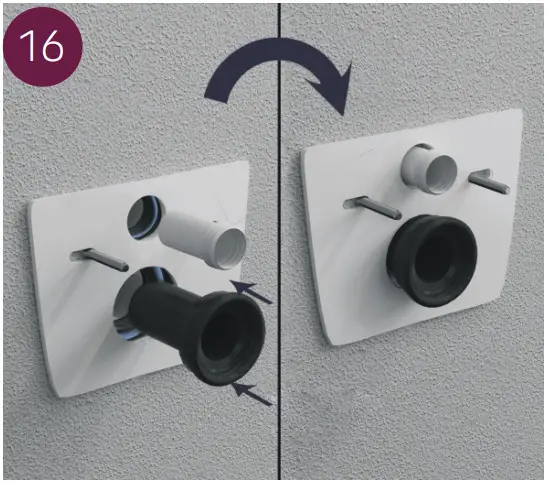 Put the pipes into the holes on the wall
 Apply the lubricating oil to the outside of the seal ring on the inlet pipe and the inside of the seal ring on the outlet pipe for easier installation
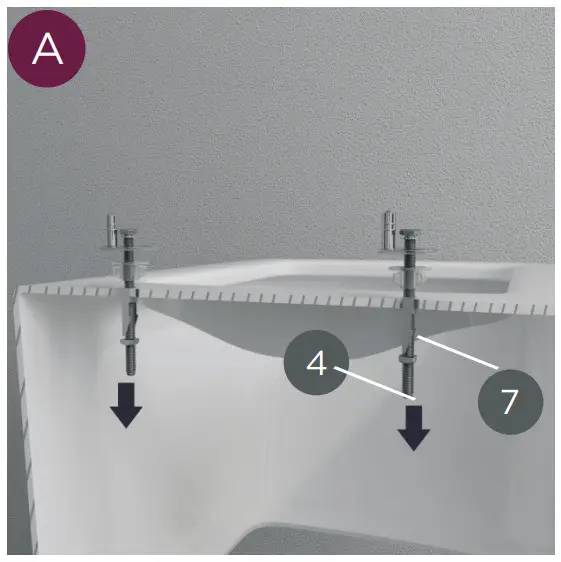
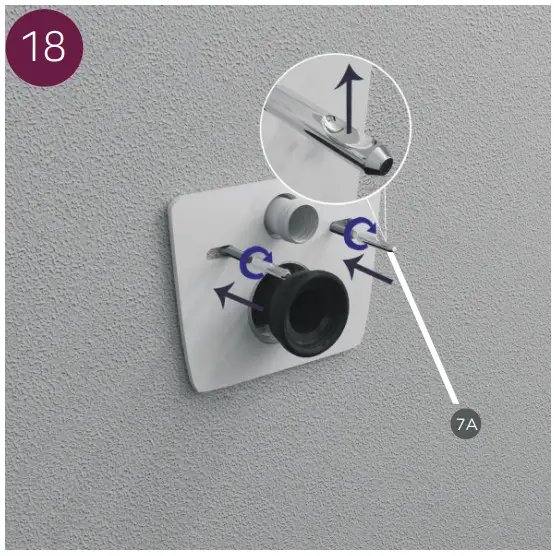 Put 7A into the screw on the wall and rotate it until the notch of the bolts 7A is pointing upwards.
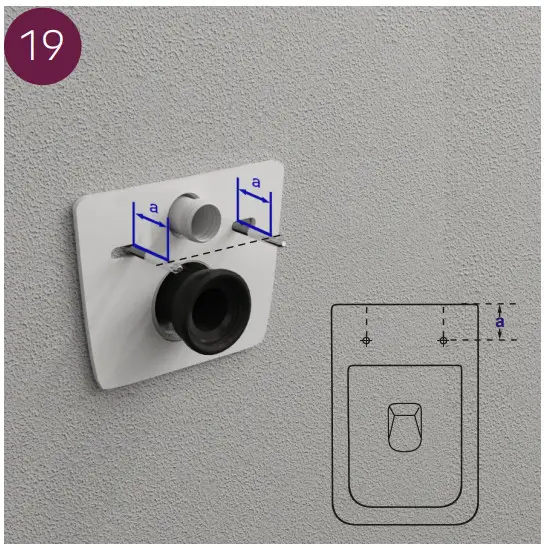 Make sure size “a” on the toilet is the same as size “a” on the screw
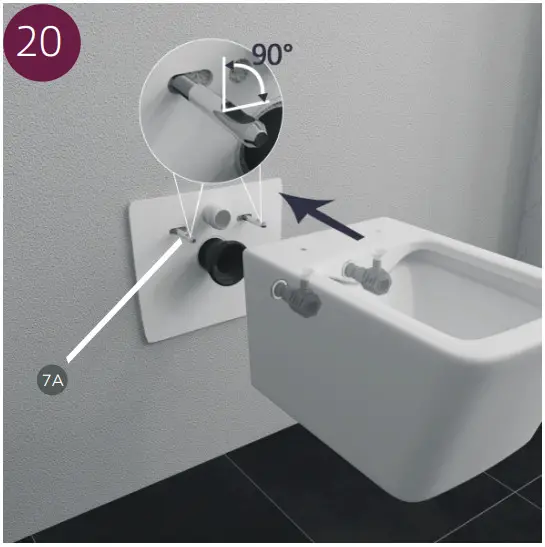 Slide the toilet on the bolts 7A.
 Rotate the 5A through the seat cover fitting hole with L-shaped screw 6A.
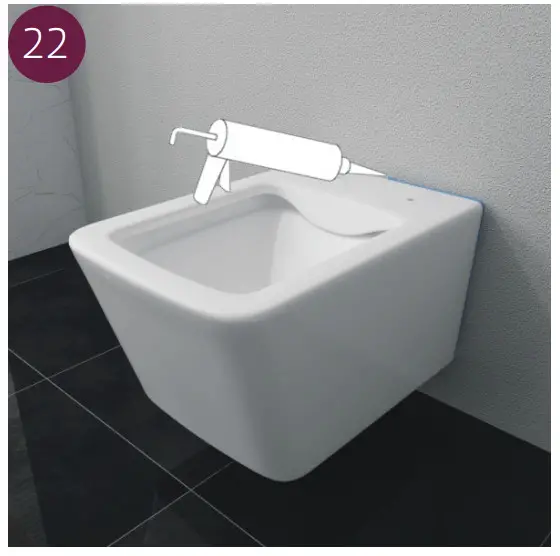 Add sealant to the gap between the toilet and the wall
Assembly instructions WC seat
 Adjust the folding pin (7) and bolt (4) to the parallel direction, then plug them into the designated holes on the toilet.
 Tighten the bolt.
 Screw the stainless steel screws (4) to the mounting plate (2) so that the mounting platecan still move easily.
 Push the WC seat onto the pins of the mounting plate (2) until it snaps into position.
 Align the WC seat on the toilet.
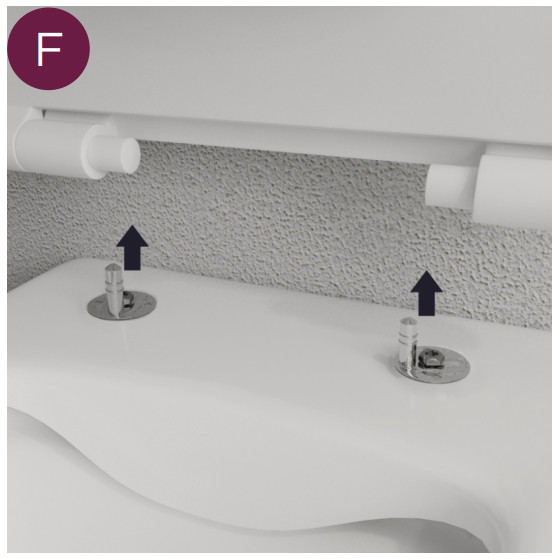 Align the WC vertically towards the top. Next, pull the seat up vertically to remove it.
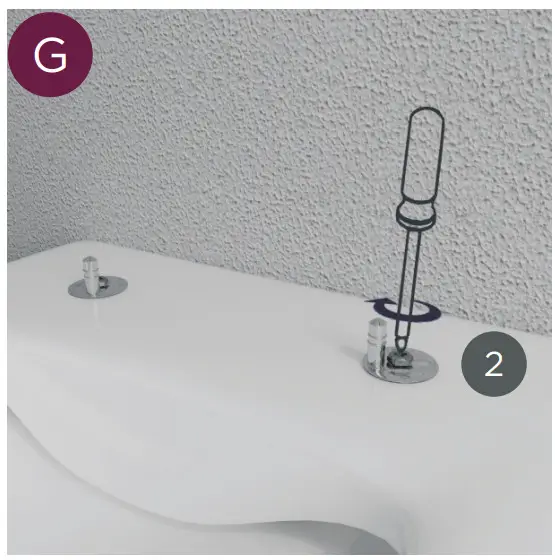 Now, screw the mounting plates (2) tight.
 Now, slide the cover cap (1) onto the mounting plate (2) before pushing the toilet seat back onto the pins so that it snaps into place.
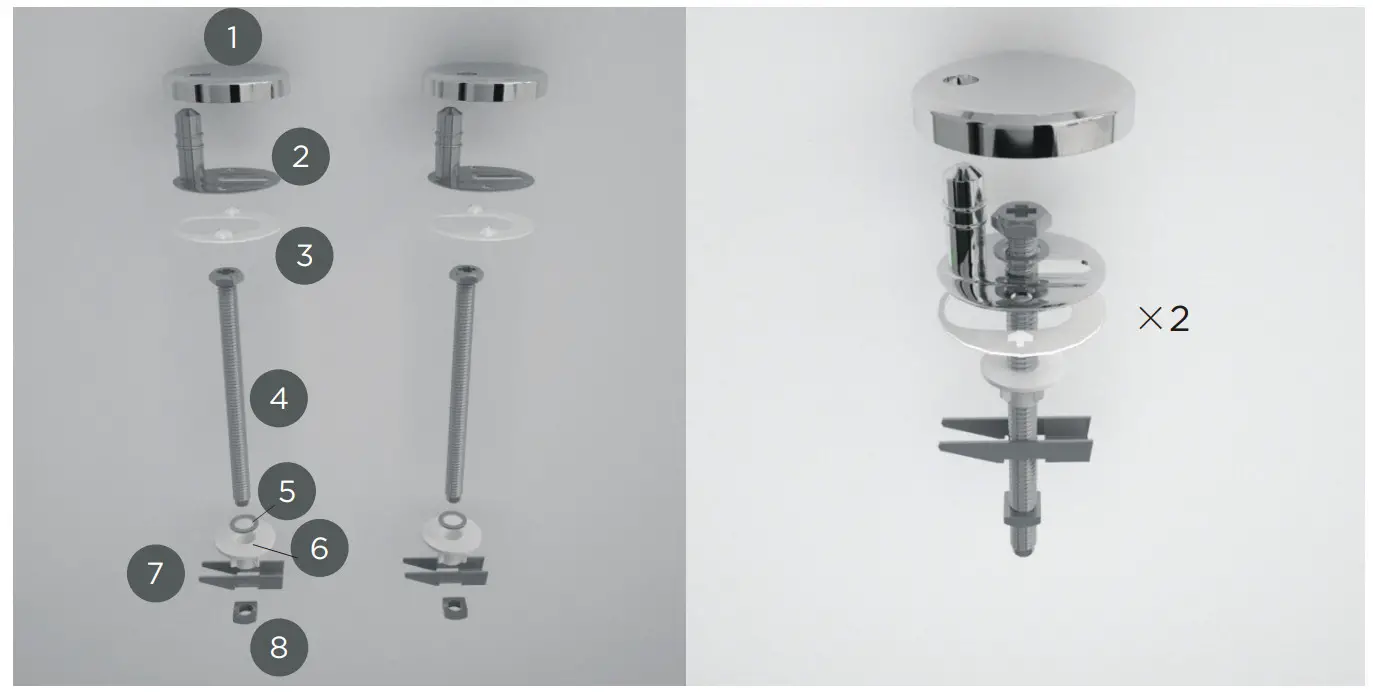
The following steps are for changing wall mounting components Put 5A into 4A and rotate 5A until they are tight enough, then put 4A&5A into 3A and rotate them half way(Installed already)
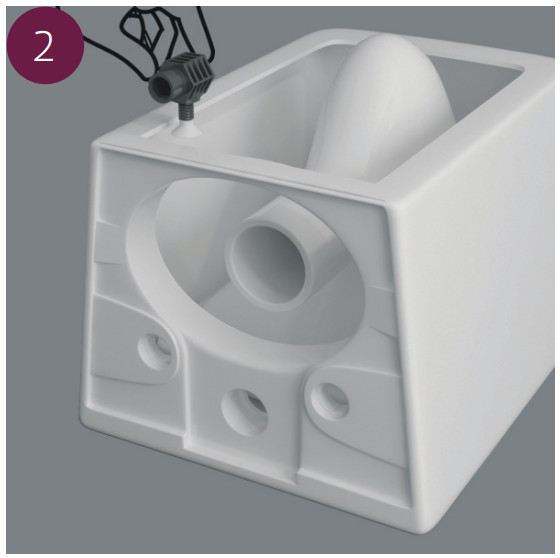 Place 3A&4A&5A into the hole from the bottom of the toilet (Installed already)
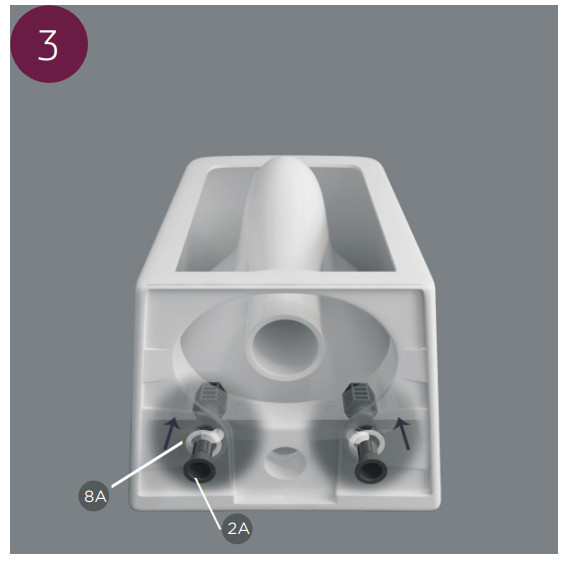 Put 2A&8A into the hole from outside (Installed already)
 Rotate 2A&8A into the hole for around a half distance (Installed already)
 Connect 2A&8A and 3A&4A&5A with 1A (Installed already)
HORNBACH Baumarkt AG
Hornbachstrasse 11
D76879 Bornheim
www.hornbach.com