![]() IQ CARD-PG QUICK GUIDE
IQ CARD-PG QUICK GUIDE
Contents
QC008-840 IQ Card PG

The IQ Card-PG can be installed in to “Slot 1” of your IQ Panel 4, IQ4 Hub or IQ4 NS to enable support of PowerG sensors.
Product Name: IQ Card-PG
Part Number: QC008-840
Document last updated on: 8/30/23
BEFORE YOU BEGIN
 |
Swipe down and touch “Settings” then “Advanced Settings”. Enter your code and touch “POWER DOWN”. |
  |
Once the IQ Panel has completely powered down, unplug or disconnect the power by removing the barrel jack connector inside the panel or by unplugging the power supply. NOTE: it is NOT required to disconnect the battery. |
INSTALLING THE CARD
 |
From the bottom of the panel, find the retaining screw, loosen completely. |
 |
Once the screw has been loosened, pull the backplate away from the panel to remove. |
 |
Locate “SLOT 1” which is designated as the slot for PowerG daughter cards. |
 |
Make sure the PowerG antenna jumper is connected to the main motherboard. |
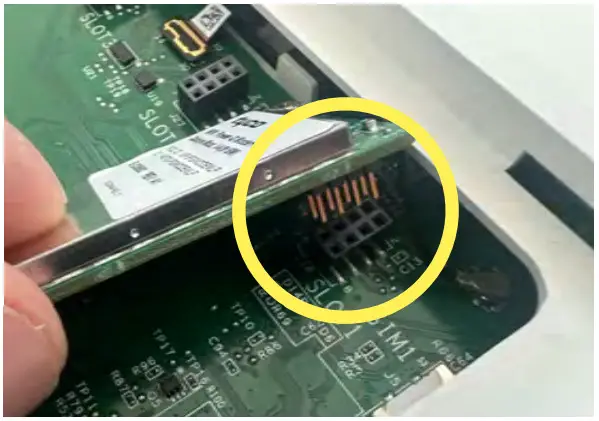 |
Match the pins on the bottom of the IQ Card to the terminal on the IQ Panel. |
 |
Push the IQ Card firmly into place. Connect the PowerG antenna jumper to the daughter card. |
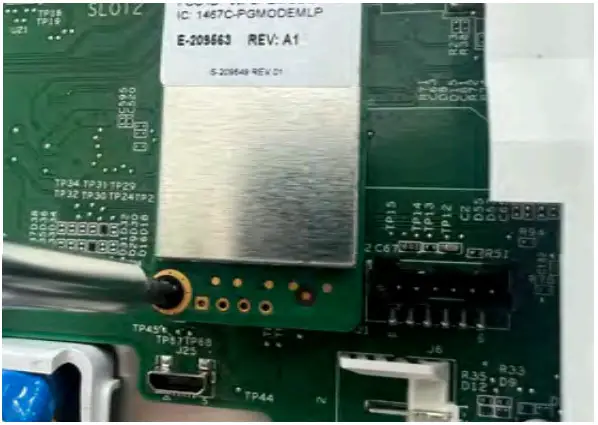 |
Install and tighten the provided locking screw to secure the IQ Card into place. |
 |
Replace the back cover, top tabs first. Press down on the bottom and tighten the retaining screw. |
 |
Plug the power supply back in and press and hold the power button for 3 sec to power on. |
TESTING THE CARD
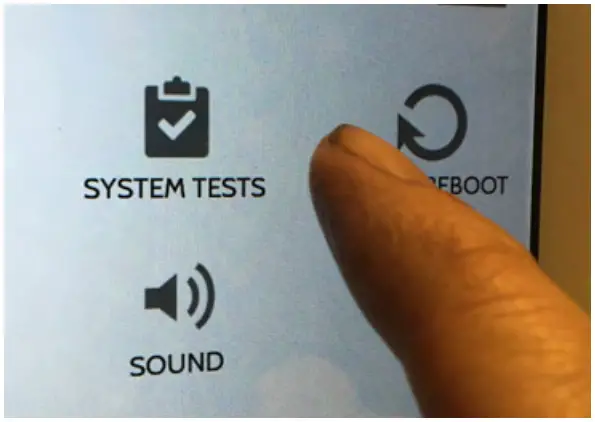 |
Swipe down and touch “Settings” then “Advanced Settings”. Enter your code and touch “System Tests”. |
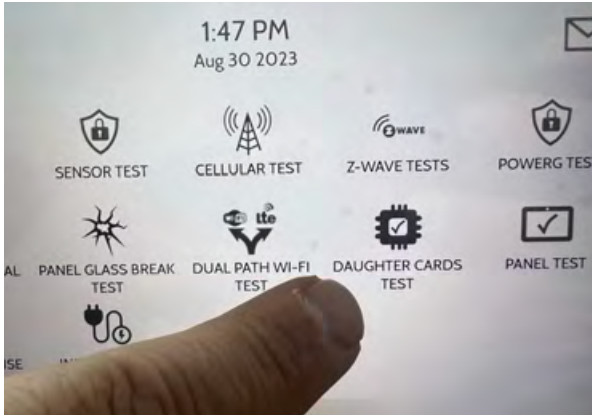 |
Touch “Daughter Cards Test”. |
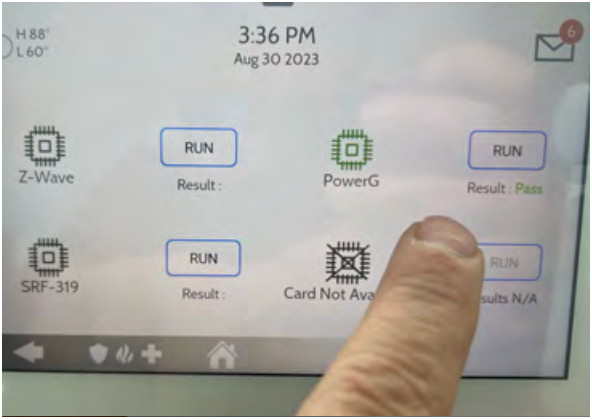 |
Run the “PowerG” test. Allow up to 2 min for the panel to successfully test the radio in the new IQ Card. If test fails, reboot the panel and try again. |
The IQ Panel will automatically recognize the newly-installed IQ Card-PG and it is now ready to use.
![]()