IRON TRUSS FABRICATION F230827 Tundra Front Debris Shields
INSTALLATION INSTRUCTIONS
FRONT DEBRIS SHIELDS
***ENSURE YOUR VEHICLE IS SECURED IN PLACE AND THE PARKING BRAKE IS ENGAGED***
***YOU DO NOT NEED TO REMOVE THE WHEELS FOR THIS INSTALLATION***
***WORKING ON A MOTOR VEHICLE HAS INHERENT RISKS. PROCEED WITH CAUTION***
- Verify contents of package.
a. 2022+ Tundra Front Debris Shield Parts/Materials Bag
i. 14 Plastic Push Rivet, Short
ii. 6 Plastic Push Rivet, Long
iii. 10 Fender Washer, Stainless Steel, Black”
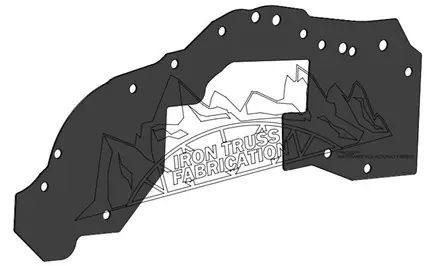
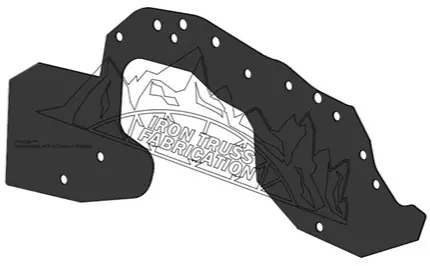
b. 1 Front Debris Shield Passenger
c. 1 Front Debris Shield Driver
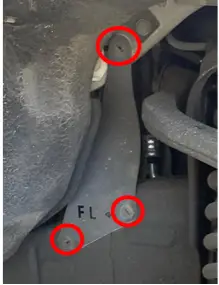
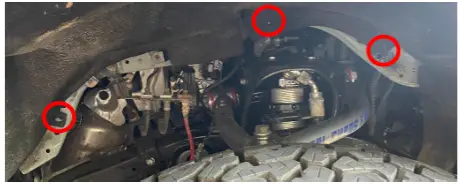
- Remove the Front Most OEM Splash Guard by removing the 3 Push Rivets from the vehicle Frame/Body. Repeat on the Driver’s side and Passenger’s Side of the vehicle.
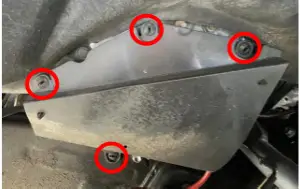
- Remove the Rear Most OEM Splash guard by removing the 4 Push Rivets from the Vehicle Frame/Body.
Repeat on the Driver’s side and Passenger’s Side of the vehicle.
- Remove the 3 Push Rivets Holding the OEM Felt Wheel Well liner to the body of the vehicle on the Passenger’s Side of the vehicle.
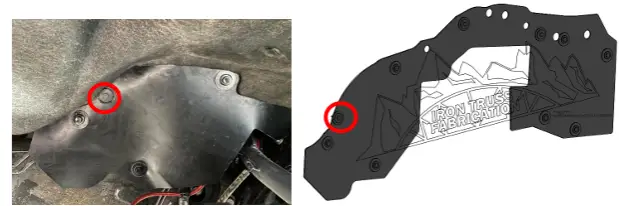
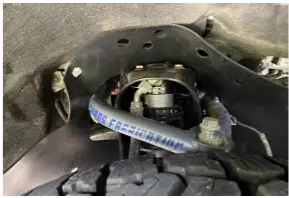
- Place the Front Debris Shield Passenger into the wheel well over the top of the coil over.
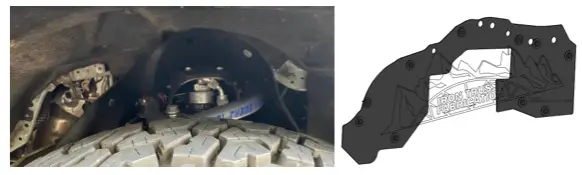
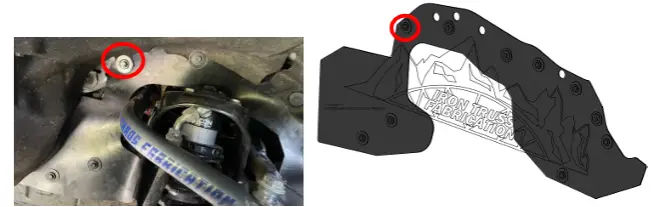
- Secure the Front Debris Shield Passenger in place UNDER the OEM felt wheel well liner with 1 Plastic
Push Rivet LONG and 1 Washer.
*** You might have to push/pull the Debris Shield toward the front/rear of the vehicle to align the holes on the vehicle body/frame as you install the Push Rivets***
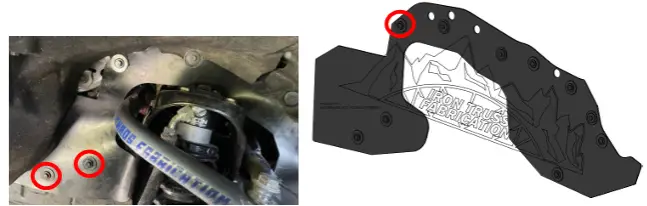
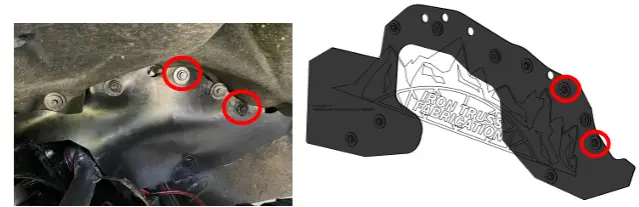
- Secure the Rear most end of the Front Debris Shield Passenger in place with 3 Plastic Push Rivets SHORT and 3 Washers in the locations shown.
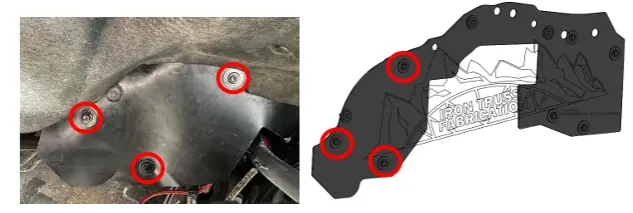
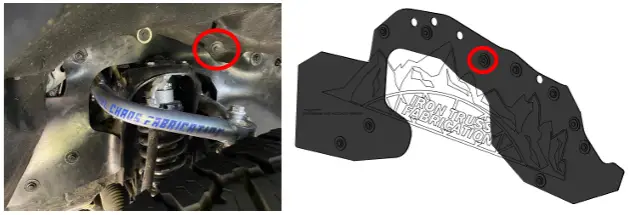
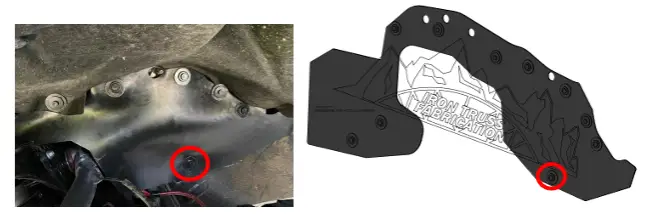
- Secure the Rear most end of the Front Debris Shield Passenger in place with 1 Plastic Push Rivet LONG and 1 Washers in the location shown.
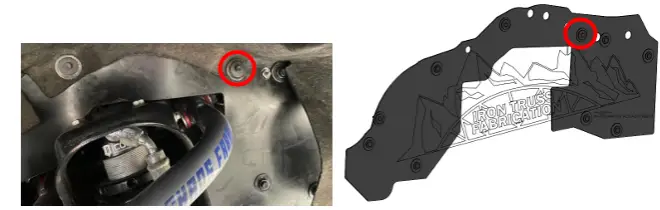
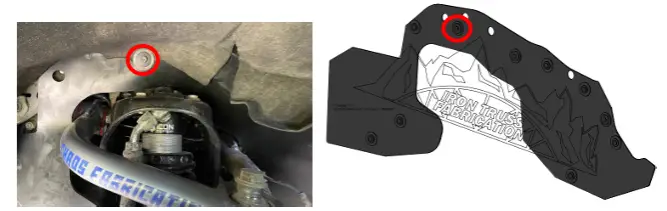
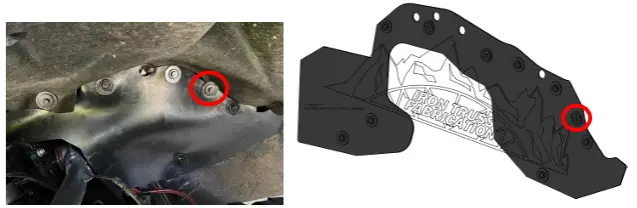
- Secure the Front most end of the Front Debris Shield Passenger in place UNDER the OEM felt wheel well liner with 1 Plastic Push Rivet LONG and 1 Washer.
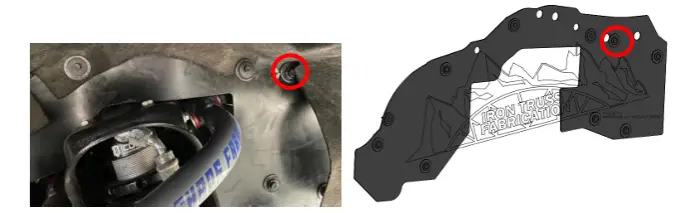
- Secure the Front most end of the Front Debris Shield Passenger in place with 1 Plastic Push Rivet SHORT and 1 Washer.
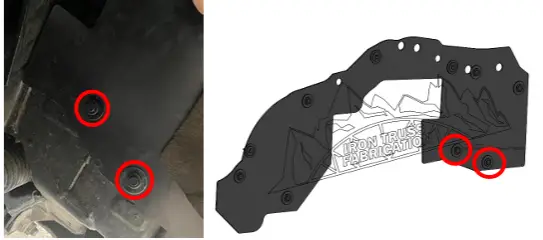
- Secure the Front most end of the Front Debris Shield Passenger in place onto the frame place with 2 Plastic Push Rivets SHORT and 2 Washers.
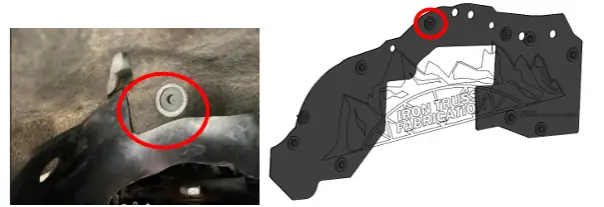
- Locate this hole on the front end of the vehicle under the OEM felt wheel well liner.
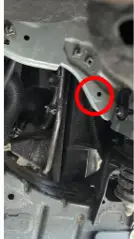
- Secure the Front most end of the Front Debris Shield Passenger in place 1 Plastic Push Rivet SHORT and 1 Washer.

- The Front Debris Shield Passenger is now installed. Move onto the Driver’s Side.

- Remove the 4 Push Rivets Holding the OEM Felt Wheel Well liner to the body of the vehicle on the Driver’s Side of the vehicle.

- Place the Front Debris Shield Driver into the wheel well over the top of the coil over.
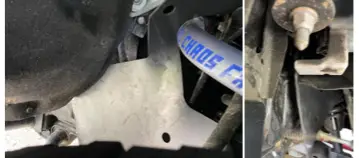
- Feed the Front most end of the Front Debris Shield Driver between the washer fluid reservoir and the frame/body of the vehicle.
- Secure the Front Debris Shield Driver in place UNDER the OEM felt wheel well liner with 1 Plastic Push Rivet LONG and 1 Washer.
*** You might have to push/pull the Debris Shield toward the front/rear of the vehicle to align the holes on the vehicle body/frame as you install the Push Rivets***
- Secure the front most end of the Front Debris Shield Driver in place UNDER the OEM felt wheel well liner with 1 Plastic Push Rivet SHORT and 1 Washer.
- Secure the front most end of the Front Debris Shield Driver in place to the Vehicle Frame with 2 Plastic Push Rivets SHORT and 2 Washers.
- Secure the rear most end of the Front Debris Shield Driver in place UNDER the OEM felt wheel well liner with 1 Plastic Push Rivet LONG and 1 Washer.
- Secure the rear most end of the Front Debris Shield Driver in place UNDER the OEM felt wheel well liner with 1 Plastic Push Rivet LONG and 1 Washer
- Secure the front most end of the Front Debris Shield Driver in place with 2 Plastic Push Rivets SHORT and 2 Washers.
- Secure the rear most end of the Front Debris Shield Driver in place to the Vehicle Frame with 1 Plastic Push Rivet SHORT and 1 Washer.
- The Front Debris Shield Driver is now installed.

© 2023, IRON TRUSS FABRICATION
https://irontrussfabrication.com/