![]()
CONNECT
MOUNT
VESA MOUNT
72393 – CONNECT VESA Mount – Black
IPORT CONNECT VESA Mount Install Manual
Thank you for purchasing the all new IPORT CONNECT PRO VESA Station. We hope you enjoy this revolutionary new system and if at any time you need more assistance please contact IPORTTech Support via Online chart or through our help desk.
Contents
Whats in box:
1 – IPORT CONNECT VESA Station
1 – IPORT Security tool – 1.5mm hex key
1 – M4 x 10mm screws
1 – Info Card
Product Info Page – https://www.iportproducts.com/Product/72305
Power Handling
- 9-30V DC 1.5A from a 2-wire connection
- 48VPoE+ when the IPORT PoE+ Upgrade (72109) is installed.
Glossary of Terms:
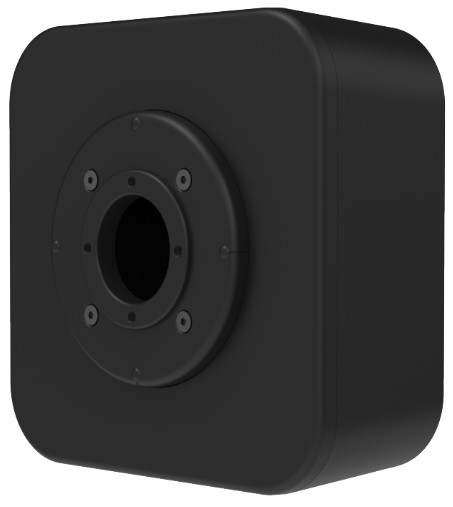
- VESA STATION – The fully assembled CONNECT PRO VESA Station consisting of the Station, Cover and screws.
- Station Cover – The thin plastic cover arround the round charging portion of the VESA Station.
- IPORT Security Tool – The orange handled 1.5mm hex tool used for locking and unlocking IPORTProducts.
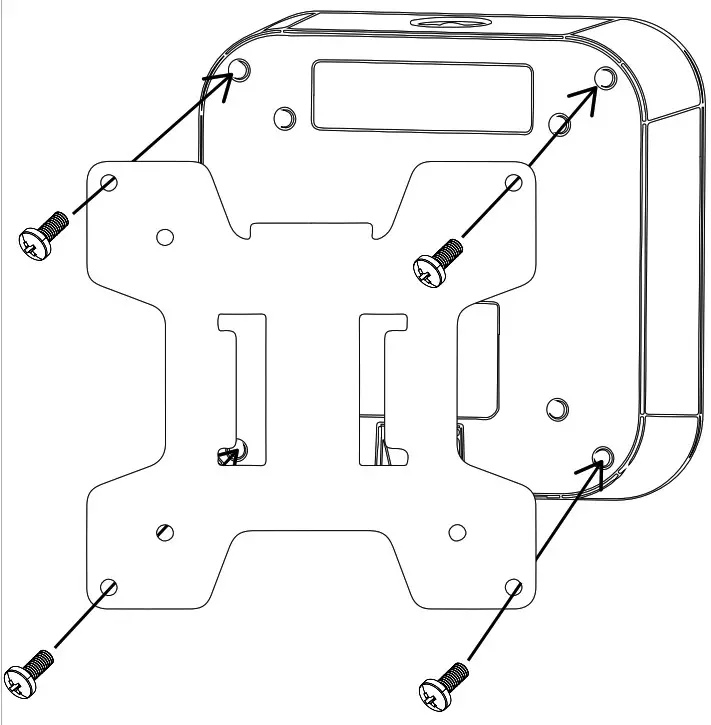
- The IPORT CONNECT VESA Station is desigend to conform to MIS-D standard and will work with most 75 mm x 75mm and 100mm x 100mm VESA mounts.

- The IPORT CONNECT VESA Station Ships with provided 10mm screws how- ever depending on your VESA mount or stant you may need to source seperate lenghts 4M screws.
- Remove the 4ea M4x10mm Screws from the back of the VESA Station.

- Install the Screws through the appropriate holes for your mount and screw into the back of the VESA Mount.
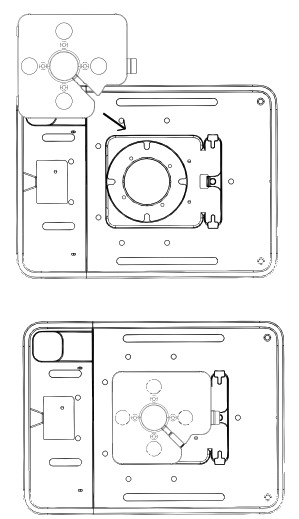
- Remove the ruber plug from the bottom of the VESA Mount and set aside for later.

- Insert the USB-C to Molex Cable thorugh the hole in the bottom of the VESA Station.

- Place the rubber grommit over the USB-C cable making sure to positoin the hooking end of the grommit away from the USB-C connector.

- Insert the rubber grommit with the hook first then pressing the grommit in all the way to secure it in place.


- Insert the CONNECT mounting bracket into the CONNECT CASE making sure the bracket snaps into place securely.
- Place the Case onto the MOUNT in the desired portrait or landscape orientation. Feed the IPORT Molex cable though the center of the mounting bracket.
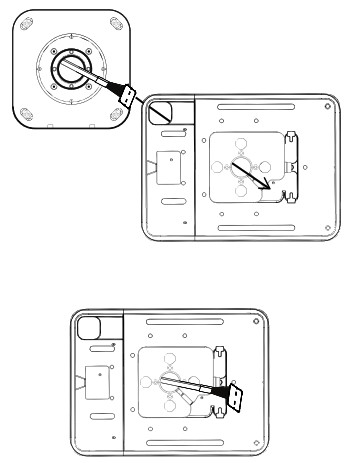
- Use the provided 4 machine screws to attach the Mounting Bracket to the CONNECT Mount Bracket.

- Plug the molex connector from the Mount into the cable on the CONNECT CASE. Note the gold pins are facing outward when connecting into the Mount cable.
Press the Mount cable into the channel to hold and secure the cable out of the way of the iPad.
- Insert the iPad into the attached Case and install the top onto the Case.

- Use the provided IPORT Security tool to lock the Case top onto the Case securing the iPad.
