FODSPORTS F1 Pro Nine Warning Light Effects 2 Way Intercom FM Radio User Guide
Contents
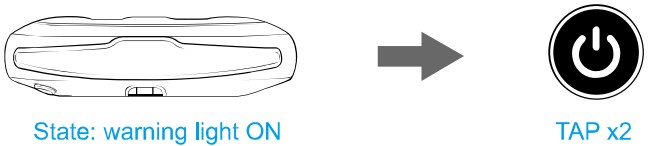
Warning Light
- Tum on warning ight mode

- Switch Nine Warning Light Effects

Nine Warning Light Effects

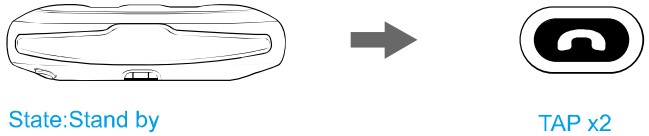
- Turn off warning light mode
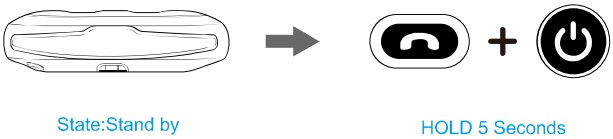
- Power Off


Basic Function
 Power On:

HOLD 3 Seconds
Power Off:
HOLD 3 Seconds
 Volume Up:

TAP x1
Volume Down:
TAP x1
 Enter Pairing Mode:
Used to connect Bluetooth devices

Enter Search Made:
Used to intercom function connection between F1 PRO

 Reset Bluetooth Pairing Record:

Intercom
- Power on (No.1) and (No.2)
- (No.1) and (No2) enter pairing / search mode


- Paired Successfully

- Start Intercom

TAP x2 - End Intercom
TAP x2
Pair Device (Mobile phone)
- Power On

- Enter Pairing Mode
- Pair Mobile Phone
Select WODSPORTS F1 PRO
- Paired Successfully
NOTE:
- First time poser on. default: F1 PRO enters pawing mode.
- Power on after resetting Bluetooth pairing record, default: F1 PRO enters pairing mode.
Mobile Phone
Answer/End Phone Call :
 Reject Phone Call :

Redial Last number Called:
Voice Command(Siri/S-Voice):
Switch Manual/Automatic Answering Calls:

Music
The F1 PRO operates in the following order of priority
- Phone call (highest)
- Intercom
- Music
- FM Radio
FM Radio
Universal Pairing
- Non-fodsports/Other Bluetooth headset
Follow the unit instruction to enter pairing mode - Enter Search Mode:
Charging
Battery detection

| Situation | Voice prompts | |
| 1 |  |
 Power over 90% Power over 90% |
| 2 |  |
Power over 50% |
| 3 |  |
Power lower than 50% |
| 4 |  |
power lower than 20%, please charge |
 Switch prompt tone
Website

User Manual Download

https://community.fodsports.com/support/f1-pro-user-manual/

Fodsports Official Facebook Page

facebook.com/Fodsports

Fodsports Official Website


Fodsports
Official YouTube Channel
NOTE: In addition, you can also contact from the following email address. contact information : [email protected]
FCC Caution
This device complies with part 15 of the FCC Rules. Operation is subject to the following two conditions: (1) This device may not cause harmful interference, and (2) this device must accept any interference received, including interference that may cause undesired operation.
Any Changes or modifications not expressly approved by the party responsible for compliance could void the user’s authority to operate the equipment.
Note: This equipment has been tested and found to comply with the limits for a Class B digital device, pursuant to part 15 of the FCC Rules. These limits are designed to provide reasonable protection against harmful interference in a residential installation. This equipment generates uses and can radiate radio frequency energy and, if not installed and used in accordance with the instructions, may cause harmful interference to radio communications. However, there is no guarantee that interference will not occur in a particular installation. If this equipment does cause harmful interference to radio or television reception, which can be determined by turning the equipment off and on, the user is encouraged to try to correct the interference by one or more of the following measures:
- Reorient or relocate the receiving antenna.
- Increase the separation between the equipment and receiver.
- Connect the equipment into an outlet on a circuit different from that to which the receiver is connected.
- Consult the dealer or an experienced radio/TV technician for help.
The device has been evaluated to meet general RF exposure requirement. The device can be used in portable exposure condition without restriction.
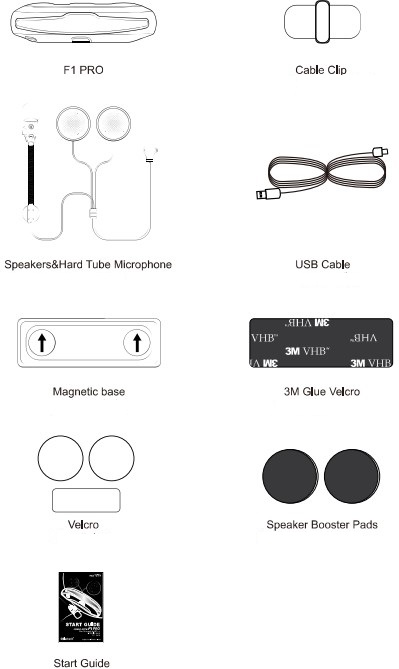
Package Include
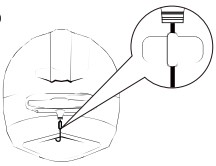
Clamp Installation
- Wipe clean the position for pasting the base
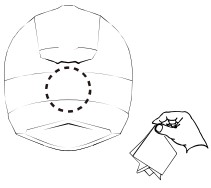
- Tear the 3M Tape protective layer.
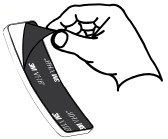
- Press the 3M Tape Bracket for more than 15 seconds to make it fit better.
- Install the F1 PRO to helmet.
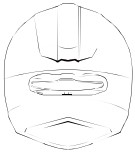
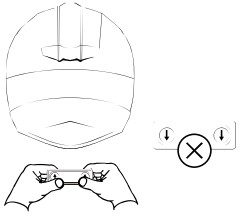
Installation
- Open the inner lining on the ear position of the helmet attach the VELCRO loop.
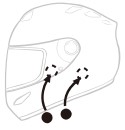
- Attach the headphone velcro hook to the loop (the short-line speaker is on the left.)
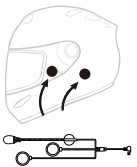
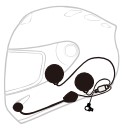
- Stick the microphone and Velcro on the left side of the helmet at a suitable position, aim the microphone at the mouth position, and arrange the wires to the inner lining.
- Install the Cable Clip in a suitable Position.
- Install the Earphone Cable: Open the Clip and insert the Earphone Cable on the Clip.
- Insert the Earphone plug connection line, installation complete.

Technical Specifications
- Bluetooth 5.2 Support: HSP,HFP,A2DP,AVRCP
- Battery Total Capacity: lithium battery, 1500mAh /3.7v
- Dimensions: 118mm *33mm * 33mm
- Bluetooth Intercom users: Two riders
- Working time:25 hours
- Standby time:350 hours
- Charging time: 3-4 hours
- Weight: 70g 130g (Include Headphone & Mic Kits)
- Frequency Range:2402-2480MHz
- Operating temperature: -20 C – 50 C
- Certification: CE FCC ROHS BOB TELEC
- USB Adapter standard charge voltage: DC 5V±0.2V
- USB Adapter standard charge circuit: DC 1A— 2A