![]() Flush Floor Vent [Lite]
Flush Floor Vent [Lite]
Install Guide
FMLIT2X12BLK Flush Floor Vent Lite
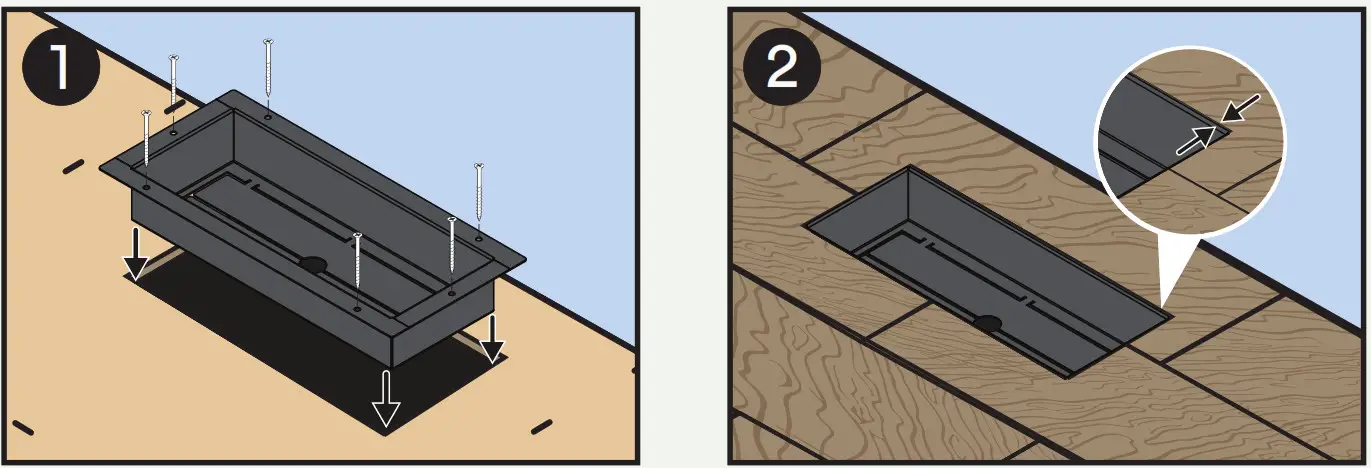
- Drop in base on subfloor and fasten with wood screws.
*DO NOT use provided screws here. - Install surface material on top of Base so that it is completely flush.
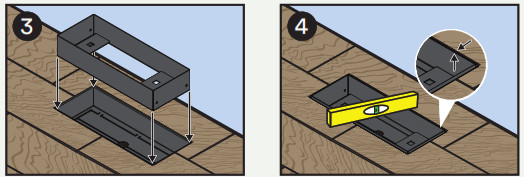
- Dry fit Body into Base.
- With the resistance from the flange, adjust Body up and down until it is flush with the top of surface.
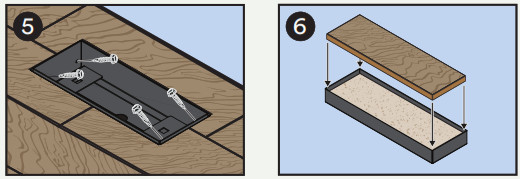
- Once adjusted to preferred height, fasten the Body to the Base using provided screws through the four pilot holes in each corner
- Backfill Tray with bonding material and place precut piece of surface material inside Tray.
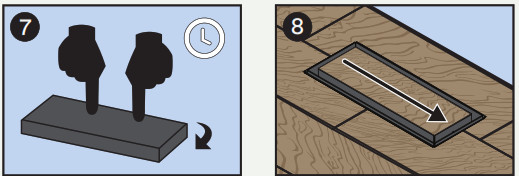
- Hold in place and flip Tray. Apply even pressure until surface material lies flat with the rim of Tray. Leave to cure.
- Insert and slide Tray in place. Enjoy!
![]() *Control Air Flow*
*Control Air Flow*
Slide to remove tray and adjust flange open and closed. For optimal air flow, push flanges past 90º.
Additional Support
[email protected]
www.fittes.com
Made in Canada