![]()
PORTABLE EVAPORATIVE AIR COOLER – MULTI DIRECTIONAL
D.I.Y assemble kit
#PACIMD-PA
ASSEMBLY INSTRUCTIONS

![]()
Contents
WHAT’S INCLUDED
| PART | QTY | IMAGE |
| Air outlet assembly 8 x top panels 8 x support brackets 4 x bottom panels 32 x louvres 1 x fan guard |
1 | 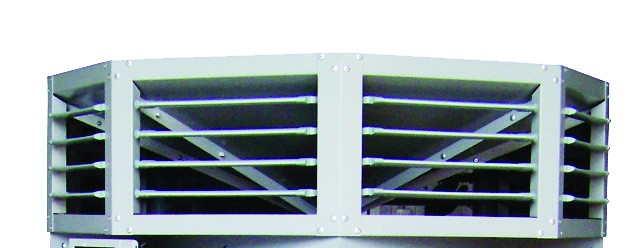 |
| Body | 1 | 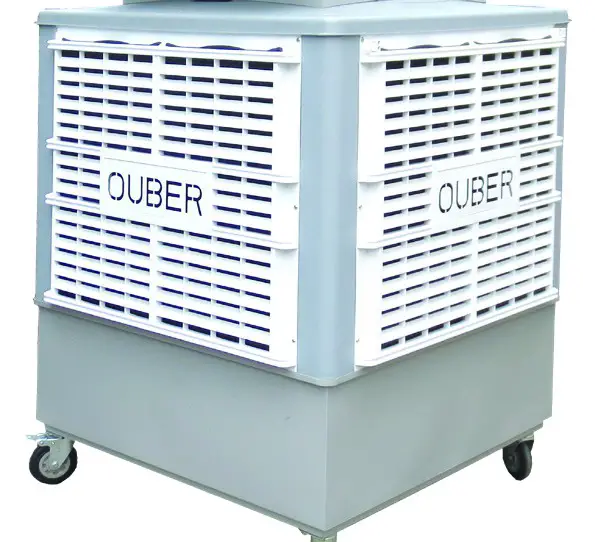 |
| Castors (located inside body) |
4 | 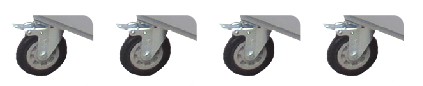 |
| PopRivets/Screws/ Accessories (located inside body) |
 |
|
| Control Panel + Enclosure (located inside body) |
1 |  |
| Remote Control (located inside body) |
1 | |
| Instruction Manual (located inside body) |
1 |
TOOLS REQUIRED
- Powered drill with Philips head bit
- Rivet gun (preferably air powered)
VIDEO INSTRUCTION

WATCH ME
PRODUCT INFORMATION

SCAN ME
ASSEMBLY INSTRUCTIONS
RECOMMEND 2 PERSONS FOR ASSEMBLY
1st Stage – Unpack & Locate Accessories Box:
- Remove body from the carton
- Remove side panel (with yellow label) to access inside of body.

- Locate box with castors, instruction manual, control panel, remote & accessories.
2nd Stage – Attachment of Castors
- Place down the carton or blanket on the floor
- Carefully lay the body on its side
- Attach 4 x castors with bolts & washers supplied
- Lock all 4 brake functions and lift unit into upright position.
3rd Stage – Assembly & Attachment of Air Outlet
- Locate 8 x top panels, 8 x support brackets, 4 x bottom panels, 32 x louvres & 1 x fan guard.

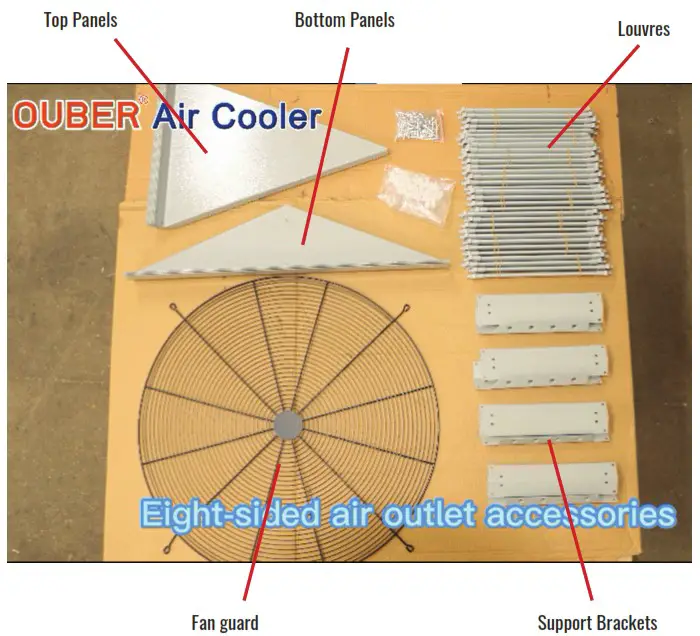
- Attach the top panels (8) using the pop rivets supplied.
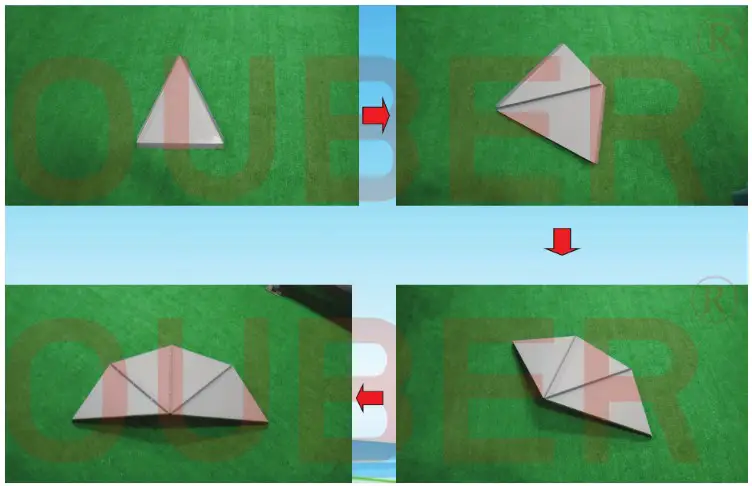
- Attach the support brackets (8) to the top panel using the pop rivets supplied.
- Install the rubber grommets into the support brackets.
- Attach the louvres (32) into the air vent (8 sections).
- Attach the bottom panels (4) to the support brackets with the pop rivets supplied.
- Attach fan guard to air outlet with pop rivets & washers.
- Attach air outlet to body with screws provided.
4th Stage – Cabling & Connection:
- Insert control panel into enclosure bracket (locate controller cable which is the front)
- Attach enclosure bracket to body with screws supplied
- Locate cable – controller cable (black)
- Connect controller cable (black) to control panel
- Replace side panel
- Ready to plug and play.