![]() Creality 3D K1 machine uses cura slicing software
Creality 3D K1 machine uses cura slicing software
User Guide
Contents
Download Slicing Software
Need to download cura5 slicing software and install it yourself:
Download link: GitHub – Ultimaker/Cura: 3D printer / slicing GUI built on top of the Uranium framework
Add printer
- Entrance

- Select K1 similar machine :Ender-3 S1

- Renamed to Creality K1 or other name.

- Just configure it to the K1 machine size, don’t forget to start and end gcode synchronously.

Start G-code(To keep newlines):
M140 S0
M104 S0
START_PRINT EXTRUDER_TEMP=220 BED_TEMP=55
End G-code(To keep newlines):
END_PRINT
Import gcode configuration file.
- In the operation drop-down box on the right sidebar, click Manage Configuration Files:

- Click the import button to upload the configuration file of the K1 machine we prepared in advance (tutorial attachment):
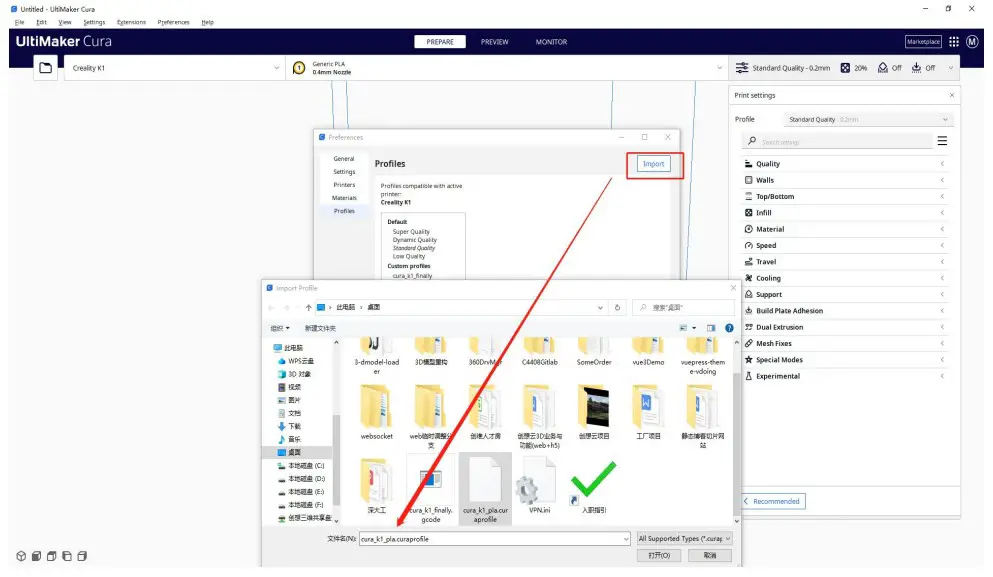 After the import is successful, we find the configuration file, select it, and click the fold button on the right:
- Finally click to activate the configuration file to take effect:

K1 series machine configuration file: cura_k1_pla.curaprofile
Save to desktop after slicing
After all configuration operations are completed, we import the model, select the imported configuration file, and click the slice button:
- After slicing is successful, we save the gcode file to the desktop/disk space.
![]() © 2014-2023 Shenzhen Chuangxiang 3D Technology Co., Ltd.
© 2014-2023 Shenzhen Chuangxiang 3D Technology Co., Ltd.
All rights reserved.
Feedback email: [email protected]