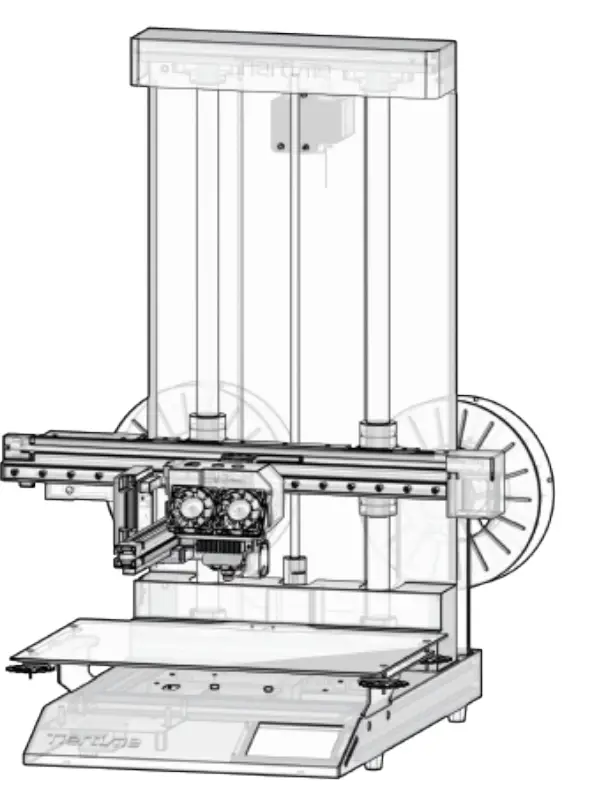
Cetus3D Cetus2 3D Printer Deluxe Version
Contents
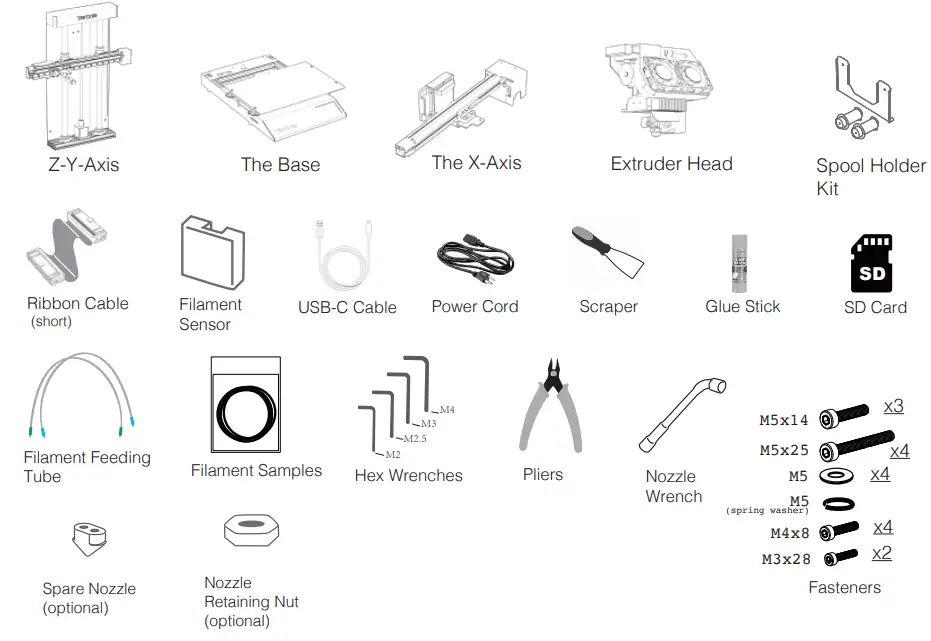
Packing List
Un Packing

Remove 4 screws onthe back of Z-Y Axis.
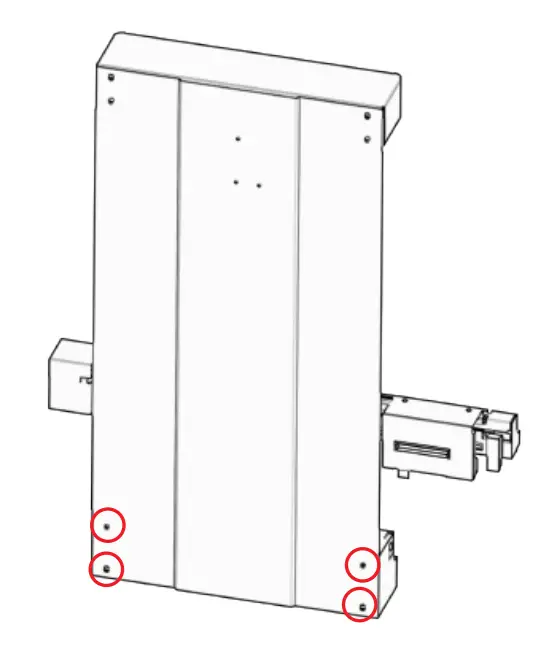
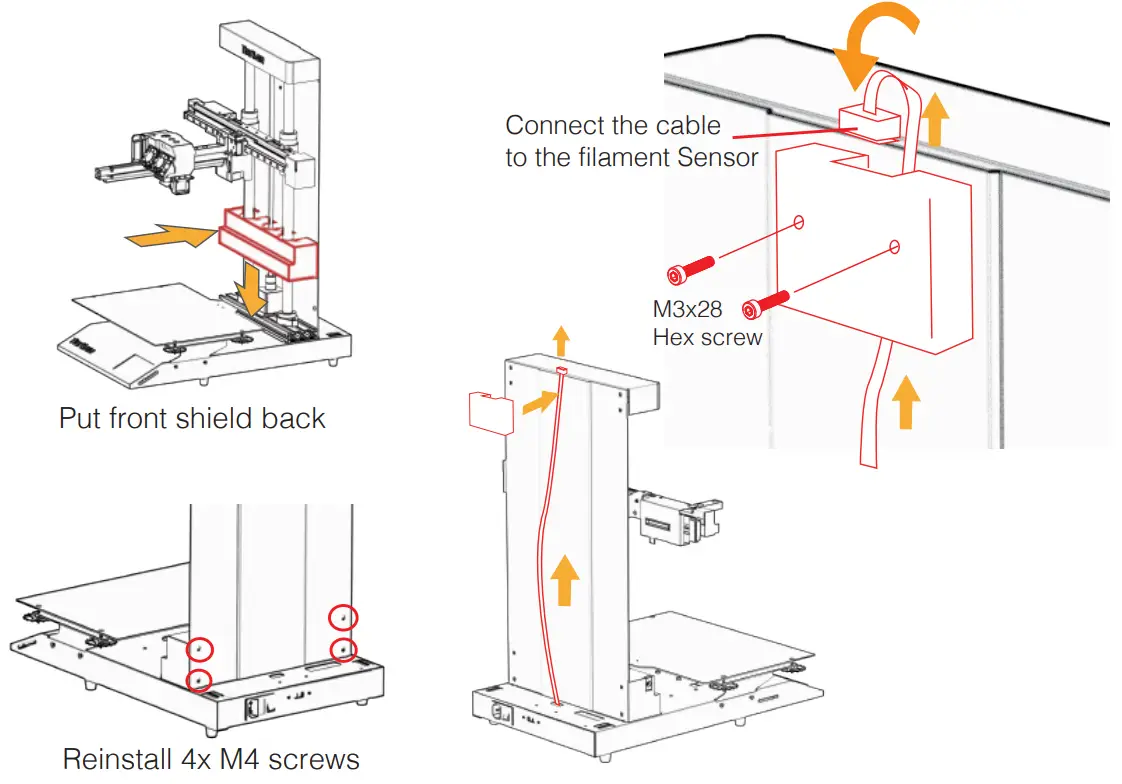
Remove the front shield.
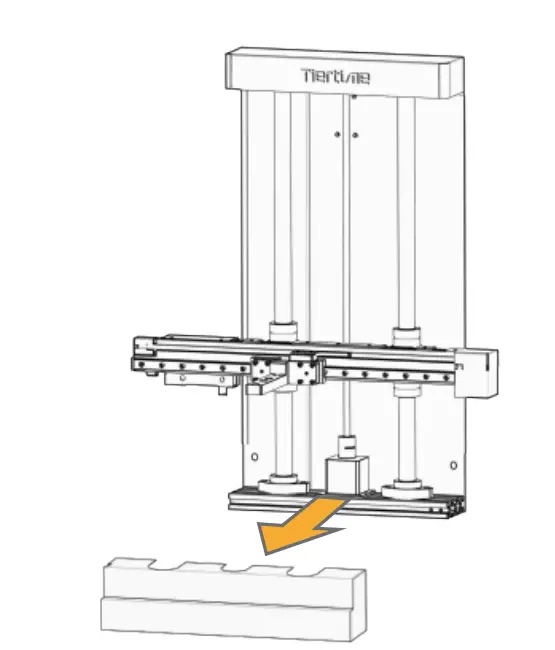
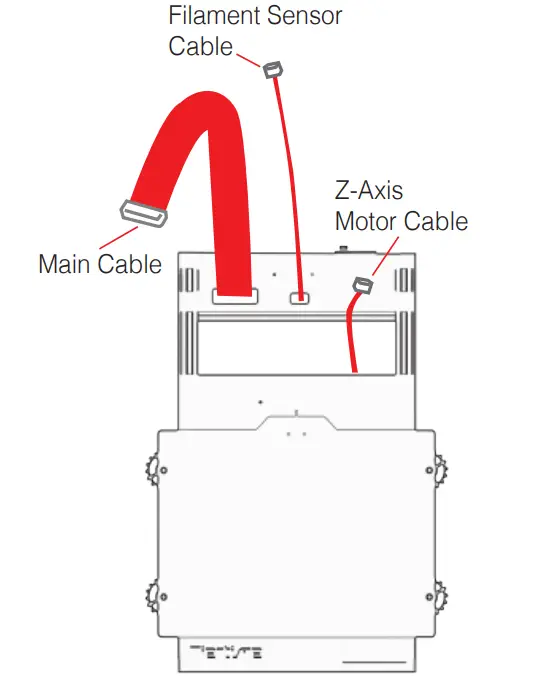
Find the 3 cables from the base module.
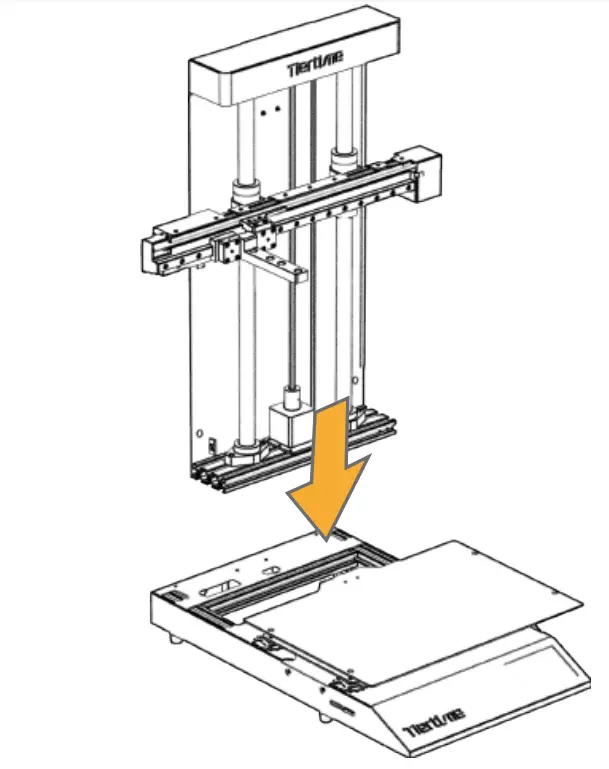
Sit the Z-Y Axis onto the base module.
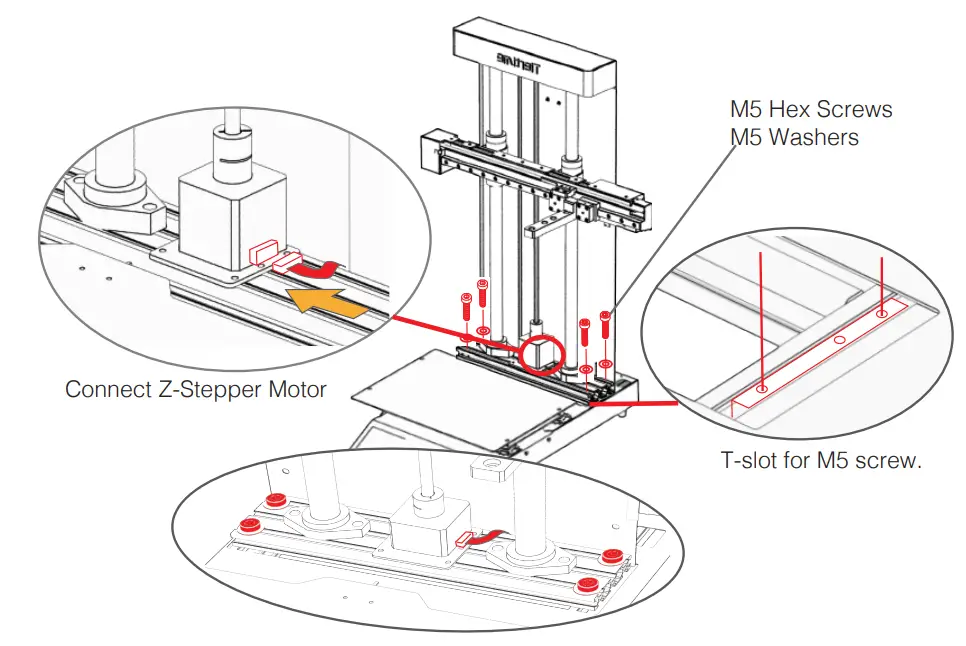
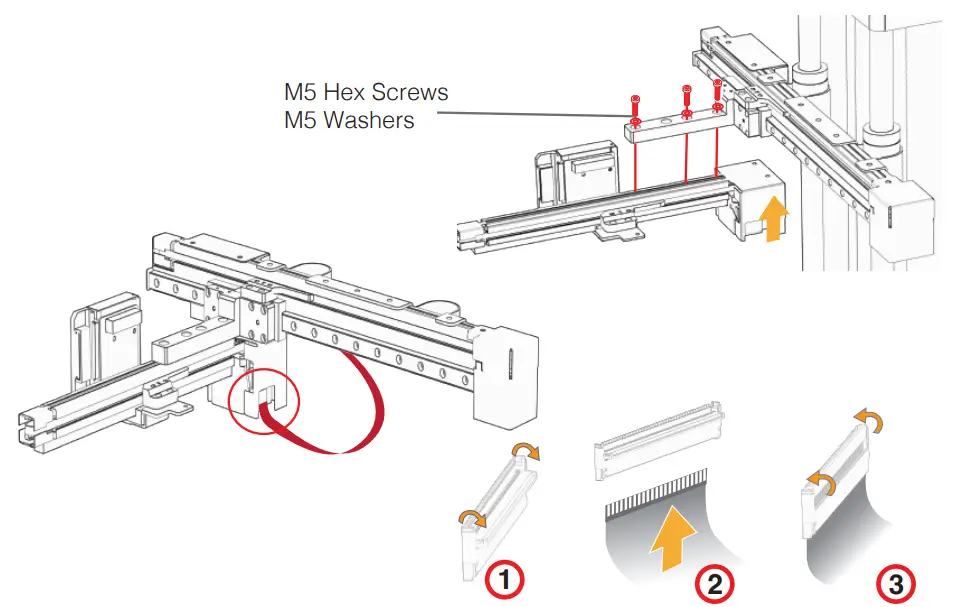
Assembling Y-Z Axis
Install Extruder
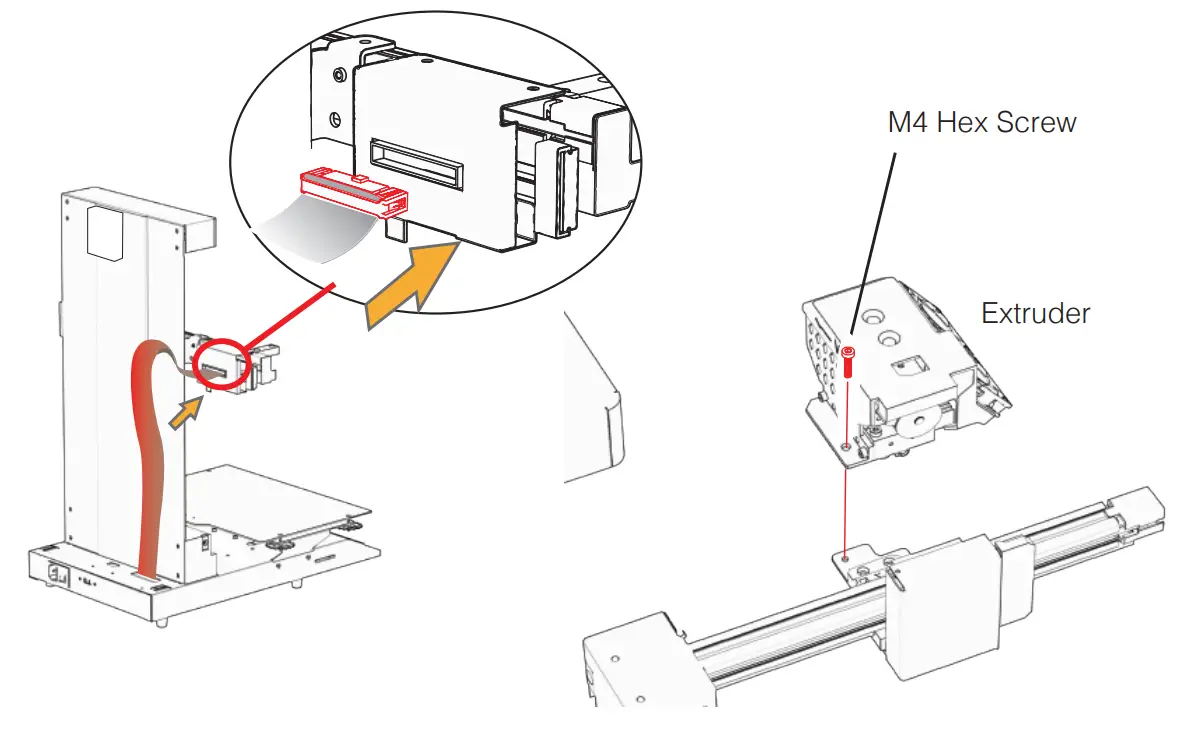
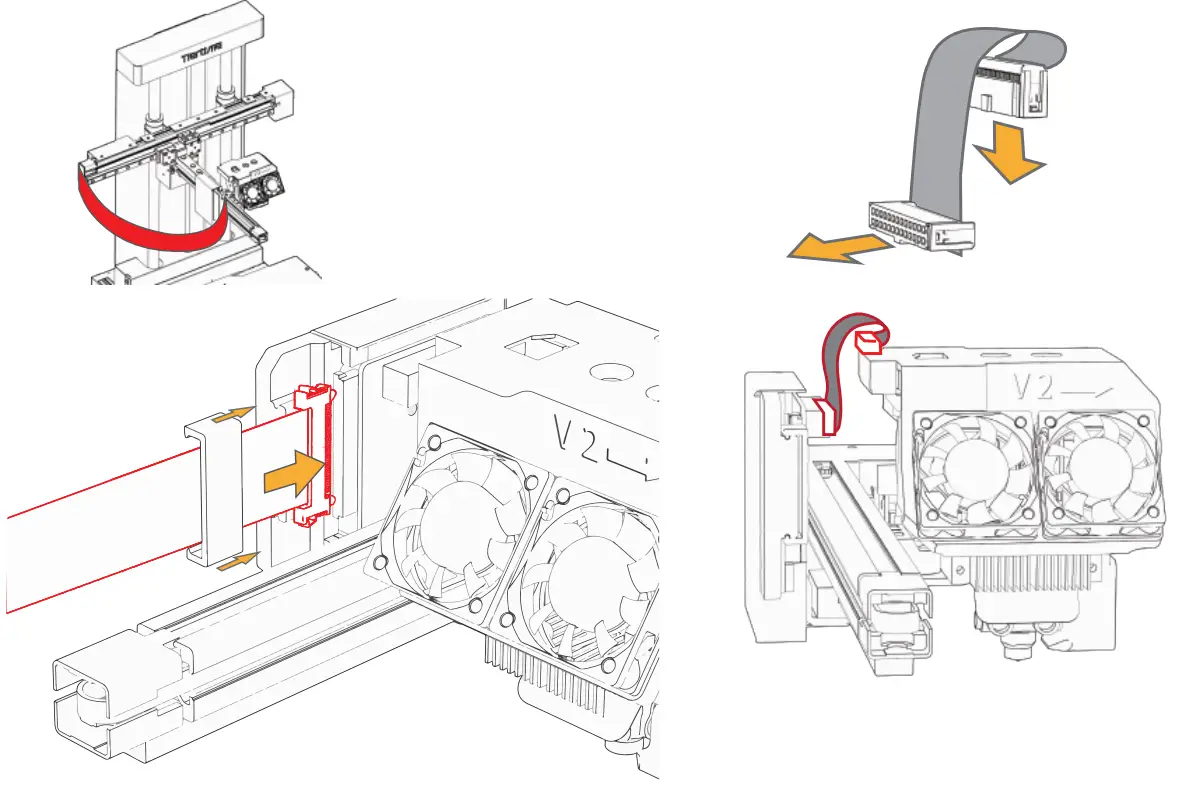
Connect Extruder Cable
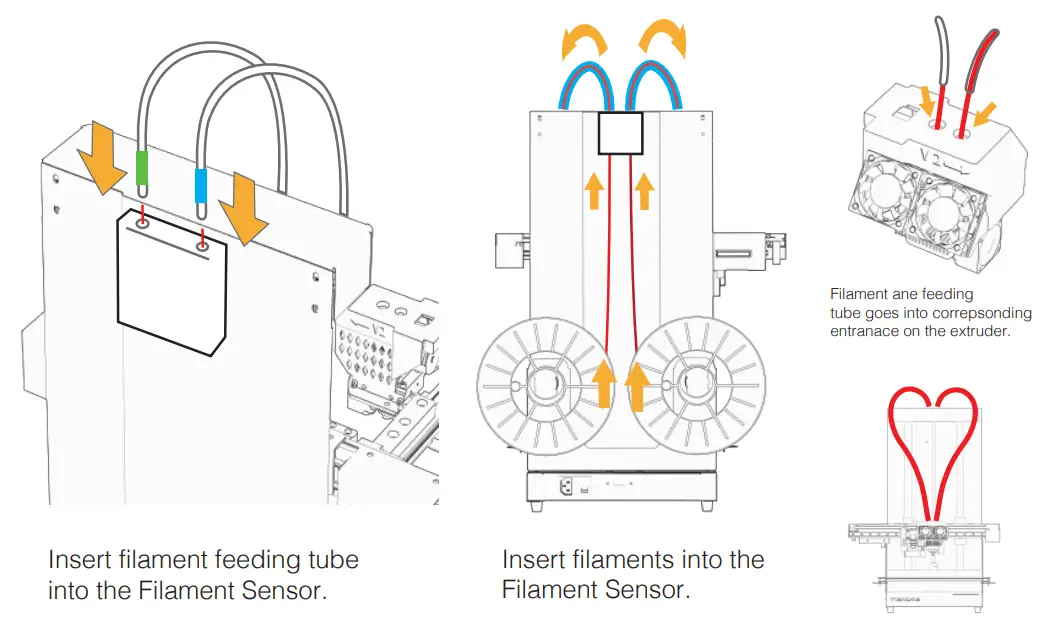
Install Filament Sensor
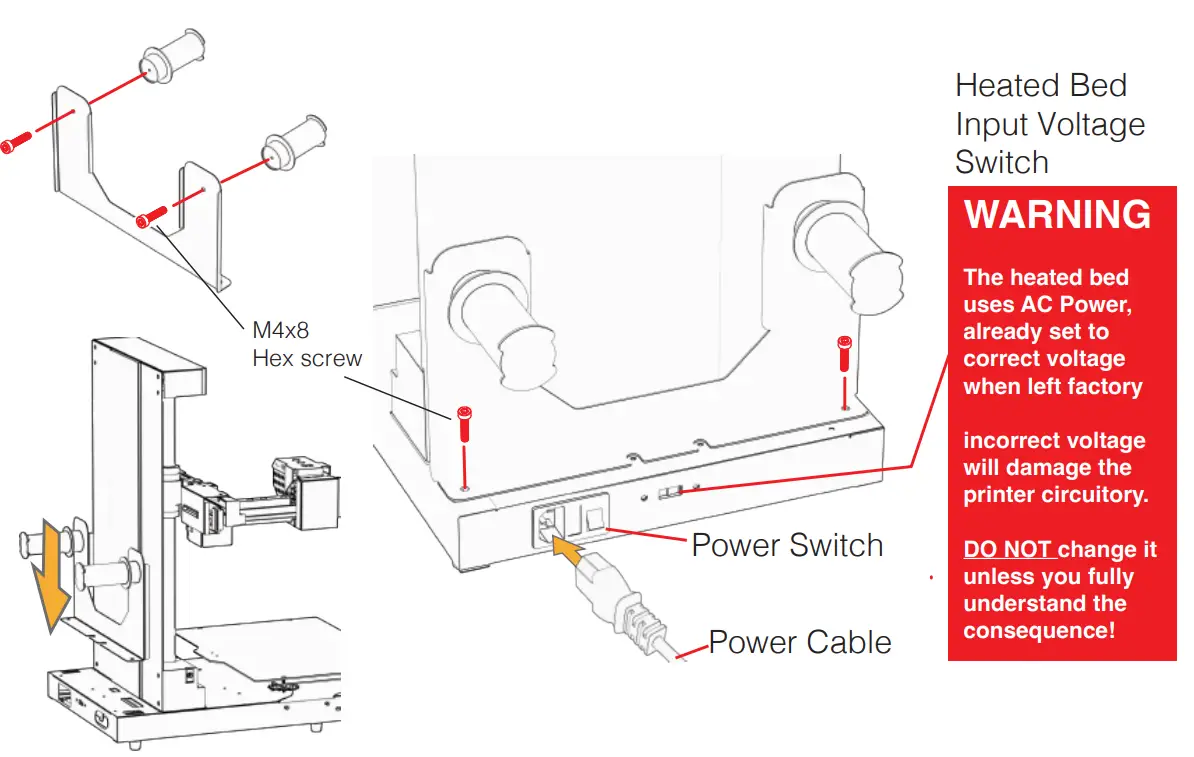
Install Spool Holder
Printer Initialization and Calibration
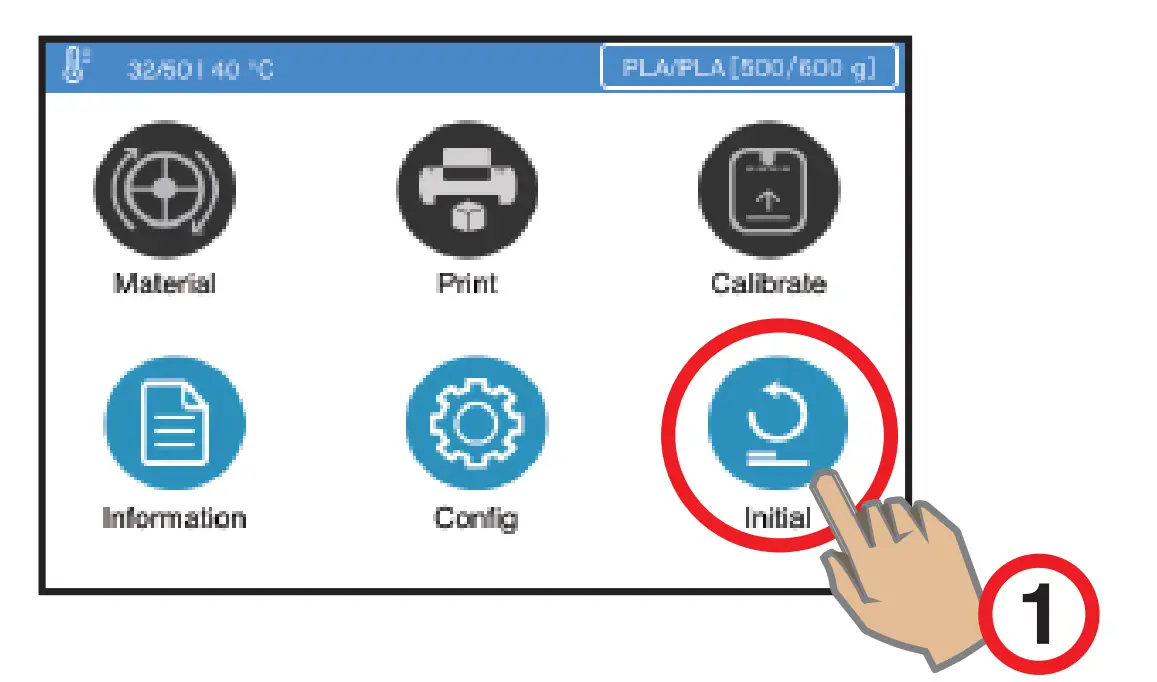
Initialize printer by pressing initialization button.
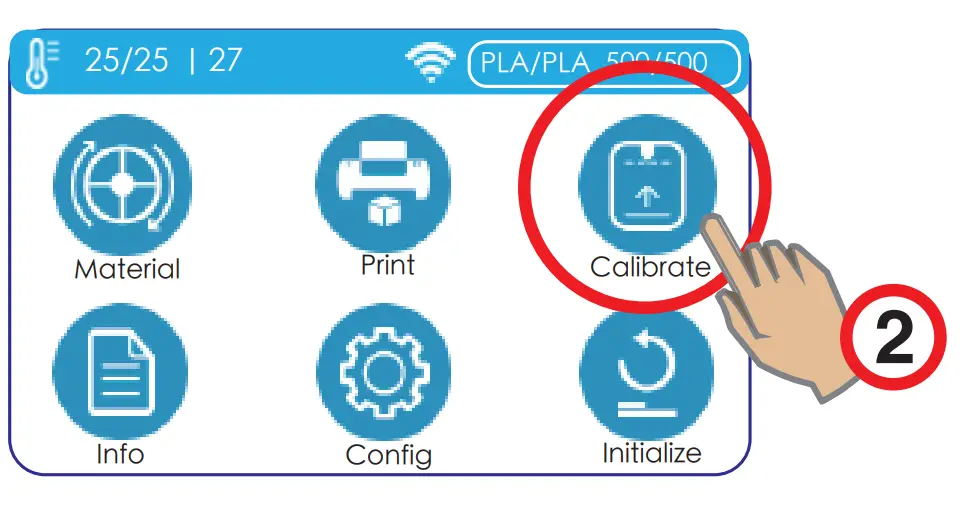
Press calibration button to open calibration interface.
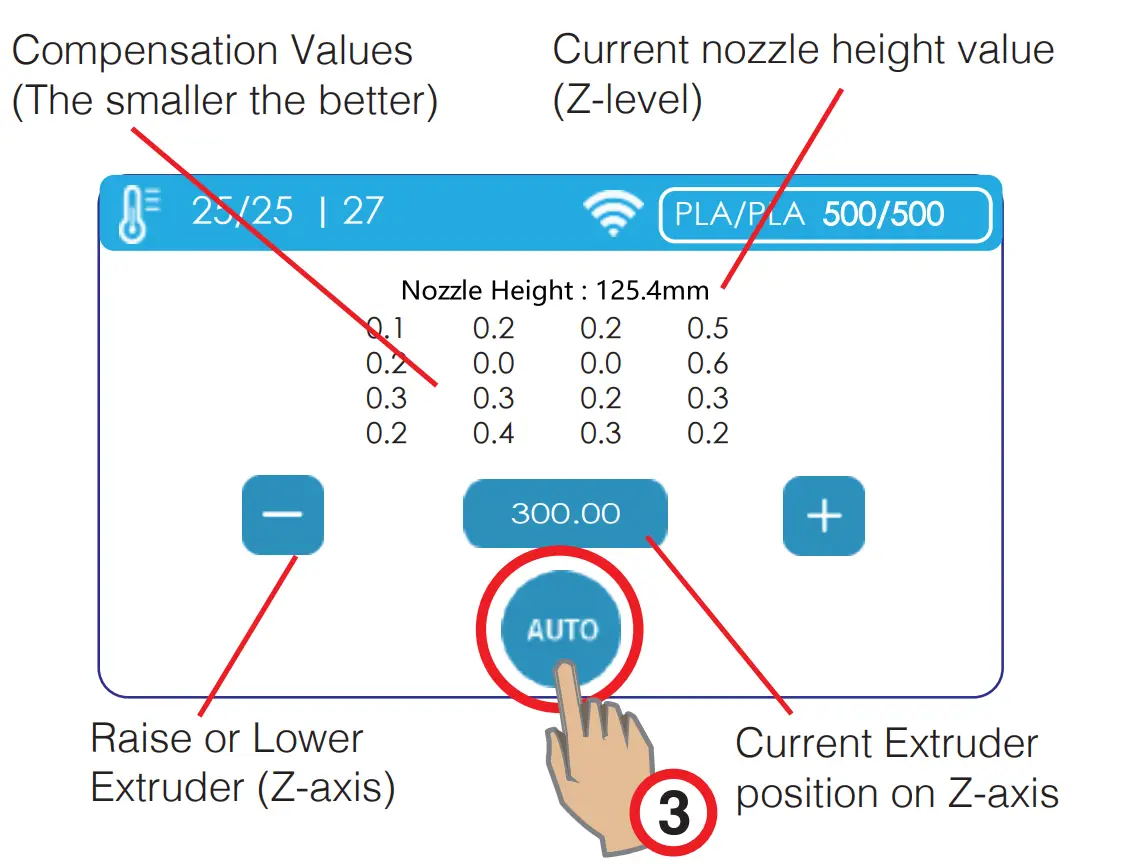
Press “AUTO” button to initiate Auto Calibration process. The printer extruder will then lower to touch the platform surface on16 locations to probe the platform height values. The value will be calculated and compensations will be applied and the nozzle height value will be shown on the interface.
Filament Sensor and Feeding
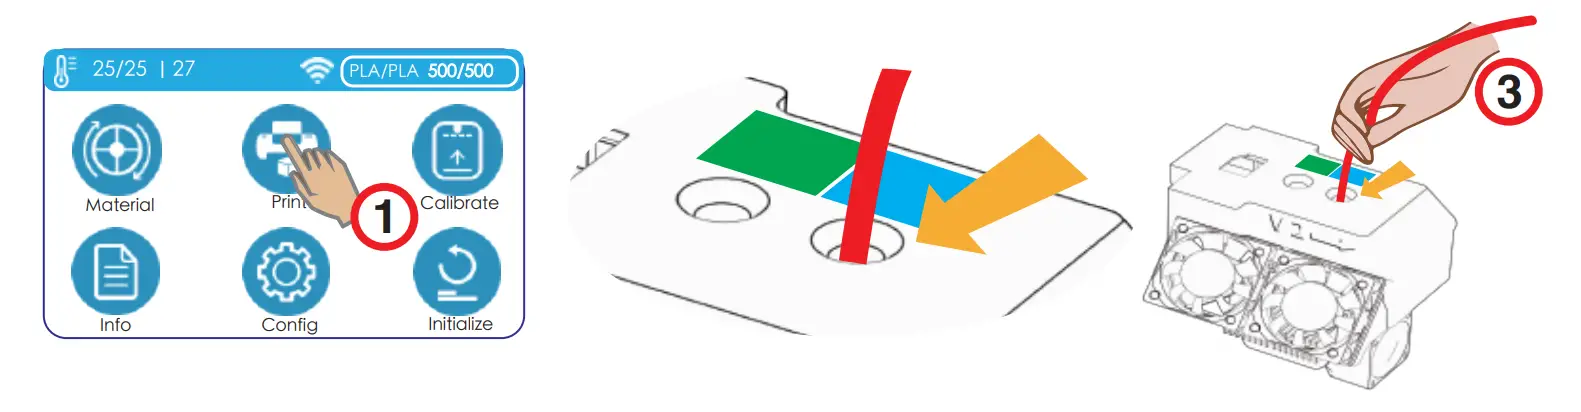
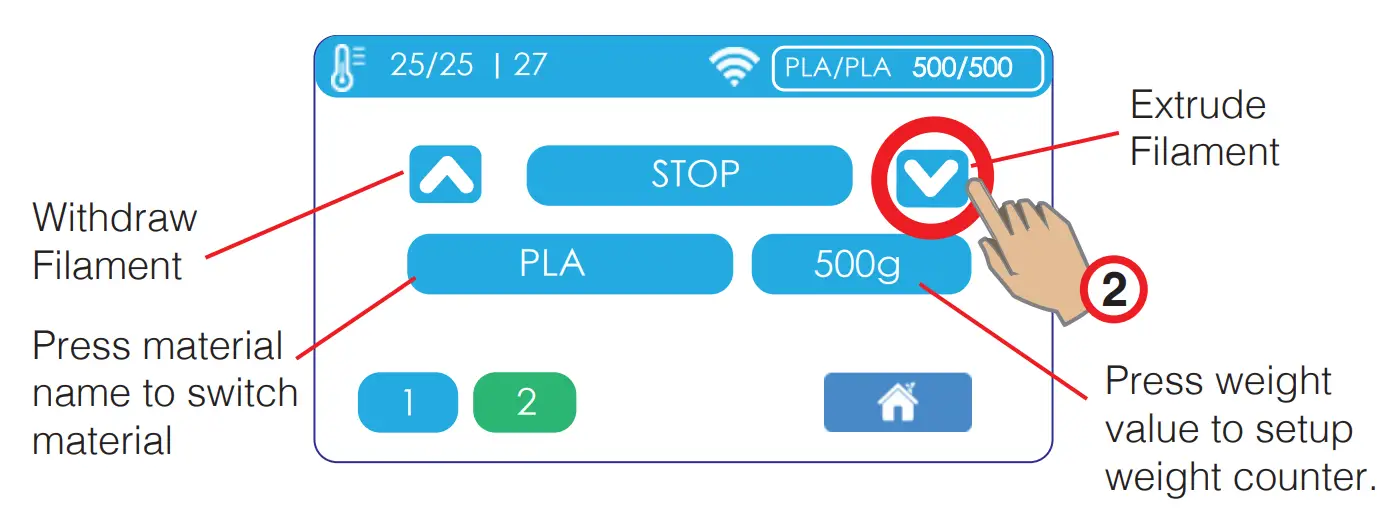
Loading Materials
Press “Material” => Extrude (down arrow) The extruder will heat up and extrude filament when target temperature reached.
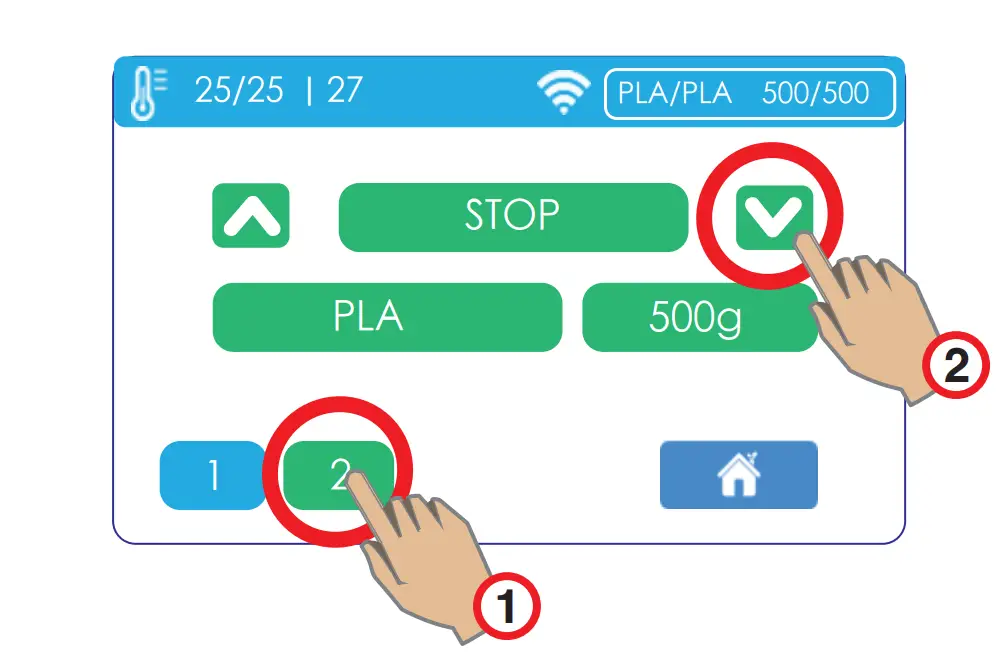
Press “2” button to switch to Extruder 2 and feed the filament.
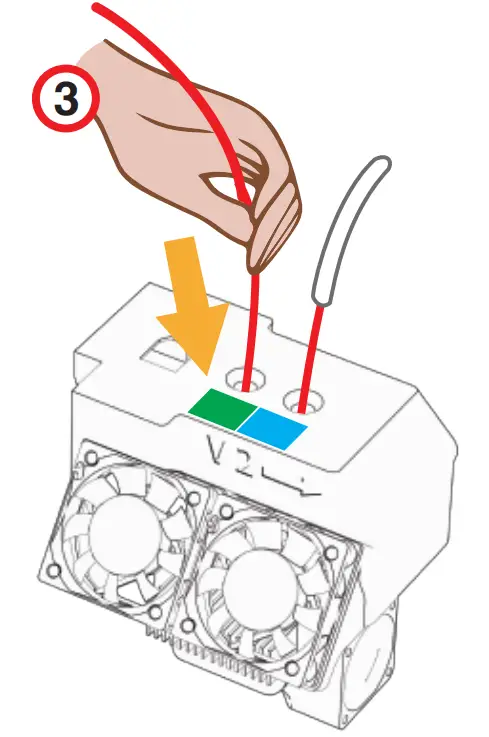
Insert Filament into extruder entrance until filament grabbed by extrusion mechanism
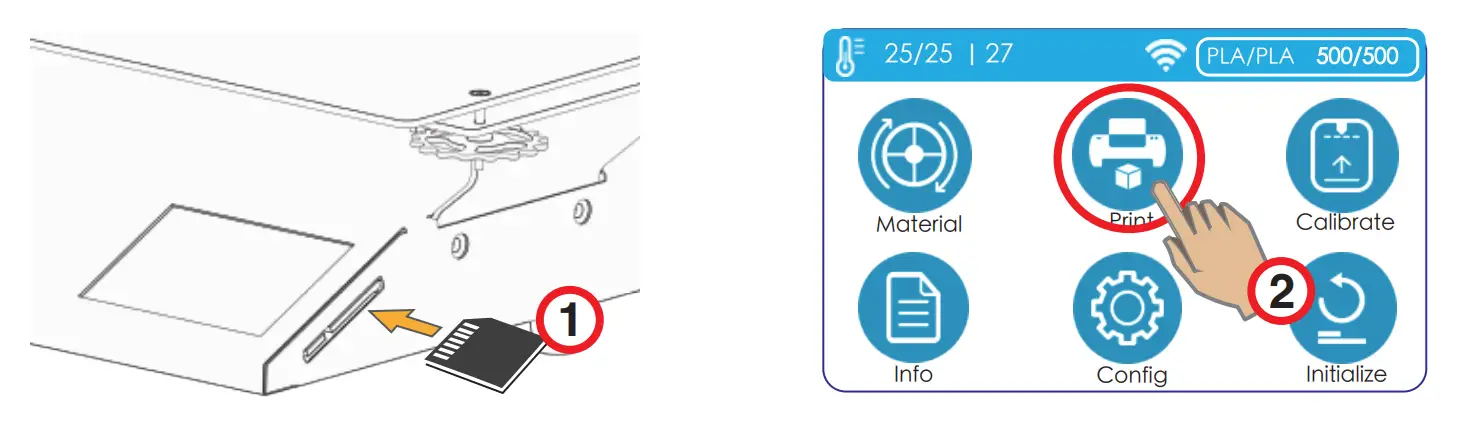
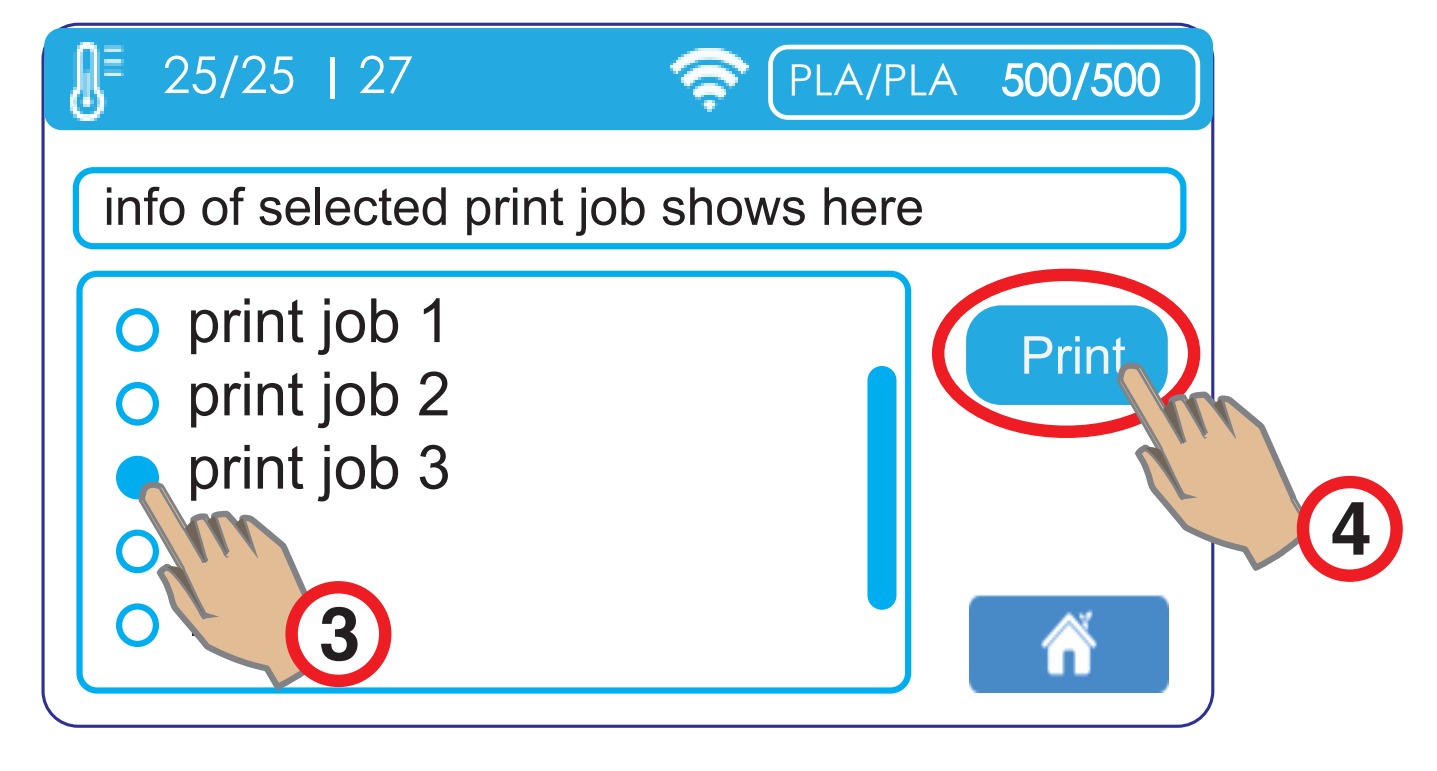
Start a Test Print
Setup WiFi
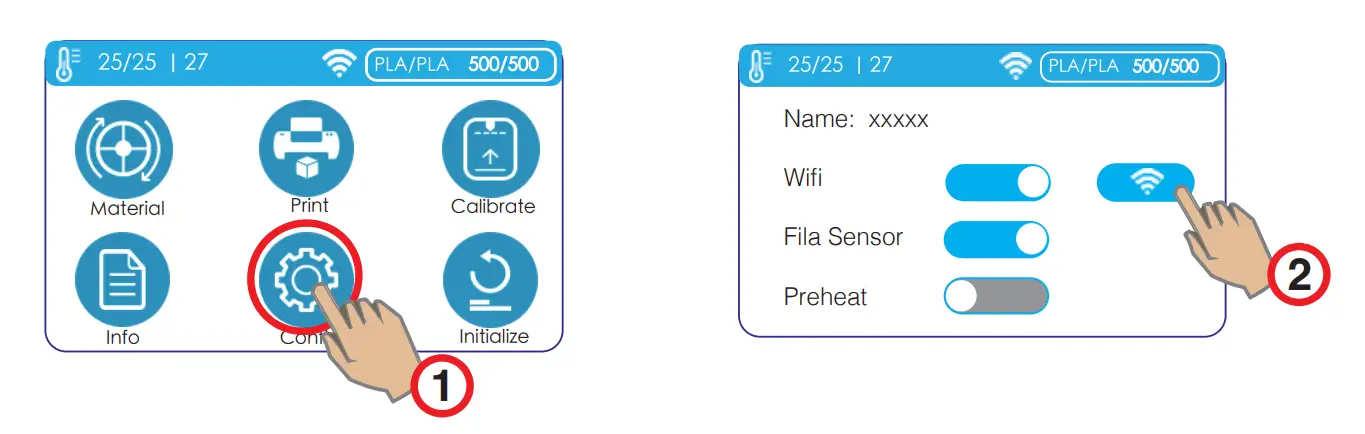
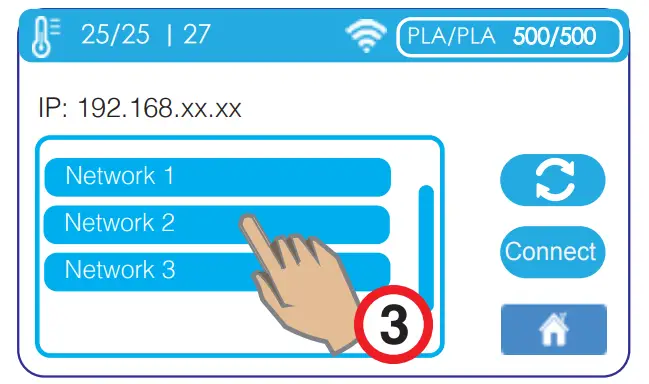
Choose a network to connect. The printer and computer must be on the same network.
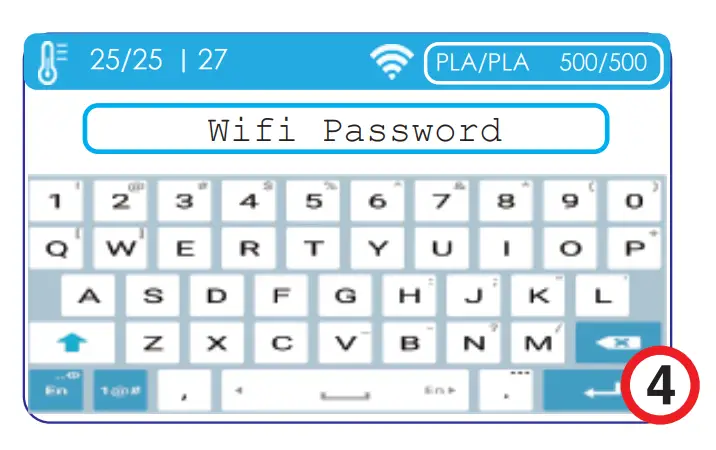
Use a hex wrench as touch-pen. Input WiFi password and press Enter key.
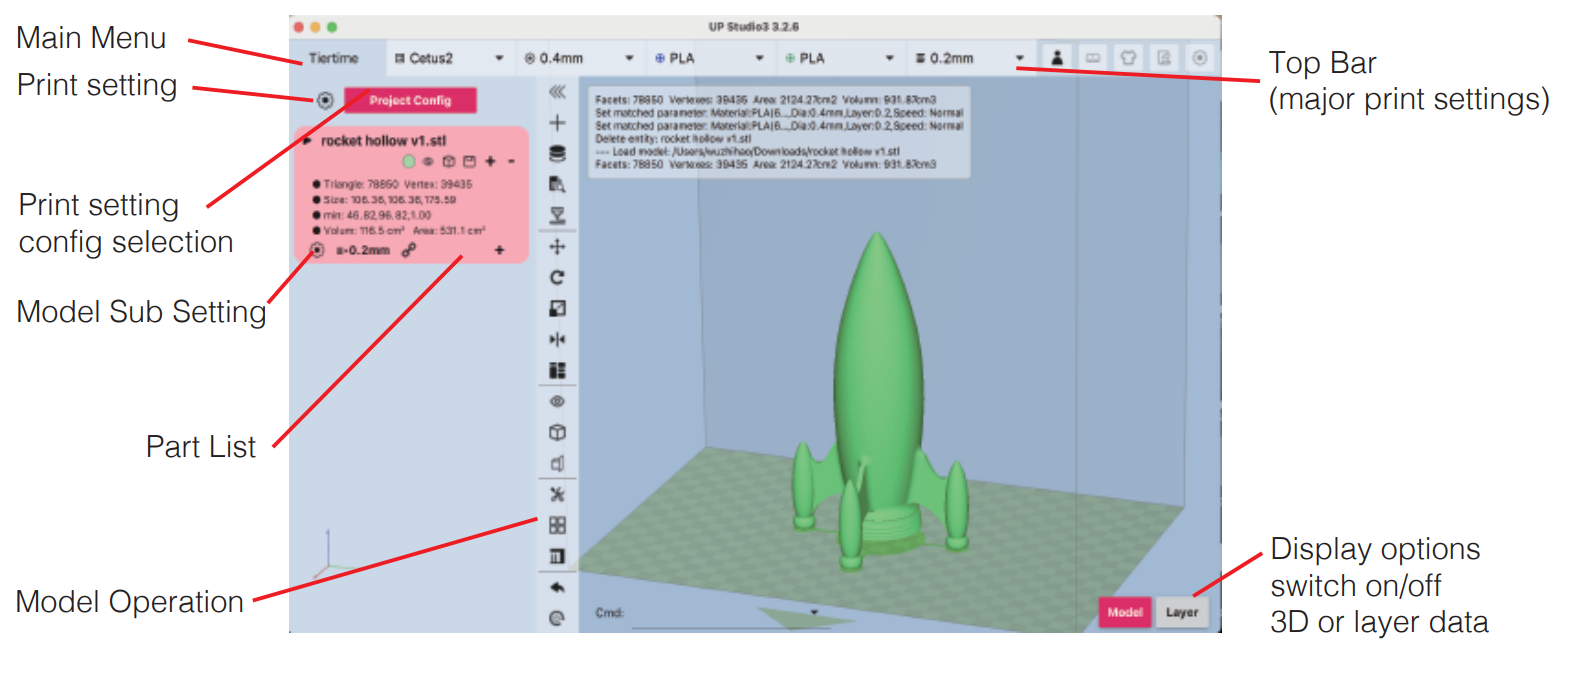
Software
Cetus2 use UP Studio 3.0 as default slicer. UP Studio 3.0 can be downloaded from:
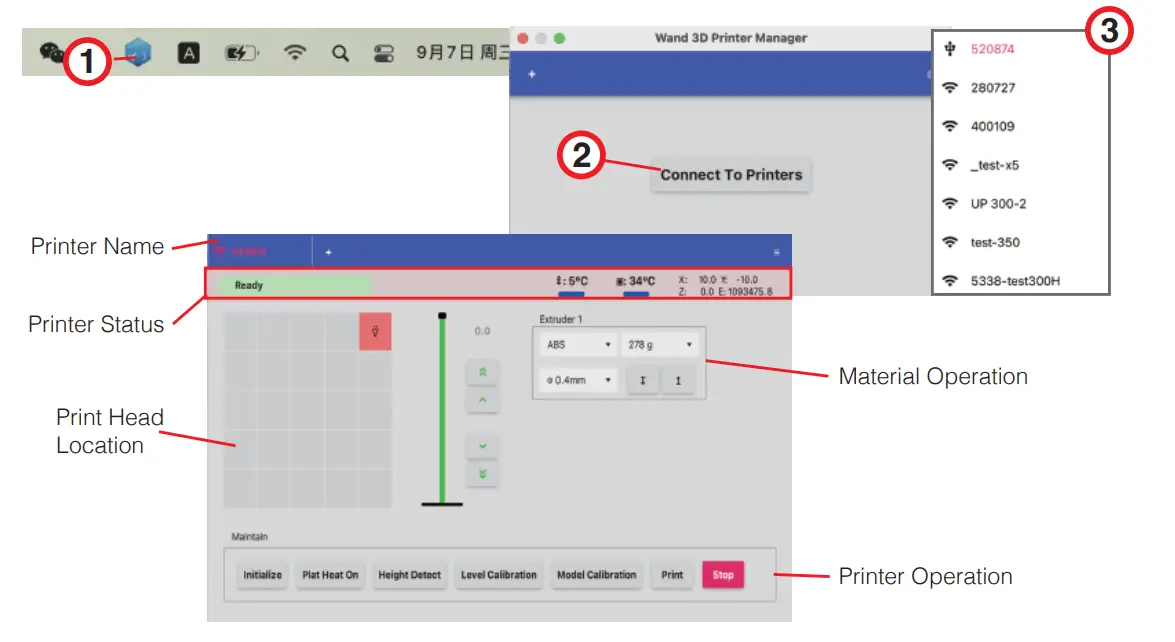
A printer hosting software Wand, is also provided, for connecting from computer to printer and essential printer operation functions. Wand is included in the installation package of Windows version of UP Studio 3. For Mac, Wand is a separate installer (.dmg). Wand can also download from links above.
Connecting to Printer
- Wand is a separate software that will opened automatically when user open UP Studio 3. It will remain in the tool bar unless user close it. Connnecting from“Wand” printer manager:
- Alernatively user can connect from UP Studio 3 directly. When click the arrow button on the right side of the printer name, UP Studio will communicate with Wand and get the list of available printers from Wand.
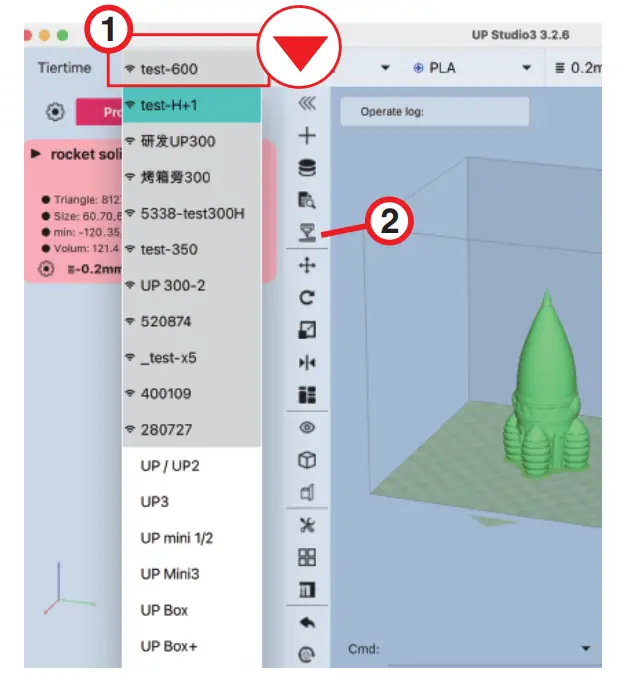
The list may take a few seconds to load/refresh, the immediate list shown may not be the full list of printers.
When connected, user can use the “Print” button to send print job directly from UP Studio 3 to printer.
Basic and Advanced Mode
UP Studio 3 by default is in “Basic Mode”. In Base Mode, the options for print settings is limited and the software will provide “wizards”, to guide the user step by step, how to setup a print job.
Advanced users could switch to “Advanced Mode” where all wizards are disabled and all print setting option are opened to users.
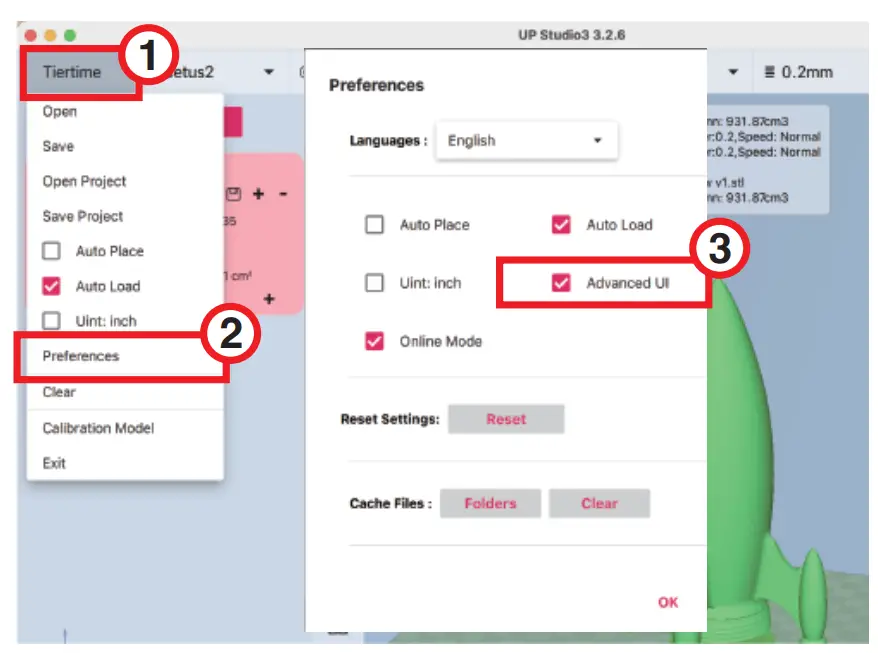
To switch to Advanced Mode, go to: Main Menu (Tier time button on top left) => Preference => Advanced UI
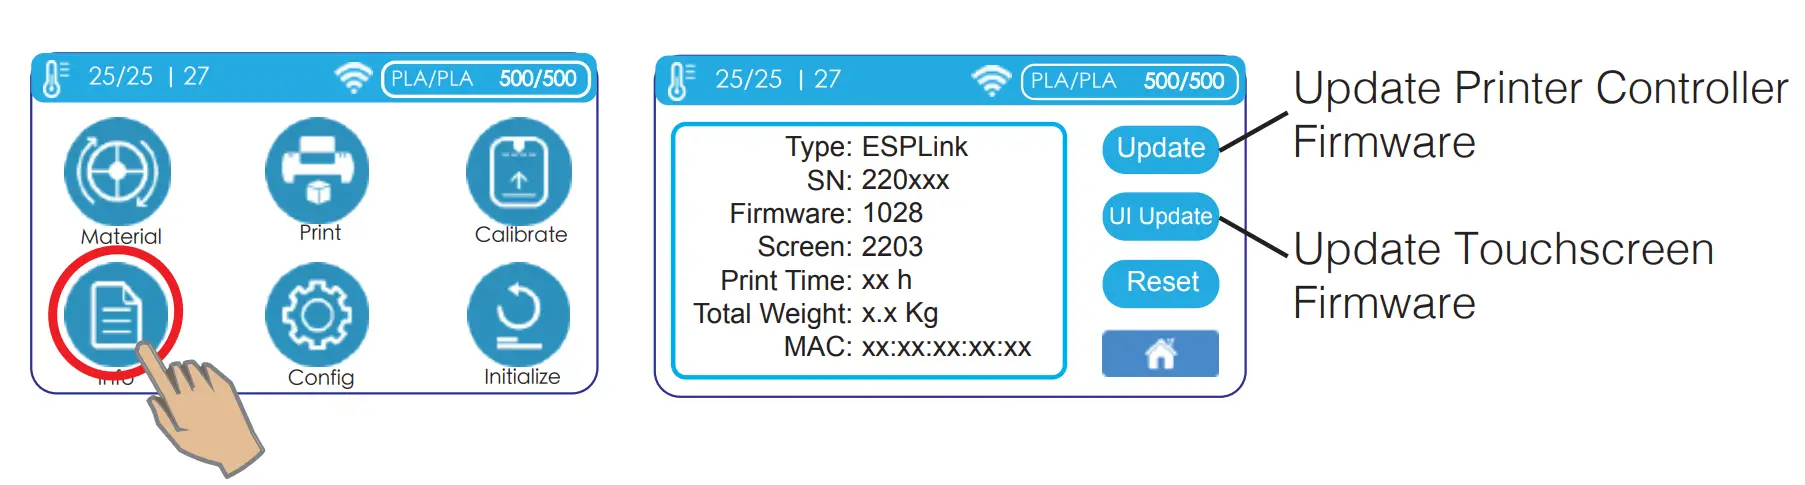
Firmware Update
Firmware update can be done by saving update files to SD card and then update from SD card on the touch screen. Update file can be download from following URL:
https://www.cetus3d.com/cetus2_update/ There are 2 types of update files, one for updating printer controller firmware, and the other is touchscreen firmware. Extract the update files and save to the root directory of a SD card. Insert the SD card into machine’s SD card slot. Then go to info => update.
After finishing the update, power cycle the printer to load the new firmware.
Specification
| Material Diameter | 1.75mm |
| Nozzle Diameter | 0.4mm, 0.6mm |
| Max. Nozzle Temp. | 280°C |
| Max. Print Speed | 200mm/sec |
| Motion Control | 5-Axis Synchronized X-Y-Z-E1-E2 |
| Stepper Driver | TMC 2209 |
| Printing Volume | 200x300x300mm (XYZ) |
| Printing Accuracy | ±0.1mm/100mm |
| Layer Thickness | 0.05-1.0mm |
| Leveling | Automatic by force sensor |
| Nozzle Height/ Z-Level | Automatic by force sensor |
| Build Platform Surface | Caborundum Glass |
| Max Bed Temp. | 100°C |
| Material Flow Monitor | Detects: Presence, Flow Breakage |
| Official Slicer | UP Studio 3 |
| Host | Wand |
| 3rd Party Software Support | Yes, Simplify3D, Cura, Prusa Slicer, etc. |
| Material Compatibility | PLA, PVA, PETG, TPU, etc.
Open material |
| Connectivity | USB-C, WiFi, SD Card |
| Power Input | 110-240 VAC,50-60Hz, 350W |
| Physical Dimension | 470x600x460 (W-H-D) |
| Shipping Dimension | 500x380x600 mm (W-H-D) |
| Shipping Weight | 20KG |
| Product Weight | 15KG |
Customer Support
Contact Us / Get Supports

or send messages to [email protected]