Contents
cell2 B18 LED Beacon
![]()
INSTRUCTION
WIRING
RED: To +VDC
BLACK: To Chassis Ground(-)
FLASH PATTERN SELECTION
Open: Twist the dome lens counter clockwise O , then lift the dome lens to open.
Change: While activating Warning Mode, momentarily push the RED BUTTON f) to change to the next flash pattern. (see Flash Patterns Chart) ![]()
Close: Twist and tighten the dome lens clockwise 8 to close.
| FP# | FLASH PATTERNS | FP# | FLASH PATTERNS |
| Double [2Hz R65] | 7 | Quint [SAE] | |
| 2 | Single [2Hz] | 8 | Mega |
| 3 | Quad [2Hz] | 9 | Ultra [SAE] |
| 4 | Single [SAE] | 10 | Single-Quad |
| 5 | Double [SAE] | 11 | Single H/L |
| 6 | Quad [SAE] |
Note: This unit may not be factory-set at FP#1. Actual approval based on the model ordered.
Dual Purpose Cigar Plug (for applicable models only):
When using models with dual purpose cigar plug, change the plug according to your actual socket by pushing in or out the red plastic frame.![]()
- for standard Cigar Ligher Socket
- for IS04165 Socket
Bolt Mount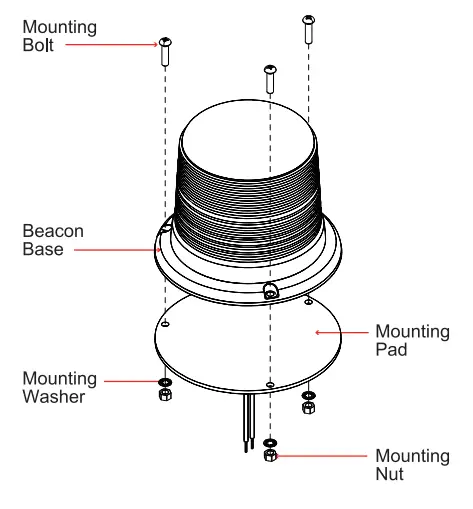
- Drill holes on the mounting surface for the wire-exit and mounting bolts.
- Secure the beacon onto the mounting surface with mounting bolts.
NOTE: All diagrams may not show to scale.
Magnetic Mount
![]()
WARNING: It is not recommended to use magnetically mounted warning devices on outside of vehicle in motion. Usage is at the sole risk and responsibility of the user. (For moving vehicles, please use Power Mags)
DIN Pole Mount![]()