Contents
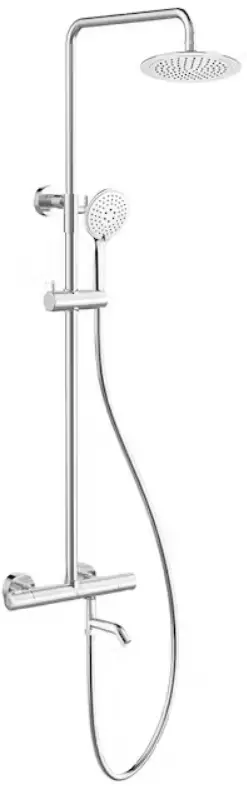
Brusa Bathlife Overhead Shower Set
Product Information
The product is called BRUSA and it is a shower system. It consists of various components that are necessary for installation, maintenance, and usage. The user manual is available in multiple languages including English (EN), Swedish (SV), Norwegian (NO),Danish (DK), and Finnish (FI).
Important Information
- For installation, it is recommended to hire a licensed and/or authorized professional.
Assembly:
- Follow the provided instructions for assembly.
Tools:
- Spirit-level (Vattenpass, Vaterpass, Vaterpas, Vatupassi)
- Drill (Borr, Bor, Bore, Porakone)
Components:
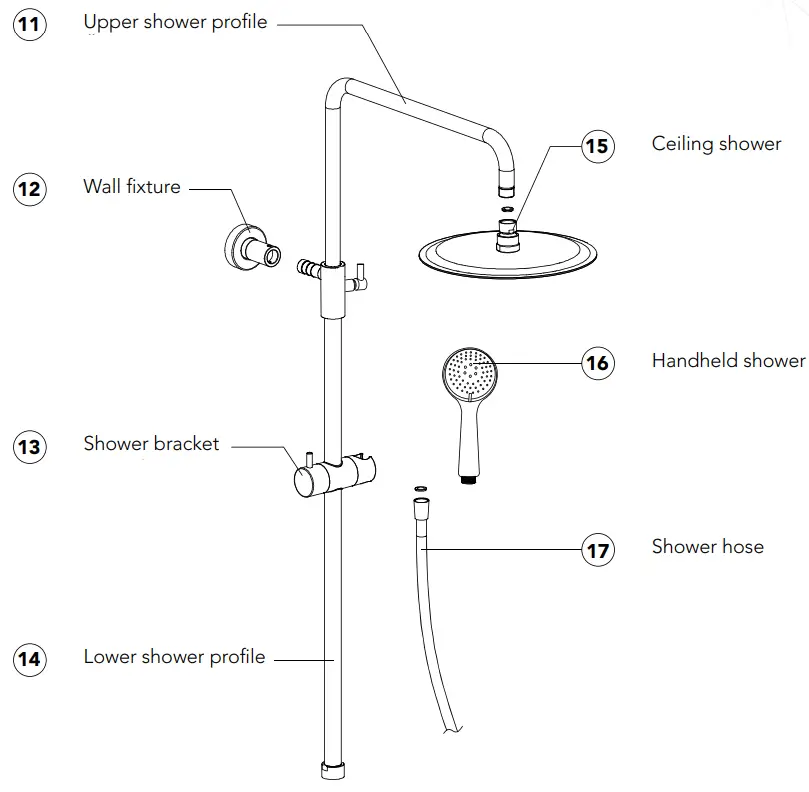
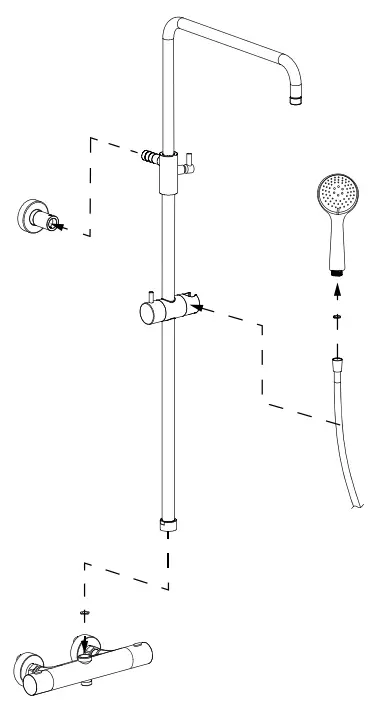
- Mixer (Blandare, Blander, Blander, Sekoitin)
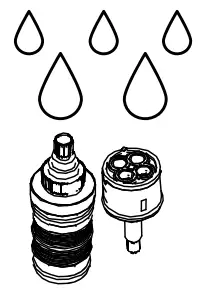
- Water channel cartridge (Vattenkanalspatron, Vannkanalpatron, Vandkanalpatron, Vesikanavan patruuna)
- Thermostatic cartridge (Termostatpatron, Termostatpatron, Termostatisk patron, Termostaattinen patruuna)
- Lower shower profile (Nedre duschstag, Nedre dusjprofil, Nedre bruseprofil, Alempi suihkuprofiili)
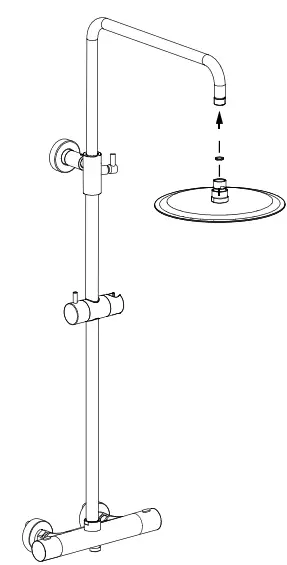
- Ceiling shower (Takdusch, Takdusj, Tagbruser, Katto suihku)
- Shower hose (Duschslang, Dusjslange, Bruserslange, Suihkuletku)
Maintenance:
- Follow the maintenance instructions provided.
Tightening:
- Follow the instructions for tightening.
Usage Instructions
- For installation, hire a licensed and/or authorized professional.
- Assemble the components according to the provided instructions.
- Use a spirit-level to ensure proper alignment during installation.
- Drill holes in concrete or other massive material for mounting purposes.
- Secure the components using screws.
- Refer to page 7 for further details.
- For maintenance, follow the provided instructions.
- If the cartridge needs to be removed, soak it in detergent or white vinegar for 1 hour and rinse thoroughly before reinserting.
Important information
Before installation, check the following component list carefully
Before installation, flush pipes carefully.
For installation, hire a licensed and/or authorised professional.
For installation, connect the hot and cold water supply properly.
After installation, turn on the water to check leakage in each joint.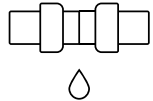
- Recommended operating temperature 4 −90 °C
- Recommended operating pressure 1 − 6 bar
Tools 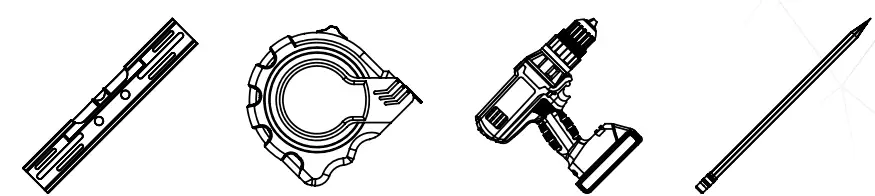
- Spirit-level
- Measure tape
- Drill
- Pen

- Spanner
- Allen key
- Screw driver
- Wall drill bit
Components
Tightening
- Drill
- Seal
- Plug
- Screw
- Concrete or other massive material

- Wood beams, nogging pieces, or other base tested and approved for mounting, such as some boards

Assembly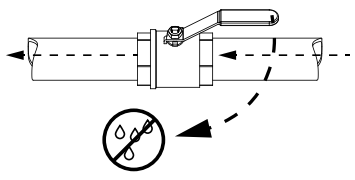

Drawing
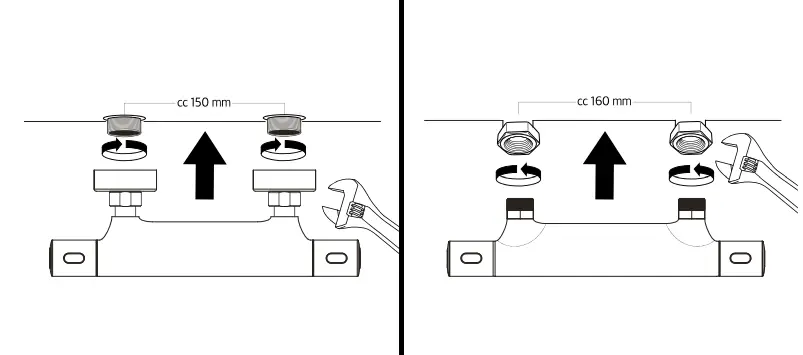
All dimension has error ± 5 mm, the actual installation size should be basic on the actual product.
Maintenance
- If you have questions, please contact us.

- If any part is broken, do not use the product before repairing it.
- When cleaning, do not use bleaching or abrasive chemicals.
- When cleaning in general, use a soft cloth and gloves.

- Turn off all valves to stop any water flow during any maintenance.

Removing or inserting cartridge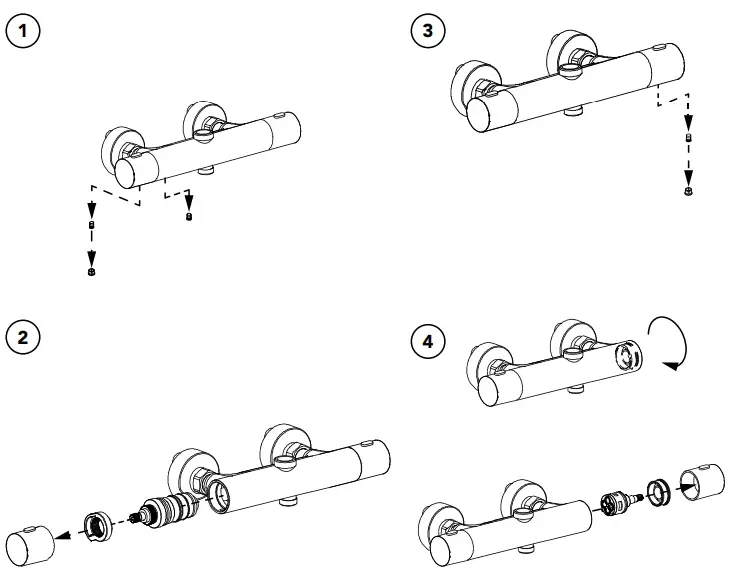
Cleaning of cartridges
Once removed, soak the cartridge in detergent or white vinegar for 1 hour. After, rinse thoroughly with water. Reinsert according to the removal and reinsertion guide.