![]() INSTRUCTION MANUAL
INSTRUCTION MANUAL
FULLY AUTOMATIC WASHING MACHINE
220-240V~ 50Hz
READ THE INSTRUCTIONS CAREFULLY BEFORE USING THE WASHING MACHINE AND SAVE THIS INSTRUCTION MANUAL
Contents
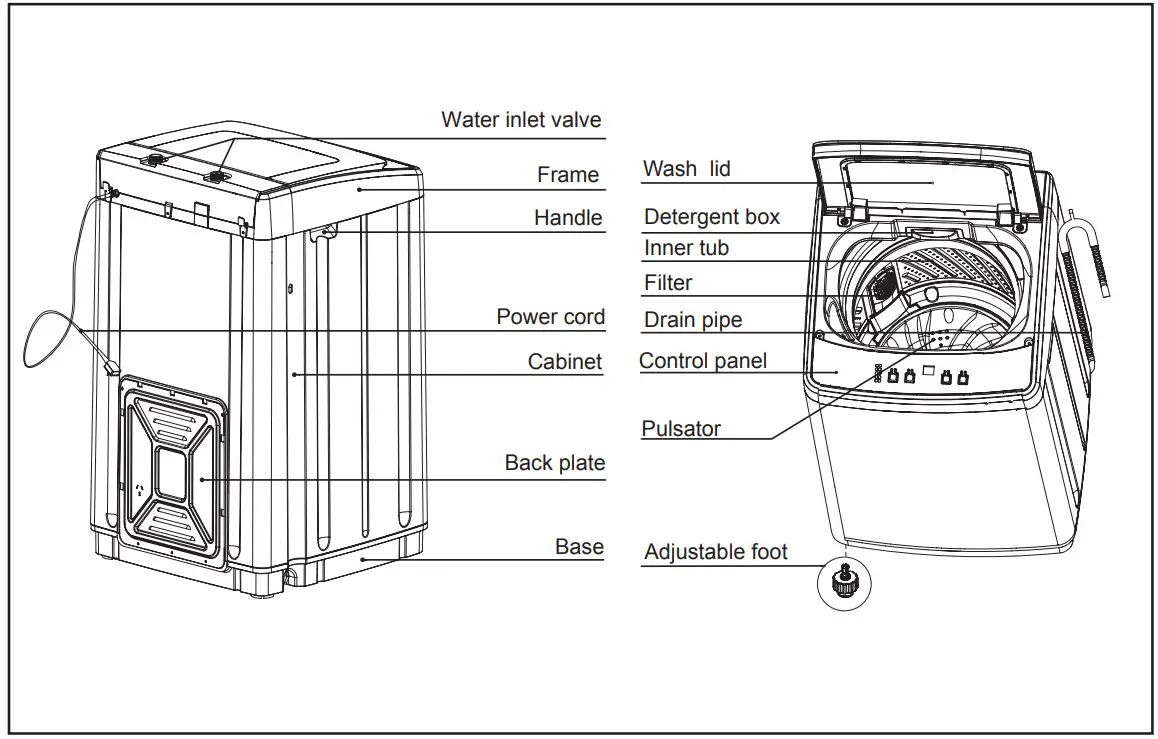
Name of all components
Accessories
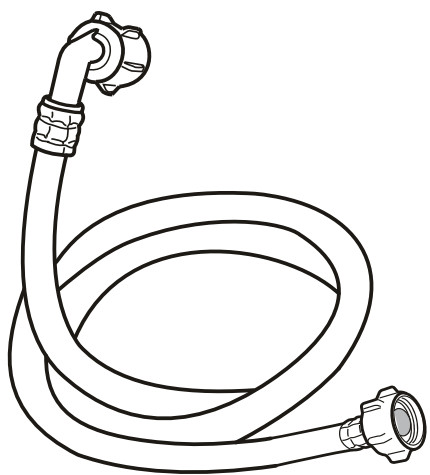 water inlet hose (2pcs)
(The two water inlet hose components are the same and there’s no different on cool/warm water during using)
| Under cover(1pcs) | tapping screws(2pcs) |
 |
 |
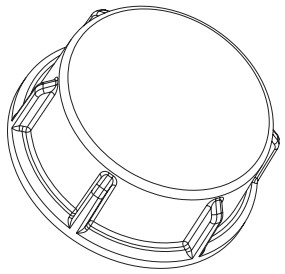
| Inlet valve cap(including sealing plate)(1suit) | |
 |
|
Suggestion
- Low foam detergent powder is recommended.
- Please operate it under 0 ~45 , as extra-high or extra-low ambient temperature may cause malfunction.
- If the washing machine has been stored under 0 , it can be used after being placed under room temperature for about 4 hours to avoid machine damage due to residual ice in the washing machine.
- The washing and spinning capacity refers to the maximum weight of standard laundry during two operating fashions, which is different from that of the actual laundries. The cloth thickness, size and category of the laundries will impact the washing capacity. The volume of washing items should be appropriate for the normal turning of washing items within the washing machine.
- High water level should not be selected for washing volume below1.0kg to avoid water splashing during washing.
- This appliance is not intended for use by persons (including children) with reduced physical, sensory or mental capabilities, or lack of experience and knowledge, unless they have been given supervision or instruction concerning use of the appliance by a person responsible for their safety.
- Children should be supervised to ensure that they do not play with the appliance.
- If the supply cord is damaged, it must be replaced by the manufacturer, its service agent or similarly qualified persons in order to avoid a hazard.
- New hose-sets supplied with the appliance are to be used and that old hose-sets should not be reused.
Control Panel

- Power On/Off button
Use this button to turn the washing machine on and off. If a set program is not started within 5 minutes of turning the machine on, it will switch off automatically. - Start/Pause button
Press this button to begin a wash program, or to pause / resume a program that is currently in progress - Program selection
Press this button repeatedly to set the desired wash program. You can choose from the following options.
Intelligent: to wash according to the weight of clothes adjusting the water level.
Heavy: to wash the coverlet, jeans and other big clothes
Gentle: for washing of wool or underwear
Speedy: to wash the slight dirty clothes
Soak: soak for some time before washing
Spin: to spin the clothes
Energy Saving: to wash clothes by saving water - Child lock function
Press and hold the two buttons ( Water level & Program) simultaneously for 1.5 second to activate and deacitvate the safety lock. - Water level selection
Use this button to select the appropriate water level according to the volume of laundry.
• Under Intelligent, Heavy, Gentle, Soak programs, the water level is adjustable.
Its default washing water level is 3; rising water level is 4.
• Under Speedy program, the user can not adjust water level.
Its default washing water level is 2; rising water level is 3.
• Under Spin program, water level button is not workable and no display.
• Under the wash process, a long pressing on Water Level will re-supply water until the hand gose or the water level reaches warning level.
Note: As the picture shows, there are 6 water levels for this washing machine, the indicator keeping lighting means odd number water level, and keeping twinkling means even number water level .![]()
Installation
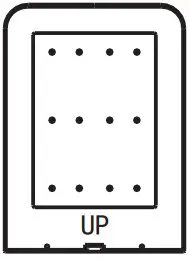
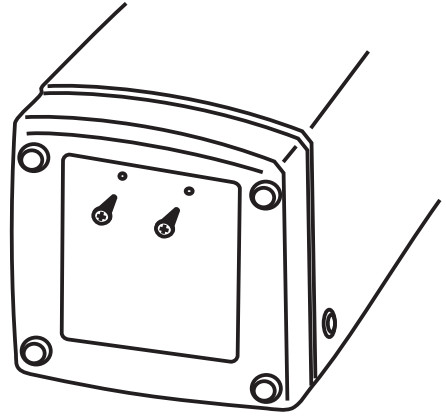
Insert the mice-proof plate into the washing machine base

- Take out the mice-proof plate.
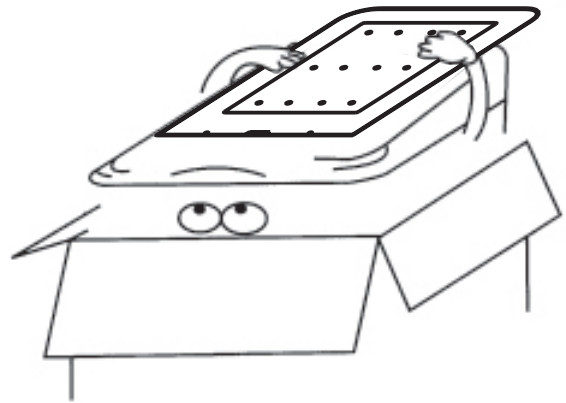
- The entrance is at back of the bottom part.
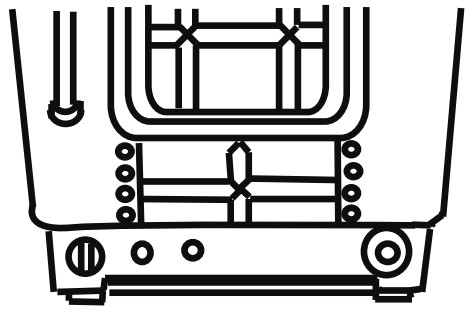
- Insert the noise-proof plate into the base.
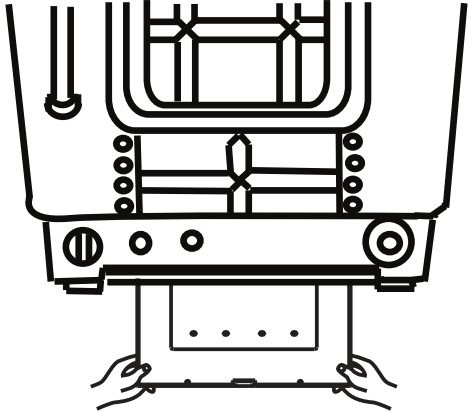
- Lay down the washing machine, fasten up two screws.
Place the washing machine on a firm and level surface, use the level adjustable knob to adjust the washing machine to be stable.
- Place the washing machine at least 5cm away from the wall.
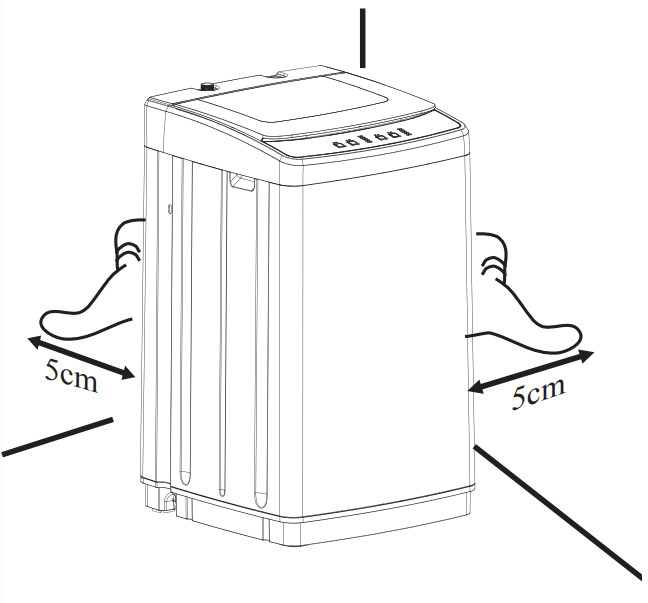
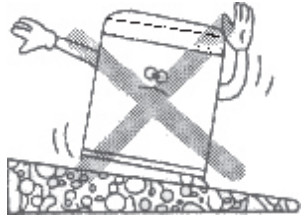
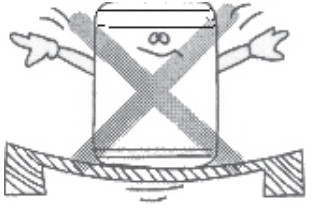
- Alteration of adjustable foot In order to prevent vibration during wash operation, you can loosen level adjustment knob and change the height of the adjustable foot until the washing machine is stable, and then tighten it. (The inclination angle of the washing machine should not be more than 2 degrees)

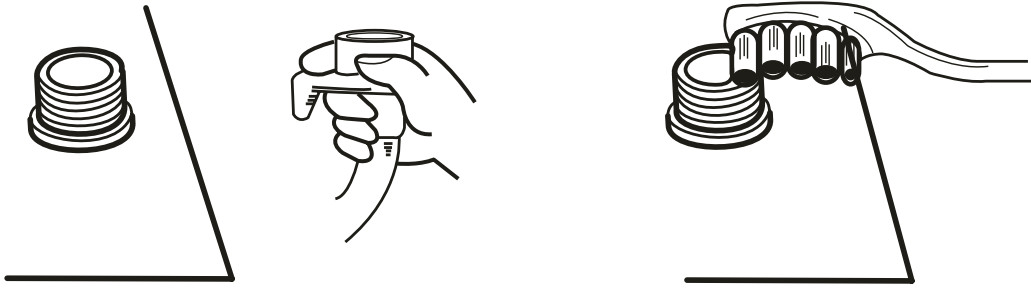
Connection of the inlet hose Outlet
- Select the appropriate type of outlet as shown in the figure.
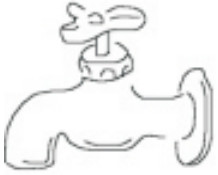
- End of outlet spout should be more than 10mm, or the connector cannot be assembled.

- Water leakage is possible from here.

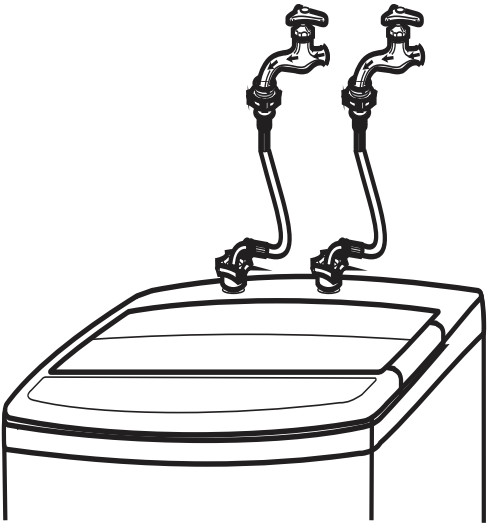
Installation and connection of the inlet hose
- Connection between water inlet and tap (Double thread water inlet)
a. To ensure that there is a sealing pad in the joint of the water inlet and the installation is smooth.
b. According to the diagram, the water inlet is aligned with the tap and the nut on the water inlet is tightened.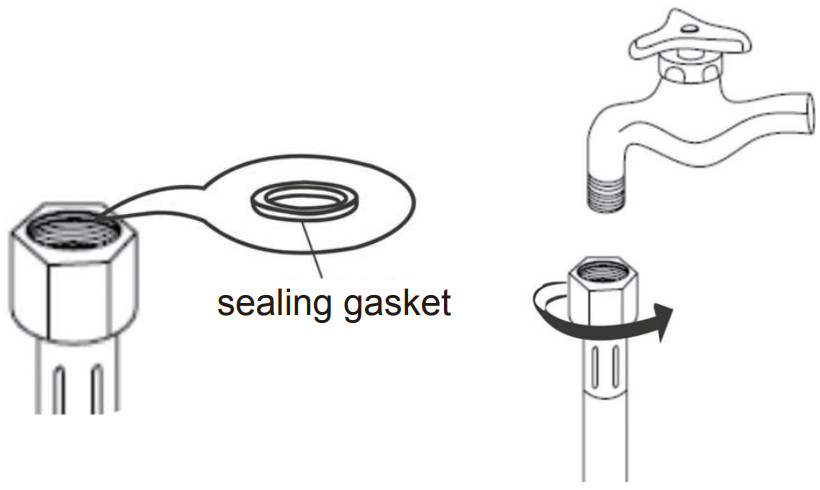
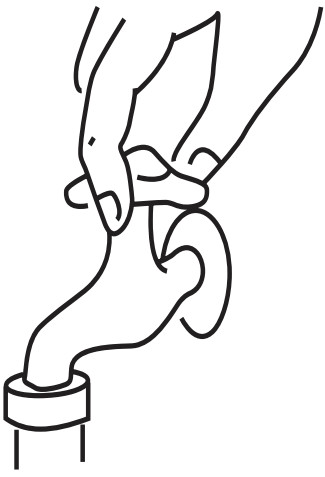
- Connection between water inlet and Washing machine
a. Before connecting, please check whether the sealing gasket in the water inlet nut has fallen off or not.
b. Put water inlet nut on inlet valve joint.
c. Tighten the water inlet nut.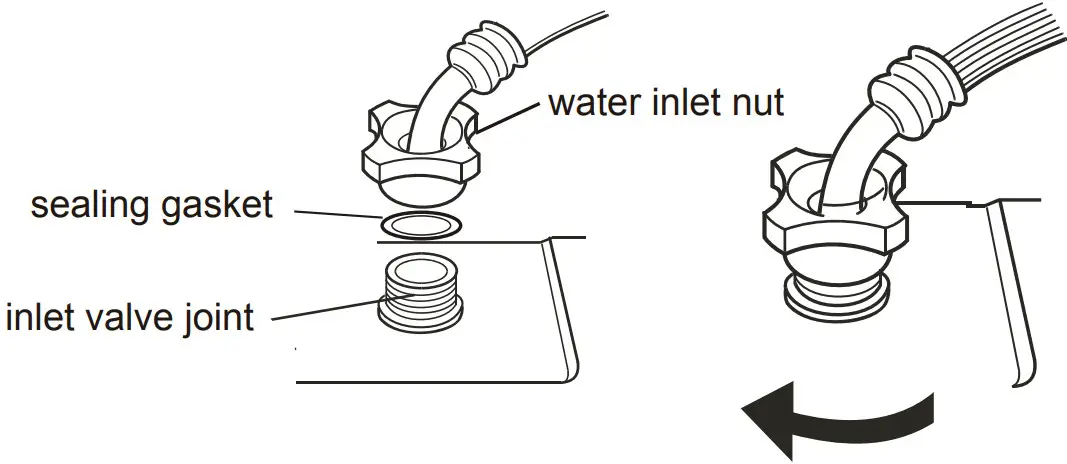
Connection of the drain hose (some modes have been connected)
- Press down the fix ring, and hitch it over the drain hose.
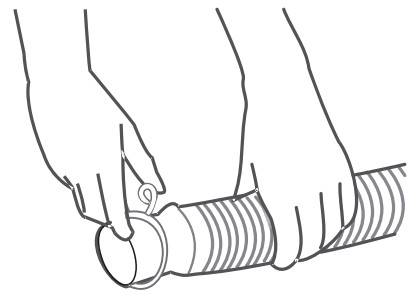
- Press down the fix ring, and then push it to the drain outlet. Clasping the fix ring to make sure they are connected well.
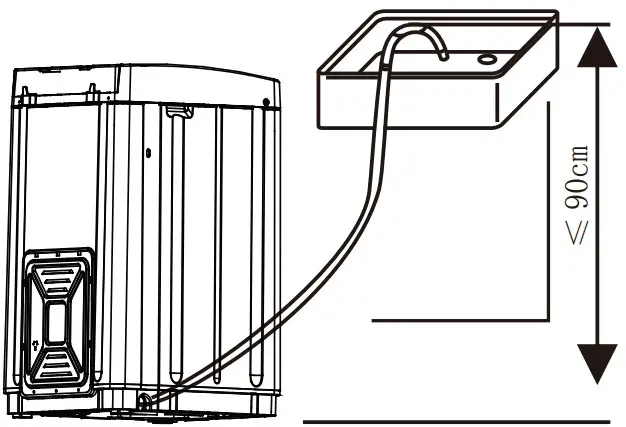
- Insert the end of the drain hose into the hook shelf, and hang the drain hose over a drain outlet.
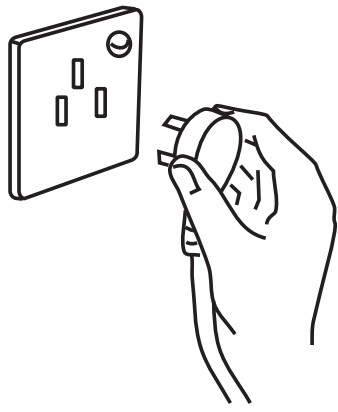
Connection of the power cord
- The earthing which is indicated by yellow and green colour must be firmly connected to a special Earthing. Please call the technician to assemble.
- The socket should have assembled the 3A fuse.
NOTE:
- Never try to connect the earthing of the washing machine together with that of gas pipe or water pipe, telephone cord or lightening rod.
- Do not use the damaged cord because it could cause electricity leakage and fire.
- In case cord is damaged, please contact the local service company, because it is removed and replaced with special tools.

Operation
Preparation
- Install the water inlet hose.
- Turn on the tap
- Plug in the power cord.
- Insert the end of the drain hose into the hook shelf, and hang the drain hose over a drain outlet.
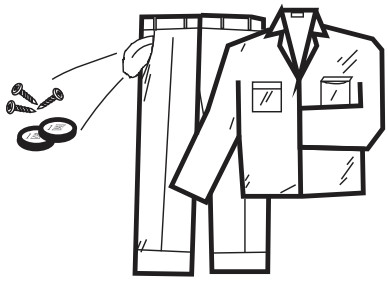
- Before washing ,please take out coins or other hard goods, and pull to close the zip fastener to prevent clothes and barrel from damage.
- Put suitable detergent and wash load into the tub.
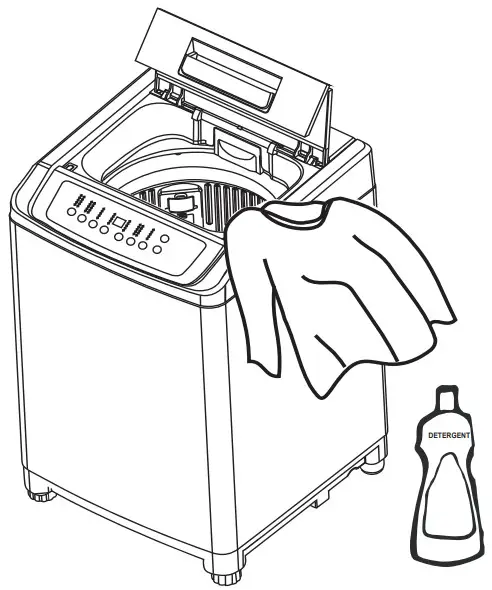
Method
- Power switch
Press the power switch to turn on the washing machine. The default indicator will light on.
- Washing Program Selector
The model has 7 programs to fit for different clothes quantity. The default program is “Intelligent”.
If other program is needed, you can press Program button to choose.
- Press Start/Pause button, start the washing machine
• After pressing START/PAUSE button, the washing machine start to work.
• If it is needed to change PROGRAM or WATER LEVEL, please press START/PAUSE button to pause the washing machine and reset the model. After the setting, press this button again, the washing machine will start according to the new setting.
• To avoid danger, do not open the wash lid during the running of washing machine, especially in spinning process.
- Wash over
• The Buzzer will alarm after the program finish, and it will power off automatically
• Unplug the power cord.
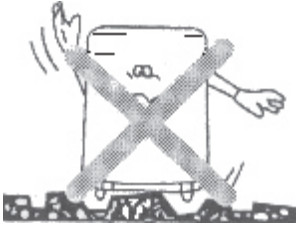
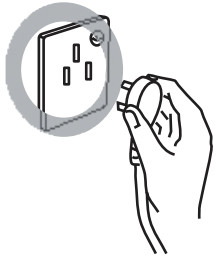
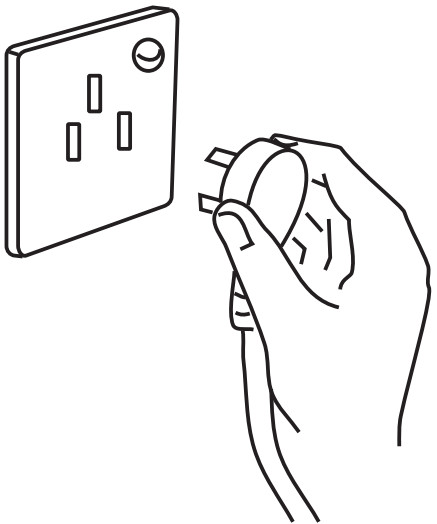
Safety warning
- Never use the plug as shown.
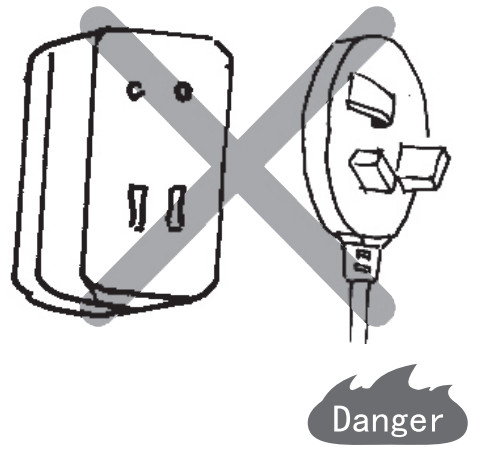
- Do not only hold the cord while pulling out the plug.

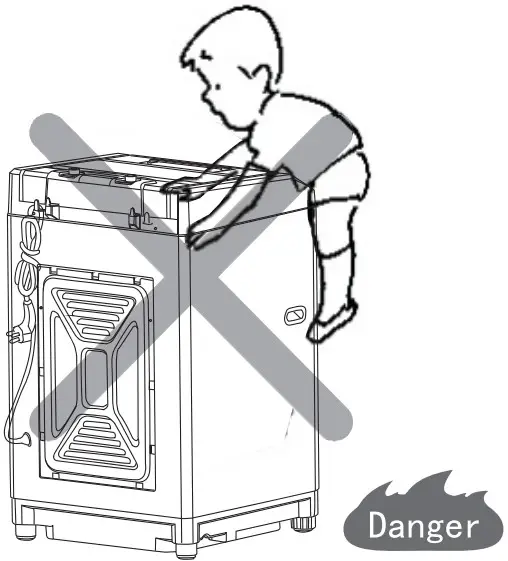
- Do not let children to play with the machine.
- Do not put hands into the rotating tub.

- Keep the washing machine away from fire or heat.

- Do not clean the body of machine with volatile solvent such as petrol and methane.
Also, do not pour these solvents into the tub for washing or drying purposes.
- Do not expose washing machine to direct sunlight or rain.

- Do not place the washing machine in a damp place and do not pour water onto the control panel.

- Never use water over 50ºc

- Make sure the lid is closed especially during spin.

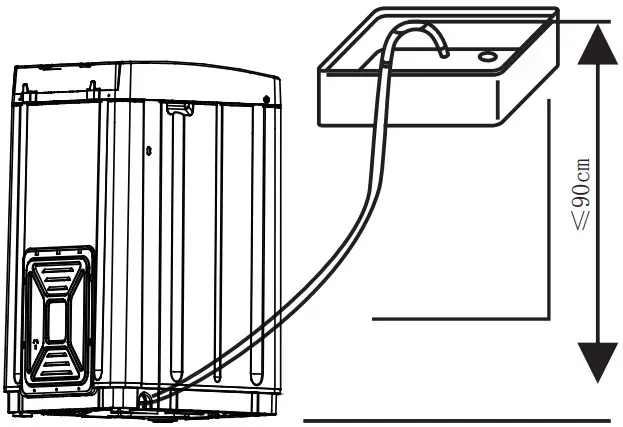
- The highest point of the drain hose must be within 90cm above floor level.

- Do not switch on when the water pressure isn’t within 0.03MPa-0.85Mpa, so as to protect the inlet valve.

The appliance is not intended for use by young children or infirm persons unless they have been adequately supervised by a responsible person to ensure that they can use the appliance safely. Young children should be supervised to ensure that they do not play with the appliance.
If the appliance is supplied from a cord extension set or electrical portable outlet device, the cord extension set or electrical portable outlet device must be positioned so that it is not subject to splashing or ingress of moisture. The power cord must be unplugged after use. Pleas use low foam powder detergent.
The appliance is to be connected to the water mains using new hose-sets and that old hose-sets should not be reused. The ventilation openings in the base must not be obstructed by a carpet .
Maintenance
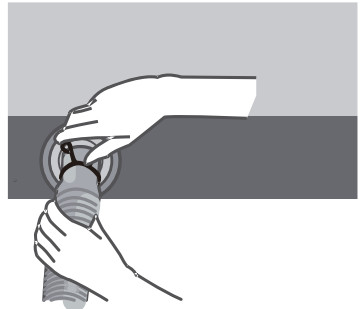
Clean the filter in the inlet valve
Clean the filter in the inlet valve regularly in order to prevent it from clogging
- First unplug the power cord.
- Take off the inlet hose and clean the filter with a brush.
Body Maintenance
Note:
- Clean the surface of the washing machine with a soft cloth regularly.
- After washing starched or bleached laundry, the inner tub must be clear ,or deposit will appear.
Clean the lint filter
- Pully upward to remove the filter assy’s.

- Take the filter from the filter cover.

- Clean and rinse it thoroughly.

- Reinstall the filter.

Trouble Shooting
| Malfunction phenomenon | Reason |
| Start the washing machine from Rinse Process, the washing machine does not input the water | The washing machine will start from the spin process in order to spin out the water and detergent from the clothes, then input the water (if there is water in the tub it will drain out the water first) |
| The wash process changes from Spin to Rinse | When the clothes are not even or are on a single side of the tub, the washing machine will input the water and make the clothes balance and even. |
| The control button is useless to touch | If want to change the PROCESS after the washing machine started, please touch the Start/Pause button to reset the process |
| spin delay | The washing machine will delay 15 to 60 seconds to enter spin process after drain or after select spin process only |
Before maintenance
| Problem | Checklist |
| Does not work | Is electricity present? Is the tap opened? Is the plug loose, or fuse broken? Turn on the power or start button? |
| Fail to fill water | Is the tap opened? Is the drain hose frozen? Is the water supply cut? Is the water inlet valve blocked? |
Trouble Shooting Method
For some troubles, the machine buzzer will ring and alarm, and the indicator will flash.
| Troubles | Display | Possible Cause | Solution |
| Breakdown | No display | The plug is badly connected to the socket or the switch is not activated. | Connect the plug properly or activate the switch |
| No display | The socket is dead or the fuse is broken. | Contact the authorized technician. | |
| No display | The current process is lost for power failure is eliminated | Reuse only when power failure | |
| No display | The voltage is too low or too high | Remove the plug and reuse it when the voltage comes to normality. | |
| Abnormal drainage | El | 1. The drainage time is too long. 2. The drain pipe is blocked. |
1. Open and close the door cover once. 2. Unclog the drain pipe. |
| Abnormal opening | E2 | The door cover is opened. | Close the door cover. |
| Abnormal dehydration | E3 | 1. The drainage time is too long. 2. The drain pipe is blocked. |
Open the door cover and clear up the clothes smoothly. Then closed the door cover. |
| Abnormal water intake | E4 | 1. The tap is not turn cc. 2. The hydraulic pressure is enough. 3. The water intake time is too bag |
1. Turn on the tap then open and the door cover once. 2. Restart the machine when the hydraulic pressure is normal. 3. 0pen and dose the door cover once. |
| Water level protection | E7 | Controlled silundum is breakdown or water inlet valve cannot stop inflowed. | Contacted the authorized Technion.
|
| Abnormal water level sensor | E6 | The water level sensor get loose and fall oft. | |
| Memory chip failure | E9 | Cannot read and write. |
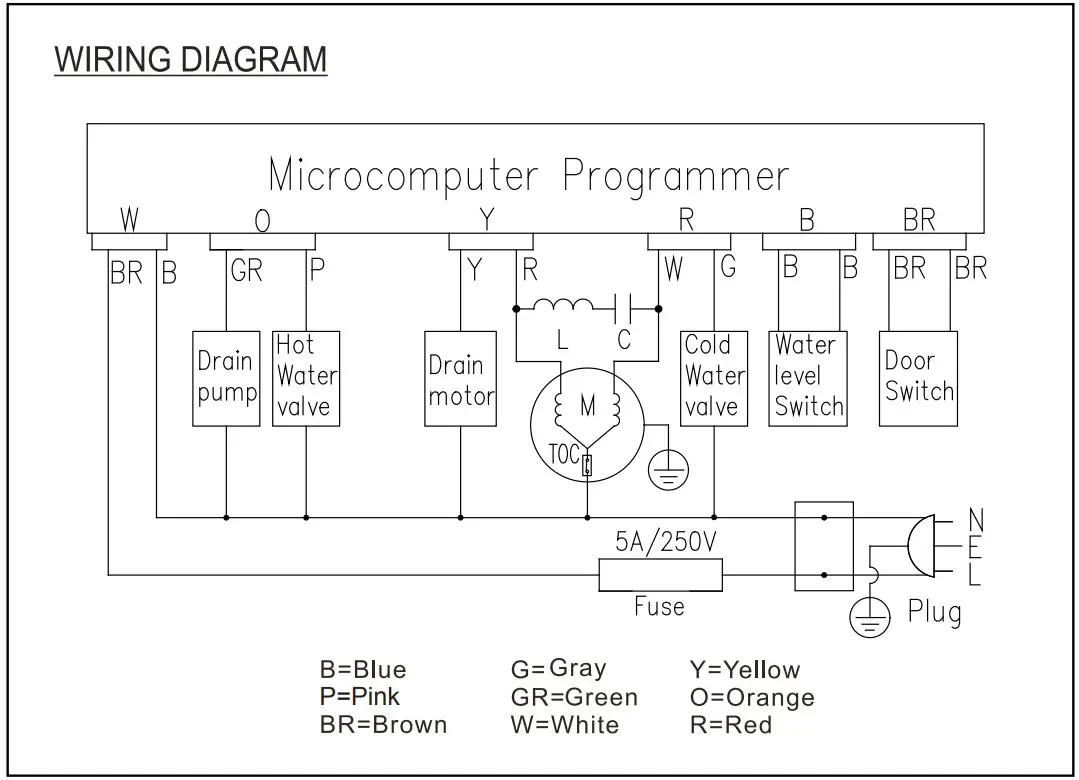
Wiring diagram
Specifications
| Rated voltage | 220-240V- | Rated frequency | 50Hz |
| Wash/spin capacity | 6.0kg | Net weight | 29.5kg |
| Water pressure | 0.03MPa-0.85MPa | ||
| Dimension | 545mmX555mmX900mm | ||

![]()