![]() INSTALLATION INSTRUCTIONS
INSTALLATION INSTRUCTIONS QR code for Installations Instructions
 https://www.anolislighting.com/resource/subdrive-1-installation-instructions
Fixture must be installed by a qualified electrican in accordance with all national and local electrical and construction codes and regulations. This device falls under class one and must be grounded!
Contents
STEP 1 OPEN BOX
 Uncover SubDrive
STEP 2 INSTALL HOUSING
Use fasteners that are appropriate for use with your mounting surface. 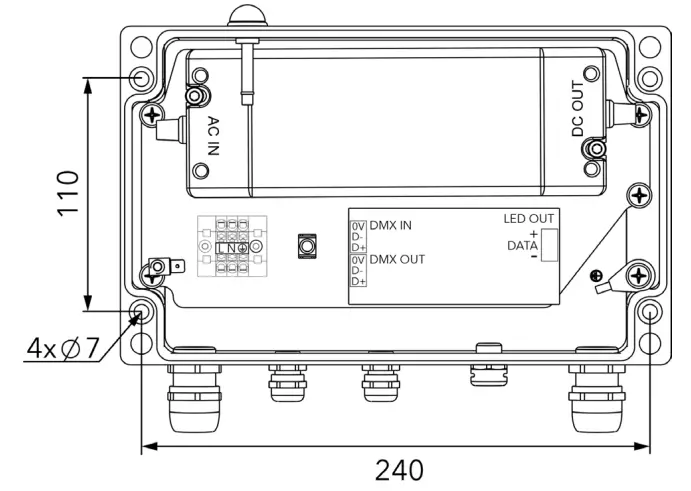
Drill holes to the surface according to holes spacing. Mount Sub drive via mounting holes to the surface.
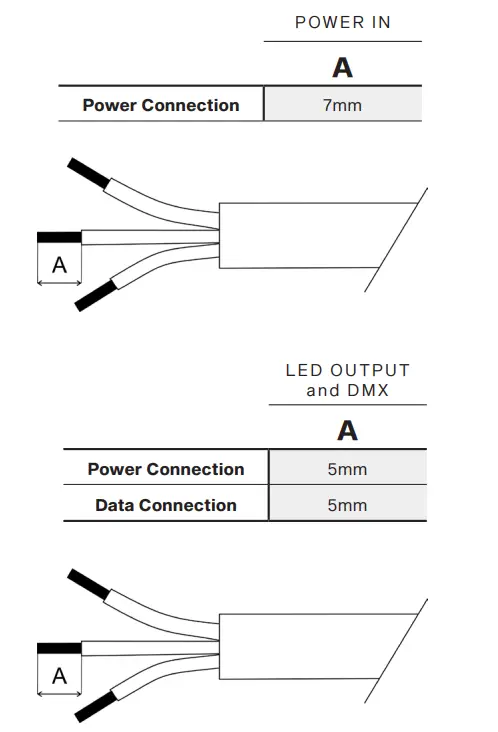
STEP 3 CONNECTION
- Strip these lenghts for cable connections
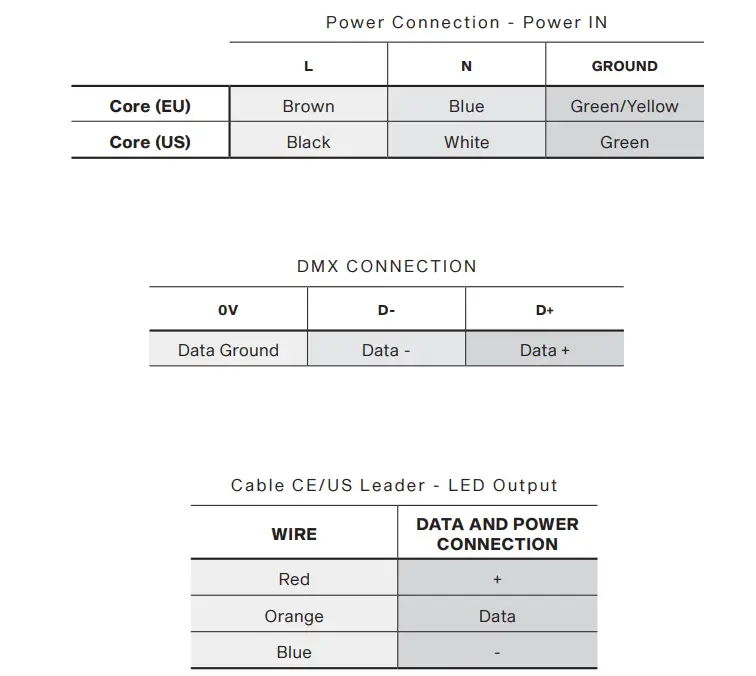
- Connection – colour coding
- Wiring connection

STEP 4 CABLE GLAND INSTALLATION
Use wrench size 24 for cable gland M20x1.5
Use wrench size 16 for cable gland M12x1.5
Install Cable glands individually!
We recommend to apply an adequate layer of the paste LOCTITE 5331 on the plastic holder of the cable gland before inserting in into the body of the gland and an adequate layer of the paste LOCTITE 577 on the thread of the gland body.
Failure to properly install cable glands will result in fai-lure of the water tight seal!
STEP 5 CLOSE BOX

Install top cover making sure the gasket is in good condition and is positioned properly in the groove.
Before applying the torque, make sure the thread is clean and functional.
ROBE lighting s. r. o.
Palackeho 416
757 01 Valasske Mezirici
Czech Republic
Tel.: +420 571 751 500
E-mail: [email protected]
www.anolislighting.com