Contents
aiwa MSBTU-300 Hi-Fi Micro Music System

Important safety instructions read carefully and keep for future reference. Household use only. SAVE THESE INSTRUCTIONS.
WHAT’S IN THE BOX?

CONNECTION TO THE MAINS

INSTALLATION OF THE SPEAKERS

REMOTE CONTROLLER
- POWER ON/OFF

- OPEN/CLOSE CD DOOR

- NUMERIC PAD
- 10+
If you want to select a radio station with a preset number greater than 10, press the 10+ button on the remote control and the number key of the second digit. - CD/USB
Access the CD or usb play modes
- GOTO (GO TO)
Press it during FM radio mode to access to the digital input mode, and input the FM frequency of your desired radio station.
Press also to recall the stored radio stations by entering the assigned preset number. - SOURCE INPUT SELECTION
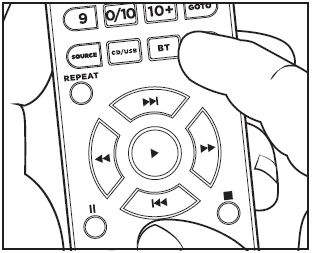
- BT
Access the Bluetooth function mode - REPEAT
REPEAT ONE: repeat the current song.
REPEAT ALL: repeat all the available songs.
OFF: turn off the repeat function modes. - SEARCH (SCAN RADIO STATIONS)
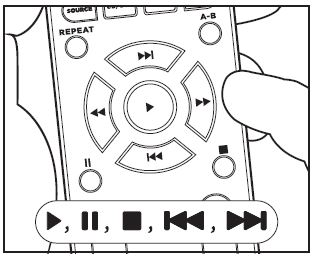
- NEXT

- A-B
Create a loop by pressing the button twice to assign the start point “A” and the end point “B”. To exit the loop, simply press the button a third time. - FAST-BACKWARD

- FAST-FORWARD

- PREVIOUS

- PLAY

- PAUSE

- STOP
- CH+/CH- (CHANNEL UP/DOWN)
- EQ (EQUALIZER MODE)
- MUTE

- VOLUME ADJUSTMENT
- FF+/FF- (FM FREQUENCY UP/DOWN)
- TREBLE ADJUSTMENT
- BASS ADJUSTMENT
- RANDOM PLAYBACK
- INTRO
During CD/USB Playback mode, press it to Play the 10 first seconds of each track - LOUDNESS
- PROG (PROGRAM MODE)
Create your own music playlist during the CD/MP3 or usb playback modes. - RESET
- MEMORY
Press to save the radio station currently playing during FM radio mode.

FRONT PANEL CONTROLS

- LED DiSPLAY
- POWER ON/OFF
- CD DOOR
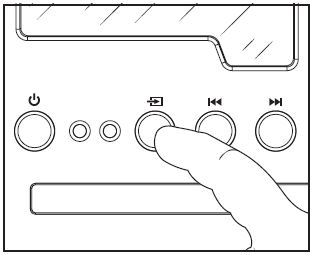
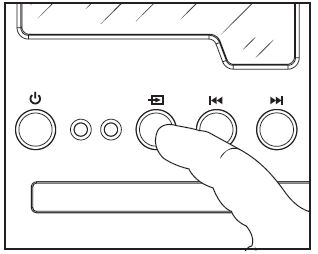
- INPUT SOURCE SELECTION

CD, USB, radio fm, LINE IN, BlueTooth. - PREVIOUS
- NEXT
- PLAY / PAUSE / SCAN

- HEADPHONES OUTPUT
- USB SLOT
It works for playback of USB-MP3, and also as a charging station for small devices. - OPEN/CLOSE CD DOOR
- MASTER VOLUME KNOB
REAR PANEL CONNECTIONS

- SPEAKER TERMINALS R / L
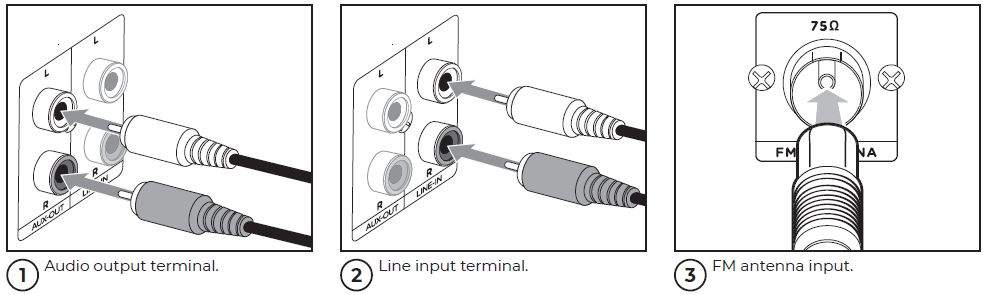
Connect speakers to the R / L terminals with an impedance of 4-8 Ohms. The R + L impedance is 8 ohms. - AUX AUDIO OUTPUT TERMINAL
- AUX AUDIO INPUT TERMINAL
- FM ANTENNA INPUT
- POWER CORD
AUXILIARY CONNECTIONS
BLUETOOTH MODE
- Select the Bluetooth mode. Using the remote controller, or the input source button on the front panel.

- Search for the pairing name. search for aiwa MSBTU-300 within the Bluetooth devices list.

- Stay close… The effective range of bluetooth devices is 10 meters.
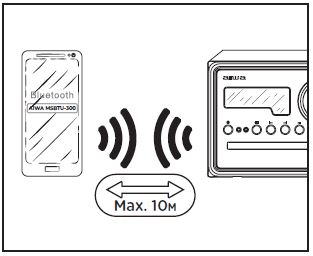
- Enjoy the music! The microsystem will notify you when both devices have been successfully connected.

USB-MP3/CHARGER
- Connect the USB or the charging cable. Plug the desired USB or charging cable in the USB Input slot of the front panel.
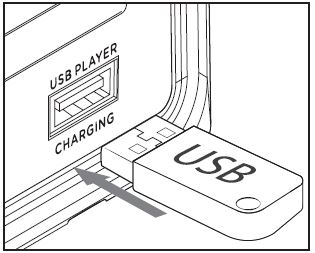
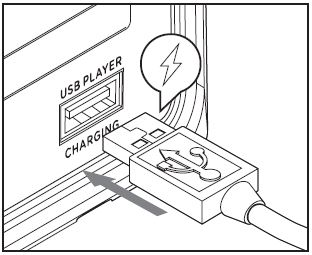
- USB compatibility. This unit is only compatible with the fat 16 and fat 32 encoding formats, reads devices up to 32GB max and allows up to 999 audio files.

- Select the CD/USB mode. Using the remote controller, or the input source button on the front panel.
- If there’s a cd, remove it… The unit will shift automatically from CD mode to the USB playback function. Make sure there is no CD inserted, if there is the unit will not be able to switch to USB mode.

PLAYBACK CONTROL
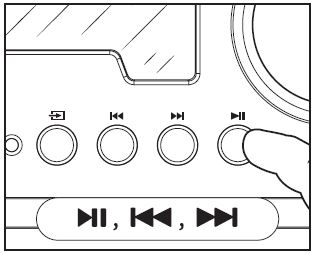
- For all playback modes: Control CD, USB and Bluetooth function modes by using the buttons for Play, Pause, Stop, Next and Previous of the remote controller or on the unit’s front panel.
Contact
- Follow us! always
- www.eu-aiwa.com.
- AIWA CO., LTD.
- Kita-Ku
- TOKYO 115-0045, JAPAN