Contents
LUTRON HT-315 Humidity Meter
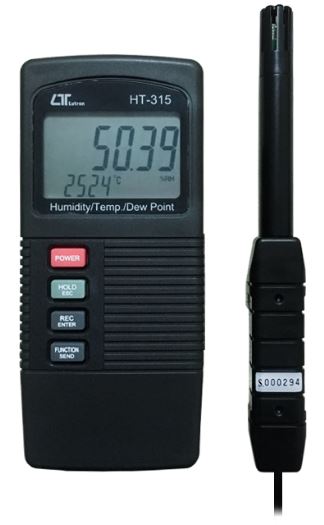
Model : HT-315
FEATURES
- Humidity + Temperature + Dew point are combined into one meter, intelligent and professional.
- 0.01 %RH resolution for the humidity reading, 0.01 degree resolution for the Temp. reading.
- Pocket size with Separate humidity & temp. probe, easy operation. & remote measurement.
- Fast humidity measuring response time.
- High accuracy and high precision.
- Dew point measurement.
- Manual and auto manual data logger.
- Just few panel buttons, easy operation.
- Microprocessor circuit assures maximum possible accuracy, provides special functions and features.
- LCD with two display, easy readout.
- Heavy duty & compact housing case, designed for easy carry out & operation.
- Records Maximum and Minimum readings with Recall.
- Auto shut off saves battery life.
- Data hold function for freezing the desired value on display.
- RS 232 PC serial interface.
- Show the humidity & temperature values on the LCD display at same time.
- Built-in low battery indicator. Wide humidity & temp. measuring range.
- DC 9V power adapter input socket.
SPECIFICATIONS
General Specifications
| Circuit | Custom one-chip of microprocessor LSI circuit. |
| Display | LCD size : 44 mm x 29 mm dual function LCD display. |
| Measurement Unit | Humidity : %RH ( Relative Humidity ) |
| Temperature : ℃ or ℉. | |
| Dew point : ℃ or ℉. | |
| Response Time | 5 to 30 seconds typically.
@ Reach the 85% reading value |
| Temperature Compensation | Automatic temp. compensation for the humidity function. |
| Data Hold | Freeze the display reading. |
| Memory Recall | Maximum & Minimum value. |
| Sampling Time | Approx. 0.8 second. |
| Power off | Auto shut off saves battery life or manual off by push button. |
| Data Output | RS 232 PC serial interface. |
| Operating Temperature | 0 to 50 ℃. |
| Operating
Humidity |
Main instrument : Less than 85% R.H.
Probe : 0 to 95 %RH. |
| Power Supply | 006P DC 9V battery
( Alkaline or Heavy duty type ). |
| Power Current | Approx. DC 4.6 mA. |
| Weight | 264 g/0.67 LB.
@ Battery is included. |
| Dimension | Main instrument : 135 x 60 x 33 mm,
( 5.3 x 2.4 x 1.3 inch ). |
| Humidity Sensor Probe :
197 mm ( 7.8 inch ) in length. |
|
| Accessories Included | Instruction manual………………….1 PC
Humidity probe………………………1 PC |
| Optional Accessories | RS232 cable, UPCB-02
Data Acquisition software, SW-801-WIN Case wall holder Power adapter ( ACV to DC 9V ) |
Electrical Specifications 23± 5 ℃
Humidity/ Temperature
|
Humidity |
Range | 0 % to 95 % R.H. |
| Resolution | 0.01 % R.H. | |
| Accuracy | ≧70% RH
± (3% reading + 1% RH). < 70% RH – 3% RH. ± 3% RH. |
|
|
Temperature |
Range | 0 ℃ to 50 ℃,32 ℉ to 122 ℉. |
| Resolution | 0.01 degree | |
| Accuracy | ℃ – 0.8 ℃.
℉ – 1.5 ℉. |
Dew Point
| ℃ | Range | -25.3 ℃ to 48.9 ℃ |
| Resolution | 0.01 ℃ | |
| ℉ | Range | -13.5 ℉ to 120.1 ℉. |
| Resolution | 0.01 ℉. | |
| Remark :
* Dew Point display value is calculated from the Humidity/Temp. measurement automatically. * The Dew Point accuracy is sum accuracy value of Humidity & Temperature measurement.. |
||
@ Above specification tests under the environment RF Field Strength less than 3 V/M & frequency less than 30 MHz only.
FRONT PANEL DESCRIPTION

- Display
- Power Button
- Hold Button ( Esc Button )
- REC Button ( Enter Button )
- Function Button ( Send Button )
- Set Button ( Logger Button )
- Battery Compartment/Cover
- RS-232 Output Terminal
- Probe Input Socket
- Probe Plug
- Probe handle
- Probe head ( Humidity & Temperature )
- DC 9V Power Adapter Input Socket
GENERAL MEASURING PROCEDURE
The meter default value are :
- The temperature reading unit is ℃.
- The auto power off.
Humidity and Temperature measurement
- Plug the ” Probe Plug ” ( 3-10, Fig. 1 ) into the ” Probe Input Socket ” ( 3-9, Fig. 1 ).
- Power on the meter by pressing the ” Power Button ” ( 3-2, Fig. 1 ), the LCD shows the unit ” %RH ” & ” ℃ ” at the same time and measured value will show on
the display ( upper display is Humidity value, the
lower display is the temperature value ) . - The meter Temp. display unit is defaulted to ” ℃ “. If intend to let the meter’s temperature unit default to ” ℉ ” , then please refer section 5-1 ( page 9 ).
Dew point measurement
The procedures of ” Dew point measurement ” are same as the above ” 4-1 Humidity and Temperature measurement ” except select the ” Dew point �� function by pressing the ” Function Button ” ( 3-5, Fig. 1 ) once, the LCD will show the unit ” DEW ” & ” ( or ℃℉ ). The upper display show the Dew point value, the lower display show the temperature value
Data Hold
During the measurement, press the ” Hold Button ” ( 3-3, Fig. 1 ) once will hold the measured value & the LCD will display a ” HOLD ” symbol. * Press the ” Hold Button ” once again will release the data hold function.
Data Record ( Max., Min. reading )
- The data record function records the maximum and minimum readings. Press the ” REC Button ” ( 3-4, Fig. 1 ) once to start the Data Record function and there will be a ” REC. ” symbol on the display.
- With the ” REC. ” symbol on the display :
- a) Press the ” REC Button ” ( 3-4, Fig. 1 ) once, the ” REC. MAX. ” symbol along with the maximum value will appear on the display. If intend to delete the maximum value, just press the ” Hold Button ” ( 3-3, Fig. 1 ) once, then the display will show the ” REC. ” symbol only & execute the memory function continuously.
- b) Press the ” REC Button ” ( 3-4, Fig. 1 ) again, the ” REC. MIN. ” symbol along with the minimum value will appear on the display. If intend to delete the minimum value, just press the ” Hold Button ” ( 3-3, Fig. 1 ) once, then the display will show the ” REC. ” symbol only & execute the memory function continuously.
- c) To exit the memory record function, just press the ” REC ” button for 2 seconds at least. The display will revert to the current reading.
ADVANCED MEASURING PROCEDURE
Before executing advanced adjustment procedures, exit the ” Hold function ” and the ” Record ” function.
- a. Hold the ” Set Button ” ( 3-6, Fig. 1 ) at least two seconds until the lower display show ” COde “, then release the ” Set Button “, the upper display will show ” 1000 “.
- 1000 is the password code that allow to execute the Advanced Measuring Procedure following.
After display show ” COde 1000 “, push the ” Enter Button ” ( 3-4, Fig. 1 ) once will go to the following b. procedures. - If push the ” ESC Button ” ( 3-3, Fig. 1 ) will escape the selecting function and return to the normal measuring display.
- 1000 is the password code that allow to execute the Advanced Measuring Procedure following.
- b. One by one to press the ” Set Button ” ( 3-6, Fig. 1 ) once a while to select the two main function that show on the lower display as
- ℉ ……. Change the Temp ℃, ℉ unit
- OFF…….Auto power ON/OFF management
Change the Temp ℃, ℉ unit
Use the ” Set Button ” to select the main function to ” ℉ “, then one by one to press the ” Function Button ” ( 3-5, Fig. 1 ) a while will determine the default Temp. unit to ℃ or ℉
- Press the ” Function Button “, if the upper display value show ” 0 “, the default Temp. unit is ℃
- Press the ” Function Button “, if the upper display value show ” 1 “, the default Temp. unit is ℉.
After the function is determined, press the ” Enter Button ” ( 3-4, Fig. 1 ) to confirm and save the selection data into memory IC permanently. Press the ” Esc Button ” ( 3-3. Fig. 1 ) will revert to normal display screen.
Auto power ON/OFF
Use the ” Set Button ” to select the main function to ” OFF “, then one by one to press the ” Function Button ” ( 3-5, Fig. 1 ) a while will determine the default the power management system is Auto Power Off enable or disable.
- Press the ” Function Button ” once, if the upper display value show ” 0 “, it is not Auto Power Off management ( disable ).
- Press the ” Function Button ” once, if the upper display value show ” 1 “, it is the Auto Power Off management ( enable ).
After the function is determined, press the ” Enter Button ” ( 3-4, Fig. 1 ) to save the selection function into memory IC permanently. Press the ” Esc Button ” ( 3-3. Fig. 1 ) will revert to normal display screen.
RS232 PC SERIAL INTERFACE
The instrument has RS232 PC serial interface via a 3.5 mm terminal ( 3-8, Fig. 1 ). The data output is a 16 digit stream which can be utilized for user’s specific application. A RS232 lead with the following connection will be required to link the instrument with the PC serial port.

The 16 digits data stream will be displayed in the following format : D15 D14 D13 D12 D11 D10 D9 D8 D7 D6 D5 D4 D3 D2 D1 D0
Each digit indicates the following status
| D0 | End Word | ||
| D1 & D8 | Display reading, D1 = LSD, D8 = MSD For example :
If the display reading is 1234, then D8 to D1 is : 00001234 |
||
| D9 | Decimal Point(DP), position from right to the left
0 = No DP, 1= 1 DP, 2 = 2 DP, 3 = 3 DP |
||
| D10 | Polarity
0 = Positive 1 = Negative |
||
| D11 & D12 | Annunciator for Display | ||
| ℃ = 01 | ℉ = 02 | % RH = 04 | |
| D13 | When send the upper display data = 1 When send the lower display data = 2 | ||
| D14 | 4 | ||
| D15 | Start Word | ||
RS232 FORMAT : 9600, N, 8, 1
BATTERY REPLACEMENT
- When the left corner of LCD display show “
 “, it is necessary to replace the battery. However, in-spec. measurement may still be made for several hours after low battery indicator appears before the instrument become inaccurate.
 - Slide the ” Battery Cover ” ( 3-7, Fig. 1 ) away from the instrument and remove the battery.
- Replace with 9V battery ( Alkaline or Heavy duty type ) and reinstate the cover.
- Make sure the battery cover is secured after changing the battery.
Documents / Resources
| LUTRON HT-315 Humidity Meter [pdf] User Manual HT-315 Humidity Meter, HT-315, Humidity Meter, Meter |