![]()
B0BKPG8TC3 Raised Garden Bed
User Manual
Contents
B0BKPG8TC3 Raised Garden Bed
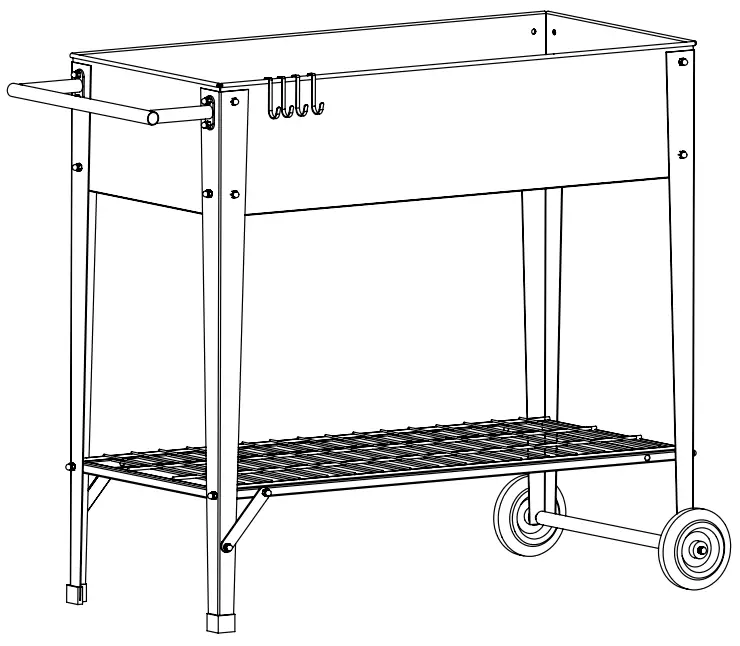 Raised Garden Bed
Preface
- Read through each step carefully and follow the proper order.
- Separate and count all parts and hardware.
- We recommend that, where possible, all items are assembled near to the area in which they will be placed in use, to avoid moving the product unnecessarily once assembled.
- Place the product on a flat, steady and stable surface.
- Keep all small parts and packaging materials for this product away from babies and children as they potentially pose a serious choking hazard.
- Retain instructions for future reference.
- If you have any questions, please feel free to contact, we will be happy to serve you!
Email: [email protected]
Package Include
| No. | Description | Picture | QTY |
| 1 | Long Panel | 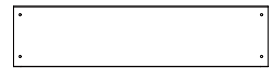 |
2 |
| 2 | Short Panel | 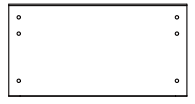 |
2 |
| Bottom Panel | 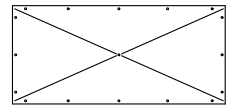 |
1 | |
| 4 | Front Leg |  |
2 |
| 5 | Back Leg |  |
2 |
| 6 | Handle | 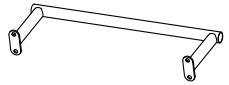 |
1 |
| 7 | Shelf | 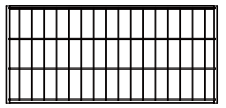 |
1 |
| 8 | Wheels |  |
2 |
| 9 | Wheel bar |  |
1 |
| 10 | Non-slip mat |  |
2 |
| 11 | Reinforcement piece |  |
2 |
| 12 | Hooks |  |
4 |
| 13 | Packs of screw nuts |  |
5 |
Installation

Step1.2 front legs with holes at the bottom + wheel bar + 2 wheels + 2 nuts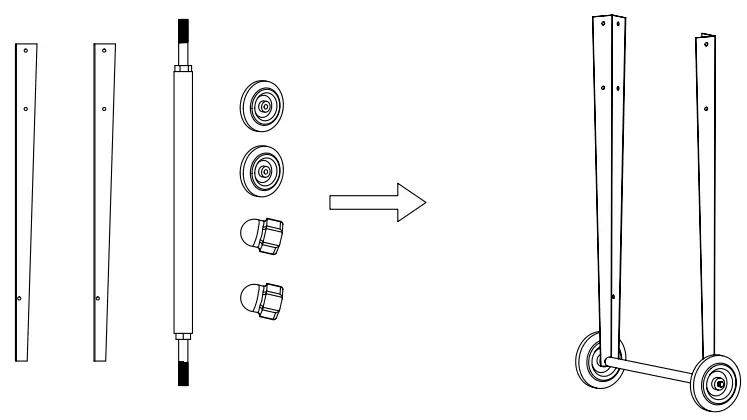
Step2.Shelf + 2 screws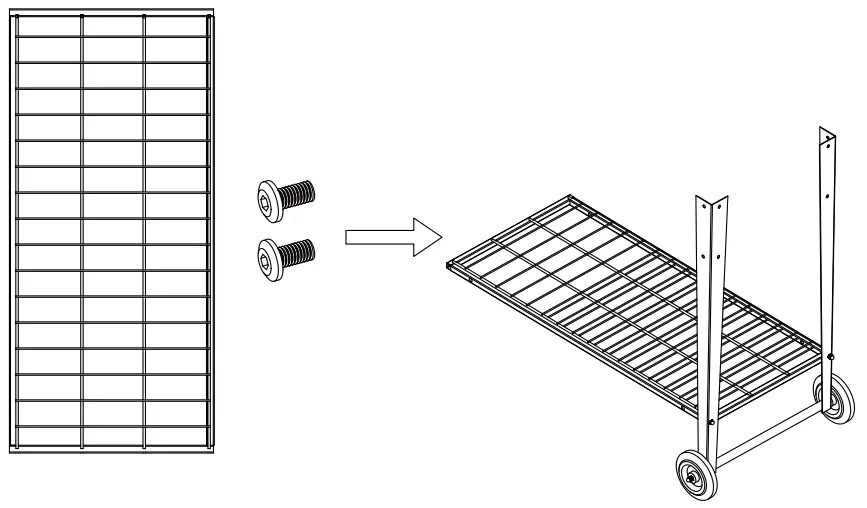
Step3.2 back legs + anti-slip mat + 2 screws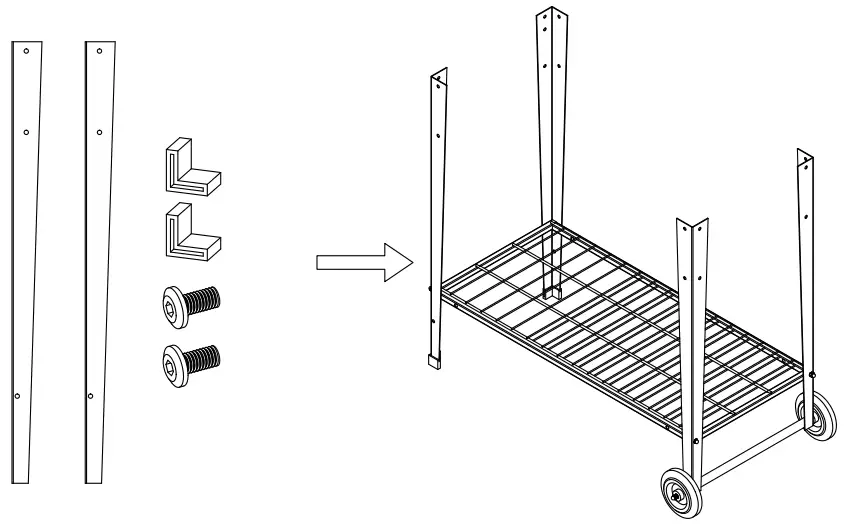
Step4.2 reinforcement pieces + two screws + 1 nut (the nut is mounted on the screw of the back leg)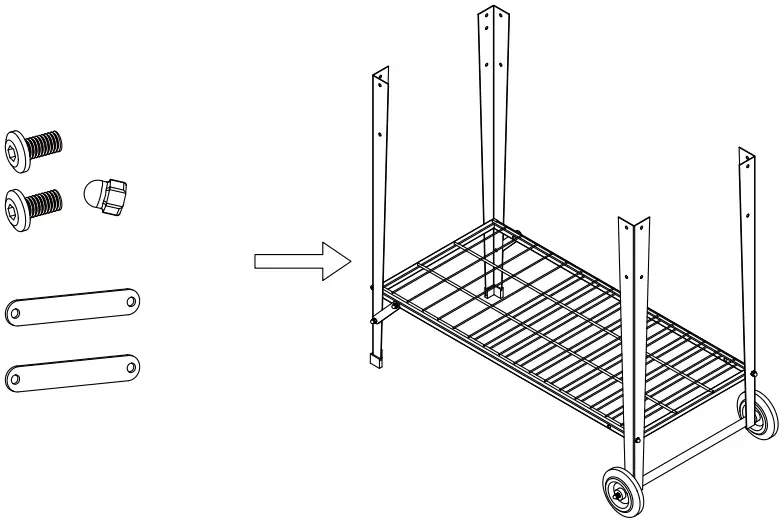
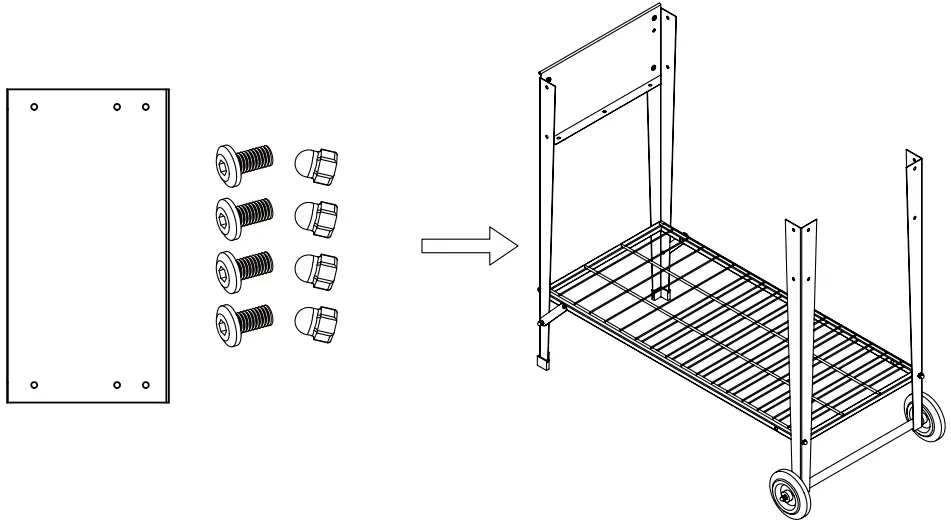
Step5.Short panel + 4 pairs of screw nuts, mounted on the front legs.
Note: Nut outside; The side with the extended side of the short panel is inside.
Step6.Long panel + 4 pairs of screw nuts, mounted on front and back legs.
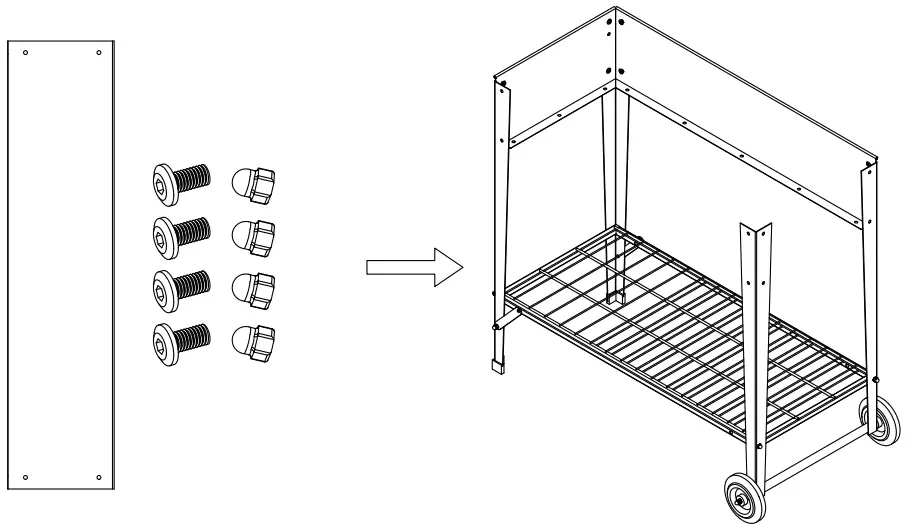
Step7.Similar to step 5 and 6, install the remaining 1 long panel and short panel.
Long panel + 4 pairs of screws and nuts
Short panel + 4 pairs of screws and nuts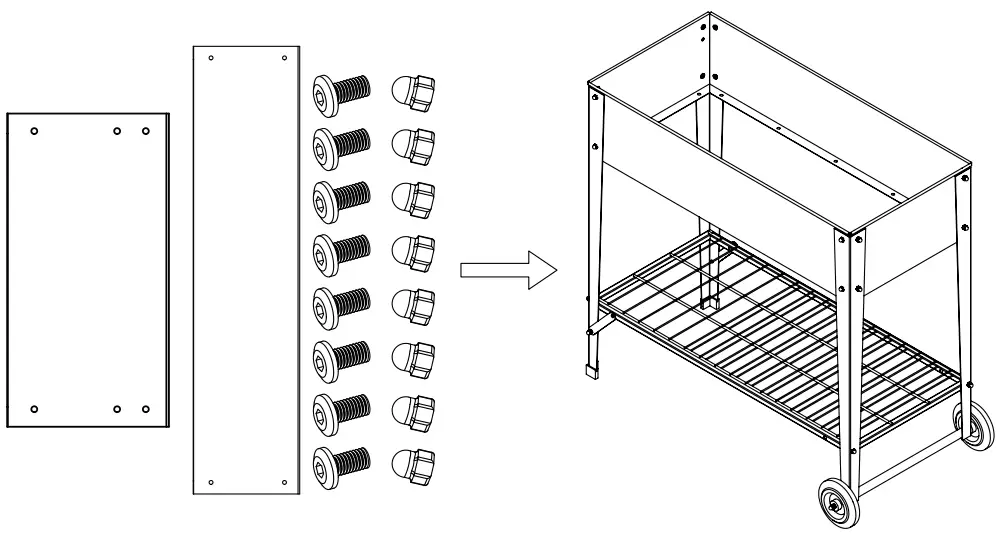
Step8.Handle + 4 pairs of screw nuts, mounted on the back leg.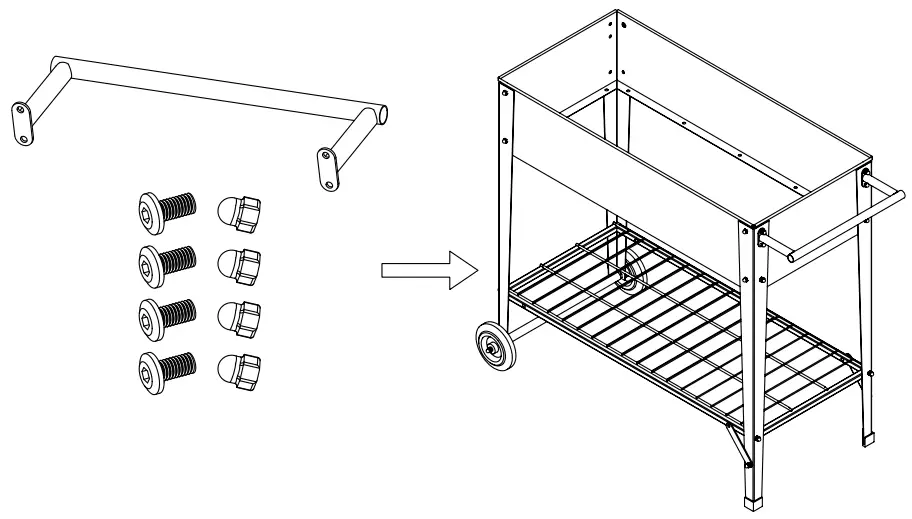
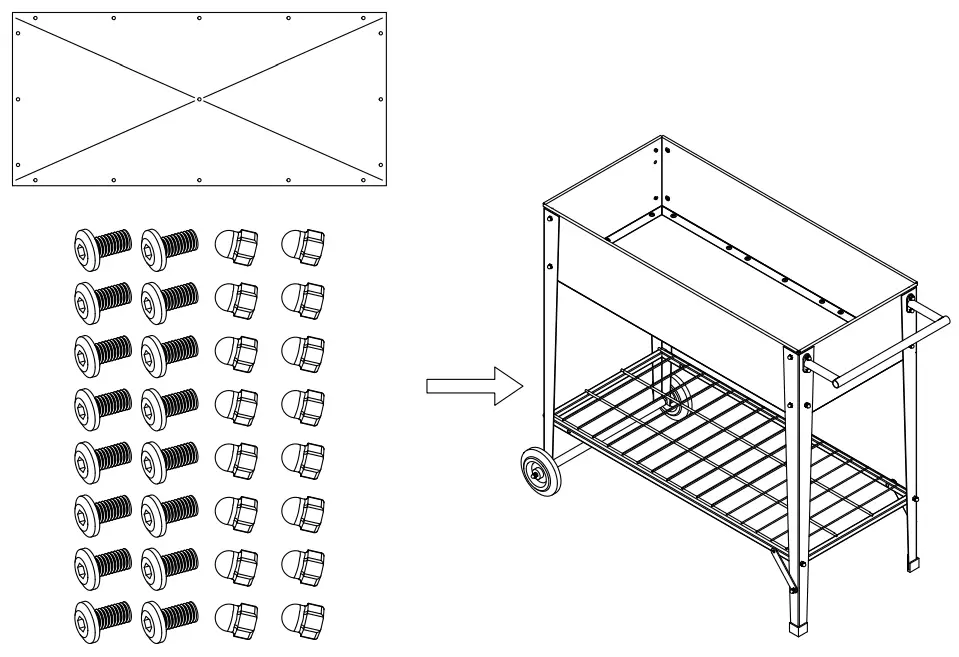
Step9.Bottom panel + 16 pairs of screws and nuts
Step10.Hang 4 hooks to finish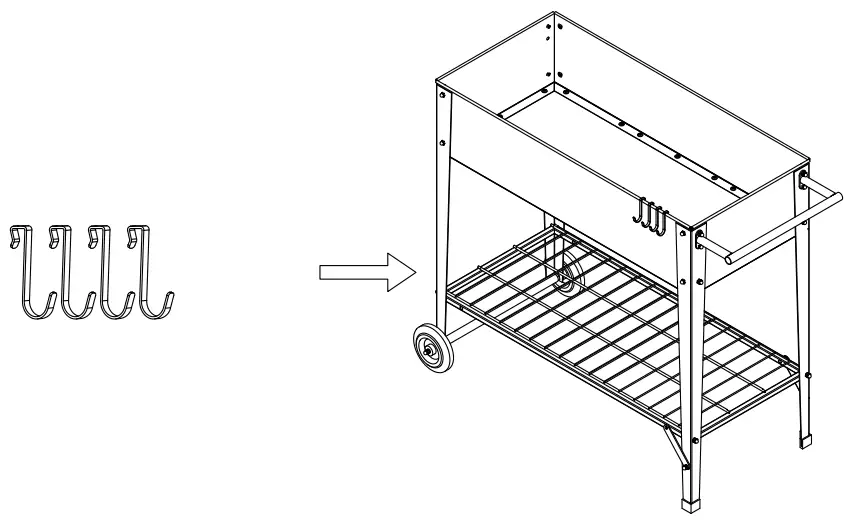
Thank you for your support of Higher Raised Garden Bed!
Hope you enjoy it!
If there is any problem, feel free to contact us and we will do our best to meet your satisfaction.
Highpro offers a 12-month warranty with lifetime consultation.
Send Email for extended lifetime warranty to 2 Years.
Email: [email protected] installation video

(Please use Google App to take photo to identify )
https://photos.google.com/photo/AF1QipOVVMGpyglbhwHpxmBOnrmLAxWW1Cx8ltXcl6kX![]()