Contents
Polhus 5566 Heat Pump Cover

Heat Pump Cover Assembly instructions
Product Information
| Component | Quantity |
|---|---|
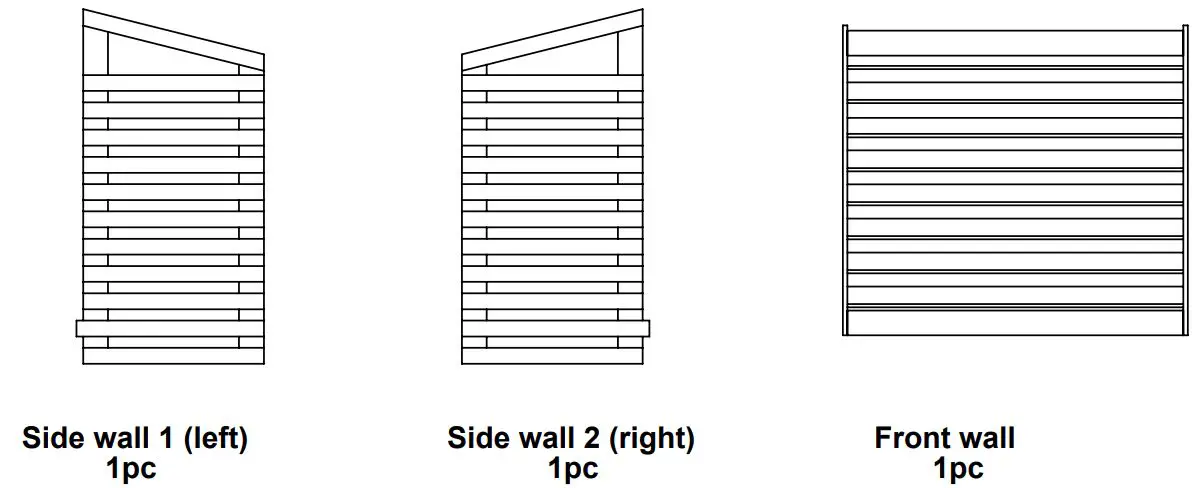
| Sidewall 1 (left) | 1 piece |
| Sidewall 2 (right) | 1 piece |
| Front wall | 1 piece |
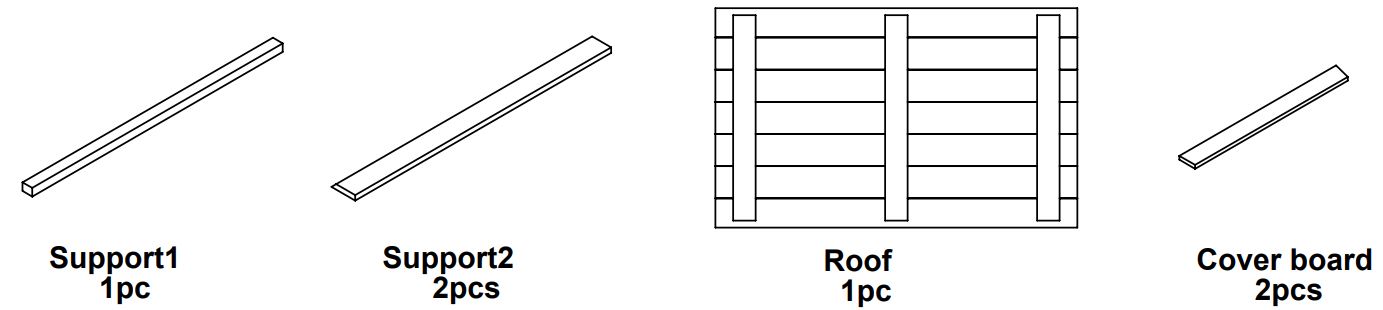
| Support 1 | 1 piece |
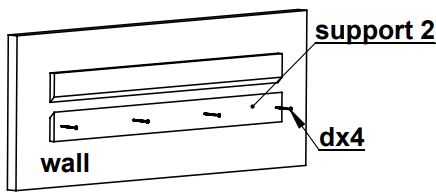
| Support 2 | 2 pieces |
| Fixing kit: | |
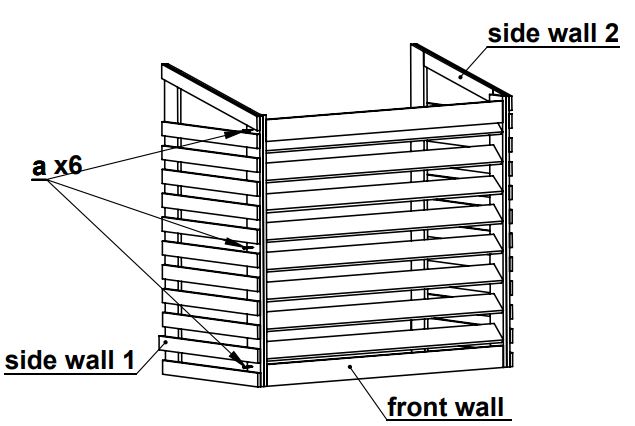
| a) 25mm screws | 6 pieces |
| b) 30mm screws | 12 pieces |
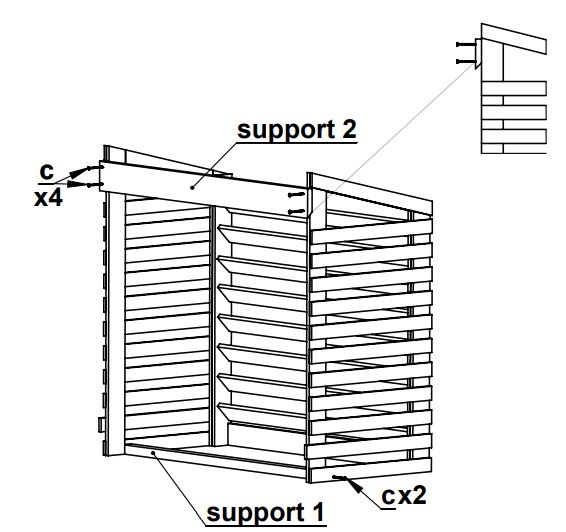
| c) 50mm screws | 6 pieces |
| d) 70mm screws | 4 pieces |
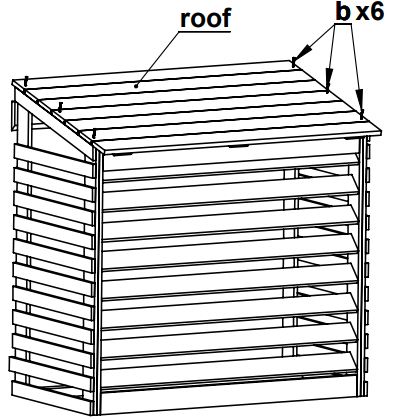
| Roof | 1 piece |
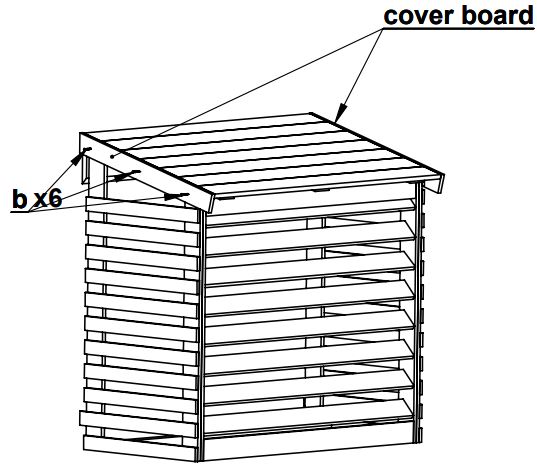
| Cover board | 2 pieces |
Product Usage Instructions
- Identify and lay out all the components.
- Start with the side walls. Attach Side wall 1 (left) to the base using the provided 25mm screws. Repeat the same for Sidewall 2 (right).
- Attach the Front wall to the side walls using the provided 30mm screws.
- Attach Support 1 to the base using the provided 30mm screws.
- Attach Support 2 to the side walls using the provided 50mm screws.
- Drill pilot holes for all screws before attaching any component.
- Attach the Roof to the top of the structure using the provided 70mm screws.
- Attach the Cover boards to the side walls using the provided 30mm screws.
Note: Please refer to the user manual for detailed diagrams and illustrations.