![]() 10259433 Floriel White Rimless Toilet Combination
10259433 Floriel White Rimless Toilet Combination
Instruction Manual FLORIEL
Art. 10259433 . Art. 10557255
Art. 10654340
Version: 03/23
Contents
10259433 Floriel White Rimless Toilet Combination
Assembly Instructions Rimless washdown two piece toilet  Read the instructions carefully before use and keep them for future reference! For daily cleaning use only commercial bath cleaners. Lime scale and soap residue can be removed with commercial lime remover or vinegar cleaners.
![]() NOTE: We recommend using an underlay to protect the ceramic and tiles during installation.
NOTE: We recommend using an underlay to protect the ceramic and tiles during installation.  Installation situation: Mark on the floor the centre of the mounting holes found on the exterior of the WC ceramic.
 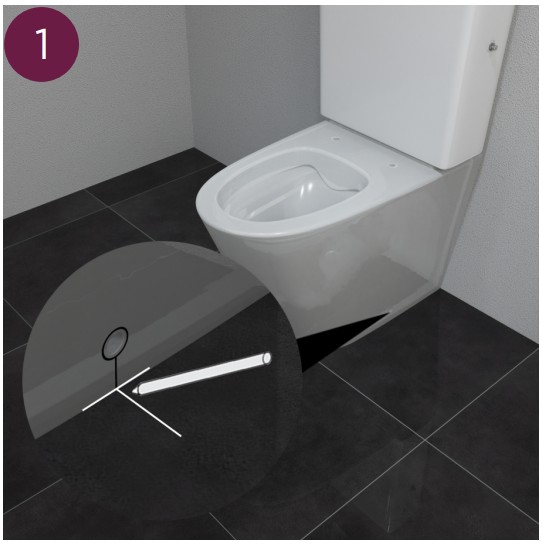 Place the soundproofing pad along the line
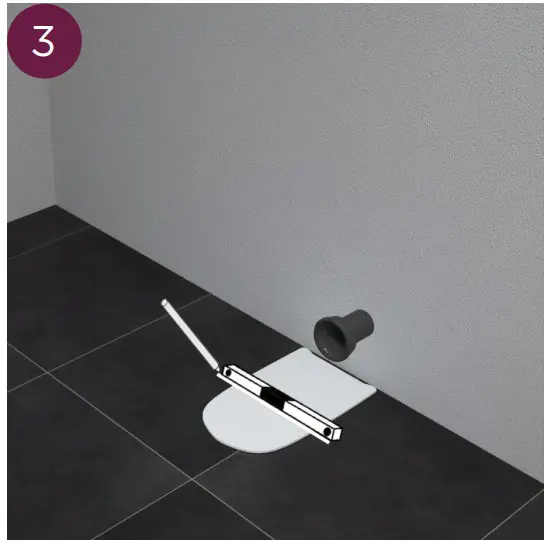
 Connect the two marks by drawing a straight line.
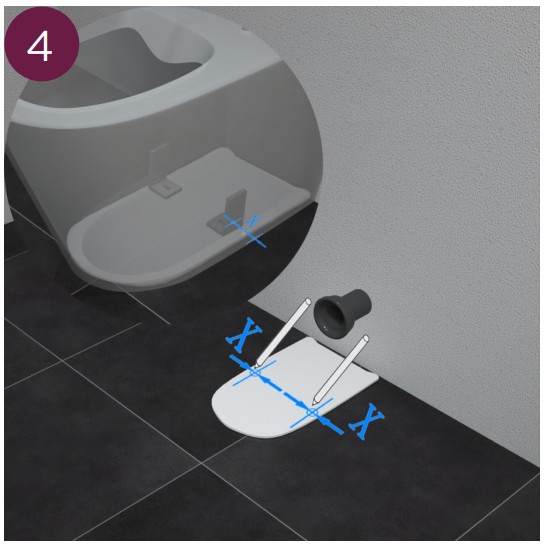
 Determine the position of the centre holes, width range (within tolerance ): X=6.9cm±1cm
 Drill 2 holes into the marks and insert the dowels.
  Screw the L-shaped fixing bracket in place.
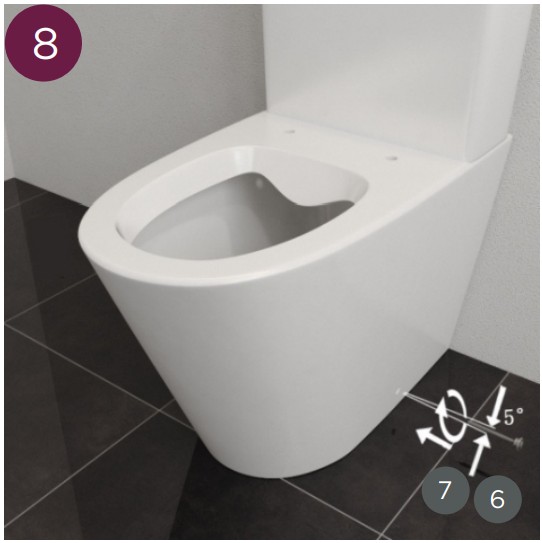
 Position the toilet.
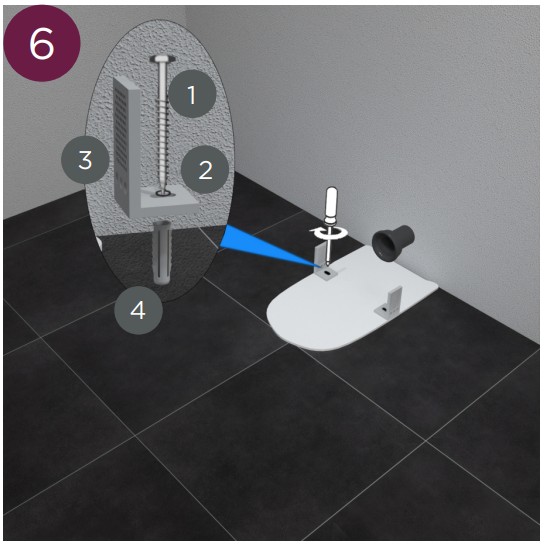
 Connect the toilet with the L-shaped fixing bracket with (6) and (7).
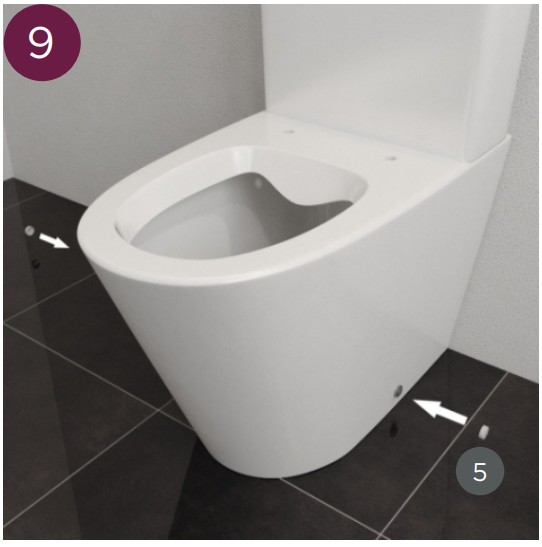
 Cover the screw with a cover cap (5).
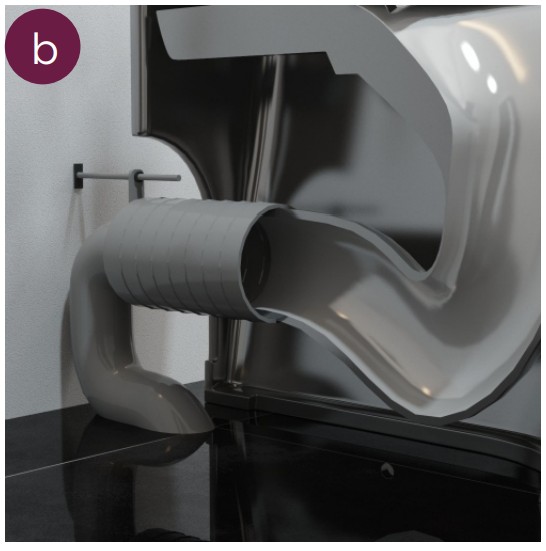
 Horizontal outlet
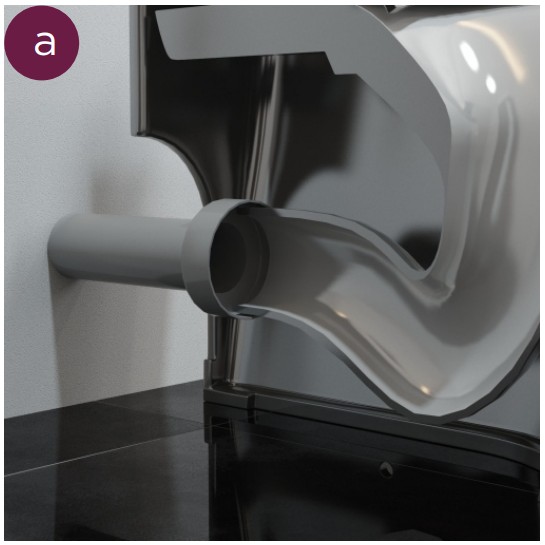 Vertical outlet
Assembly instructions cistern and valves
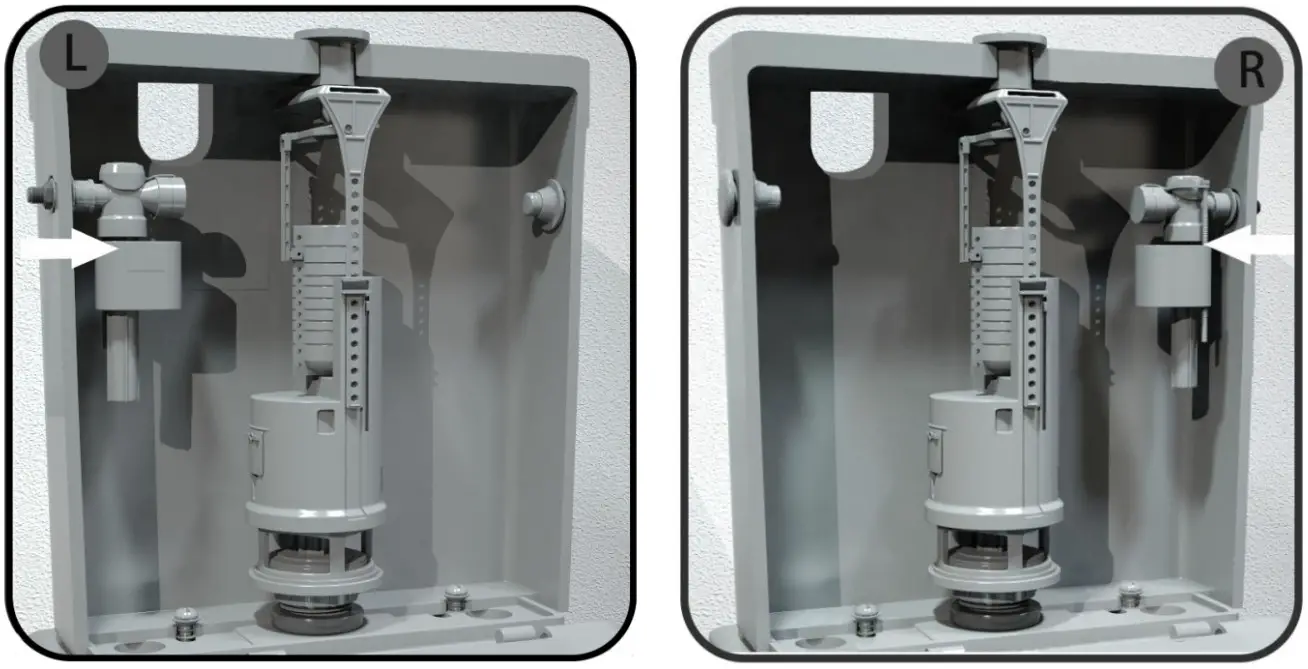
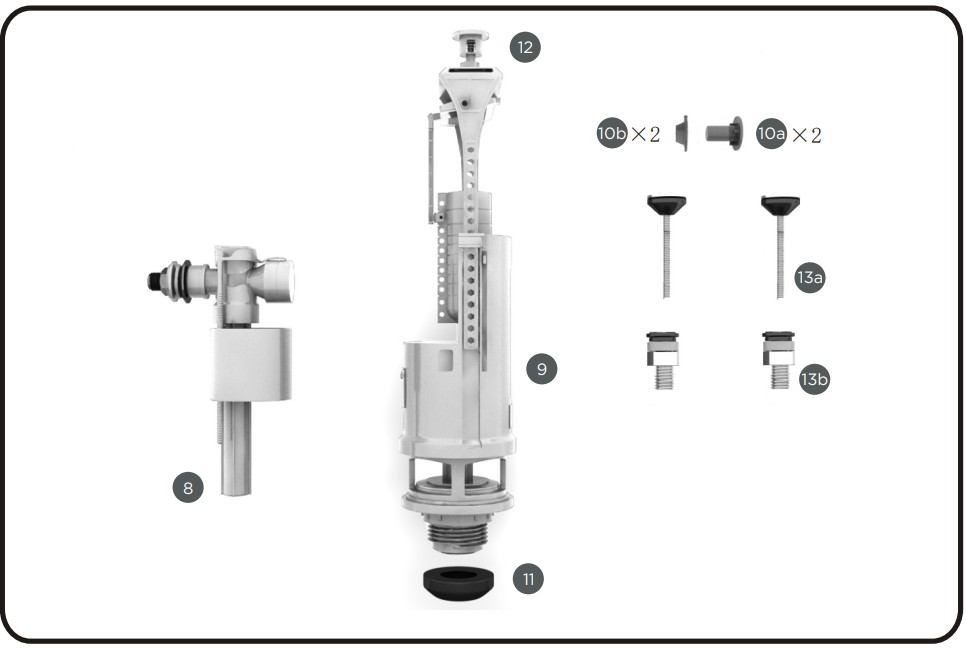 “R&T filling valve”, A1420 and A2706 (included in the scope of delivery)
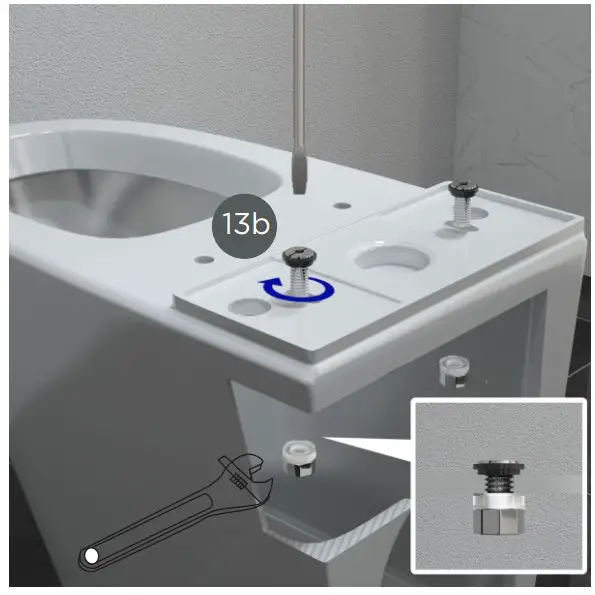 Install the base of the mounting screw(13b) on the toilet pan.
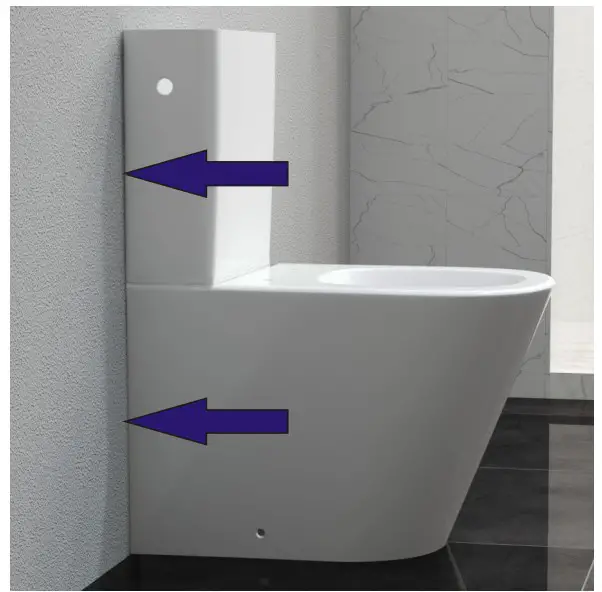 Put the cistern on the pan and make sure the mounting holes in the tank match the screw base on the pan perfectly, then move the pan and tank against the wall at the same time, after that install the screws at the same time.
 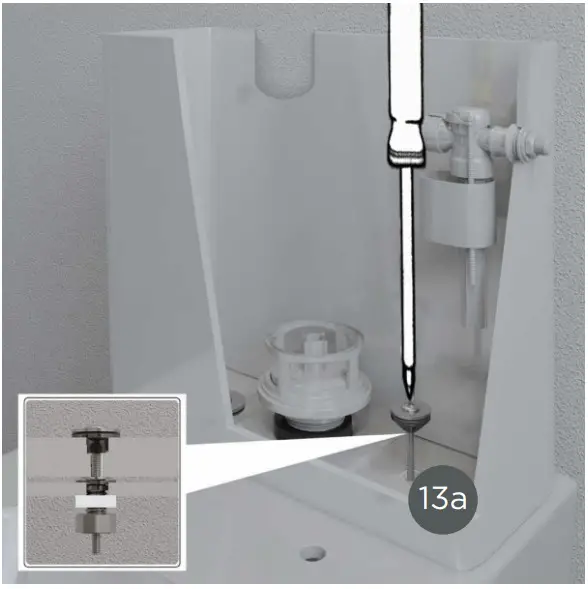 Fasten the cistern using the included bolt.
 Install the flush valve (outlet valve).
 Compatible with: “Geberit filling valve”, type 380 and type 290 (not included in the scope of delivery)
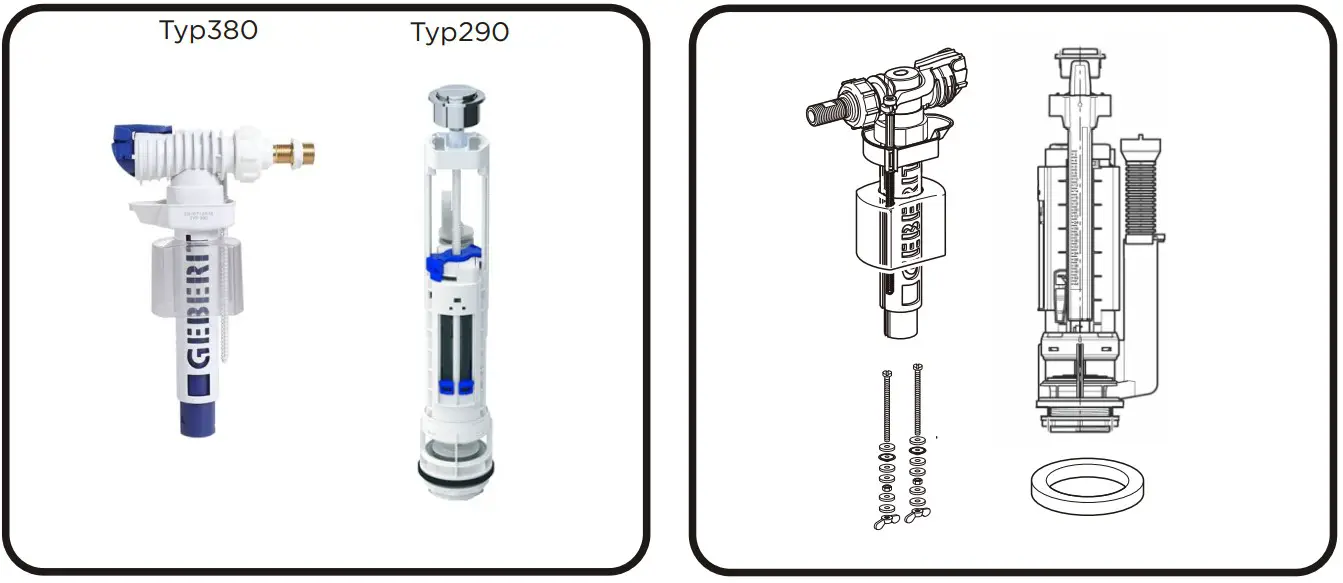 Type 380+Type290
Assembly instructions WC seat (Spare part available #10329391) 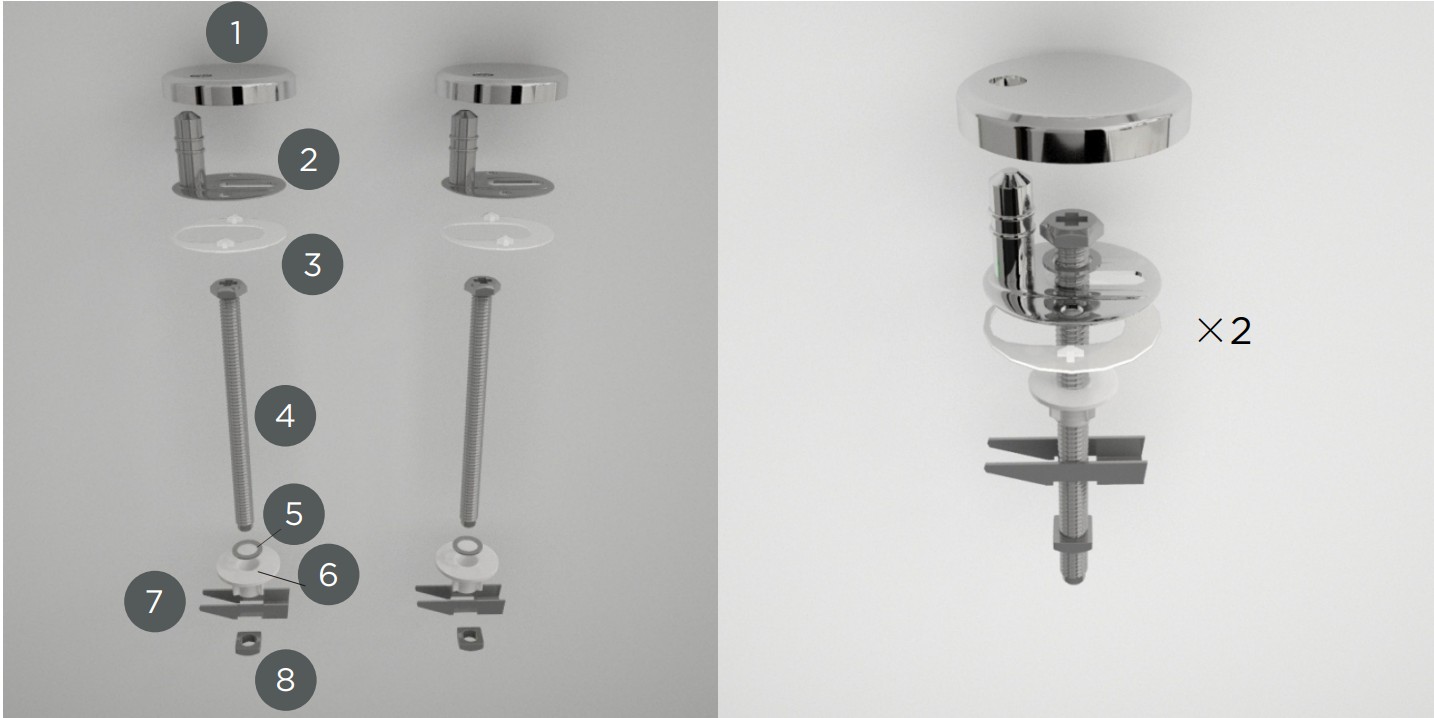 Adjust the folding pin (7) and bolt (4) to the parallel direction, then plug them into the designated holes on the toilet.
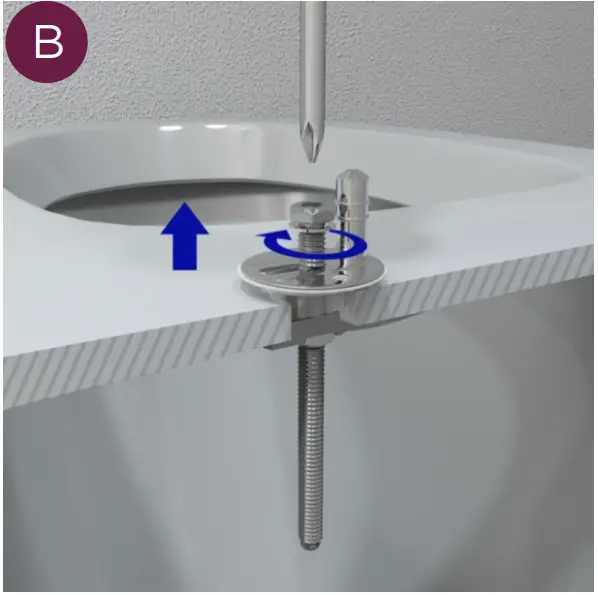
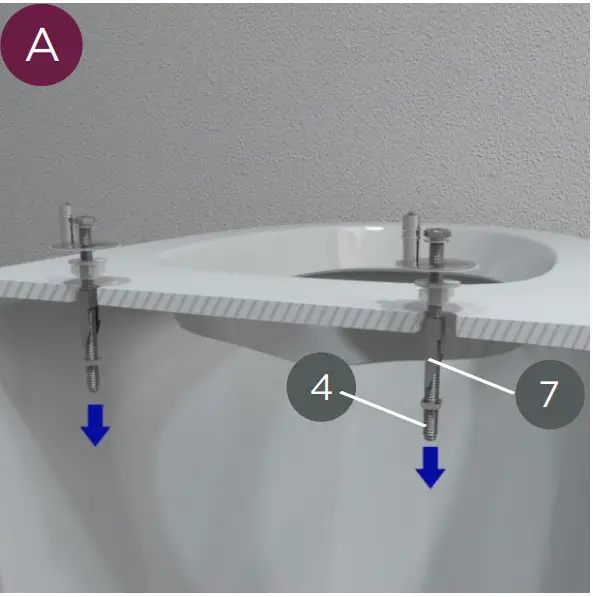 Tighten the bolt.
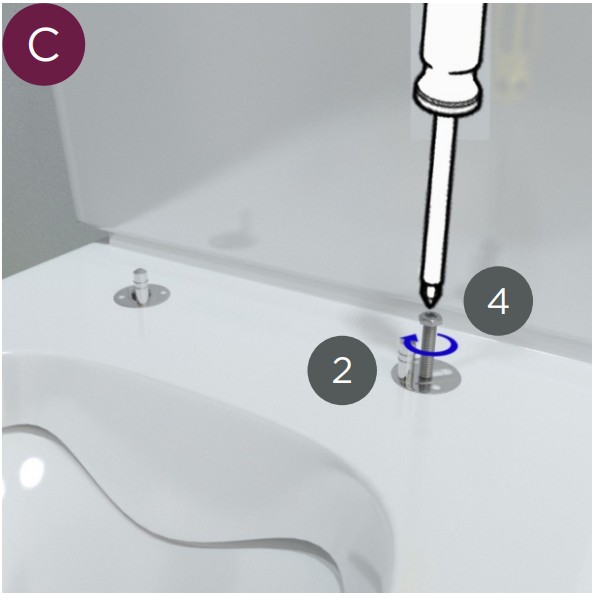
 Screw the stainless steel screws (4) to the mounting plate (2) so that the mounting plate can still move easily.
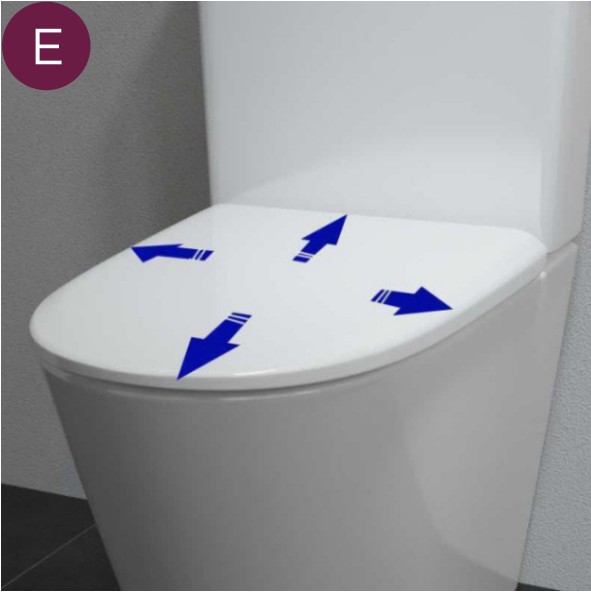
 Push the WC seat onto the pins of the mounting plate (2) until it snaps into position.
 Align the WC seat on the toilet.
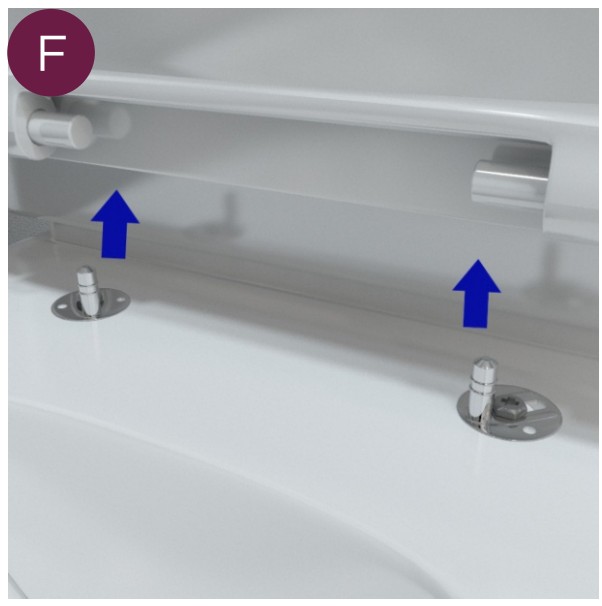
 Align the WC vertically towards the top. Next, pull the seat up vertically to remove it.
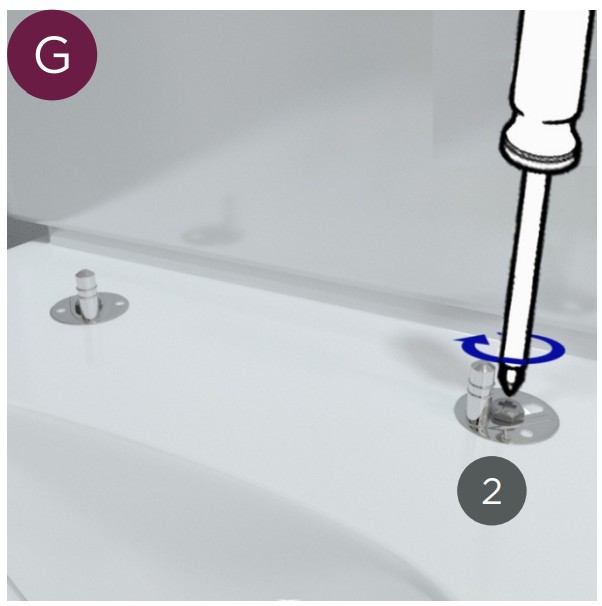
 Now, screw the mounting plates (2) tight.
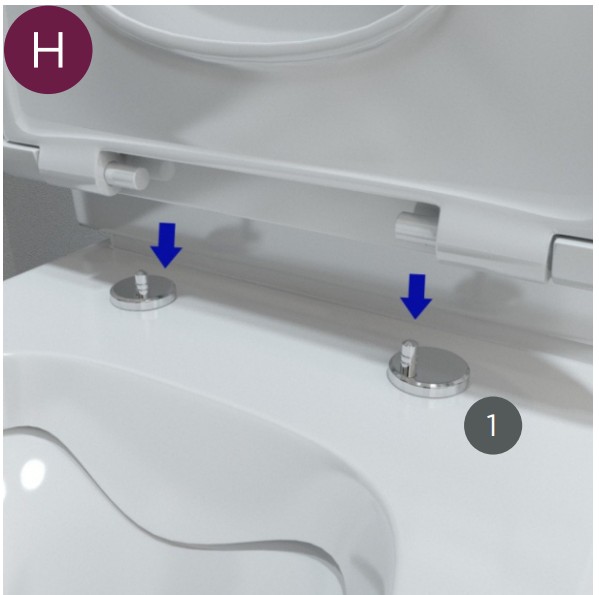
 Now, slide the cover cap (1) onto the mounting plate (2) before pushing the toilet seat back onto the pins so that it snaps into place.
![]() HORNBACH Baumarkt AG
HORNBACH Baumarkt AG
Hornbachstrasse 11
D-76879 Bornheim
www.hornbach.com