Contents
KRUX KRX0016 Astro ARGB Case

ACCESSORY PACKET CONTENTS

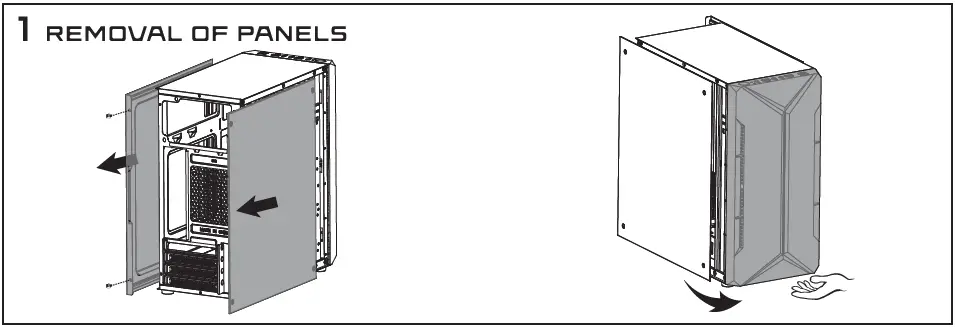
REMOVAL OF PANELS
CASE FEATURES

- A – SIDE TEMPERED GLASS PANEL
- B – FRONT PANEL
- C – SIDE PANEL
- D – POWER+ RESET BUTTON
- E – lx USB 3.0, 2x USB 2.0, HD AUDIO
INSTALLATION INSTRUCTIONS
MOTHERBOARD INSTALLATION

ADD-ON CARD INSTALLATION

- BEND A0O-ON CARD COVER
- SLIDE PCI-E CARD INTO POSITION
- SECURE PCI-E CARD WITH ADD-ON SCREW
POWER SUPPLY INSTALLATION

3,5″ AND 2,5″ DISCS INSTALLATION

- SLIDE 3,5″, 2,5″ DRIVE INTO THE BAY
- SECURE WITH SCREWS
3,5″ DISC INSTALLATION

FRONT/REAR FAN INSTALLATION

2-year manufacturer warranty
Use and warranty limitations
- The product should be used according to its intended purpose. Incorrect use can damage the product and endanger the life of the user;
- Excessive humidity, dust and other contaminations can result in product damage which is not covered by the warranty;
- The warranty does not cover mechanical damage to the product;
- Avoid exposure to rapid changes in ambient temperature. Should they occur, wait approx. 30 minutes before using the product until the temperature is leveled;
- You can find the Warranty Terms and Conditions in”Support” at https://krux.tech/
ENTITY RESPONSIBLE: COOLING SP. Z O.0. UL. SOKOLOWSKA 24 05-806 SOKOLOW, POLSKA
- TEL. +48 22 292 01 30
- BD0: 000020025