![]()
LED SOLAR STREET LIGHT 8W-15W-40W WITH REMOTE CONTROL
Contents
Features
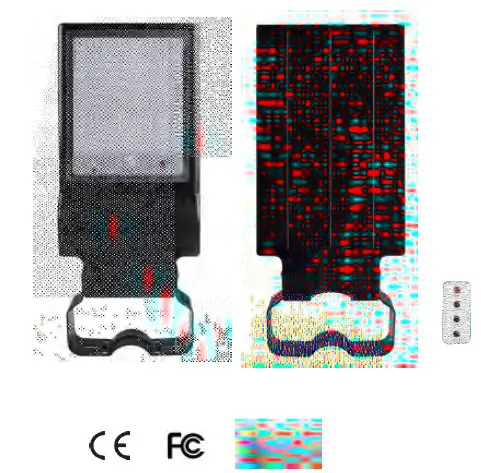
- All-in-one design LED solar street light, slim and simple style, easy to install.
- Support multi installation methods with different installation accessories.
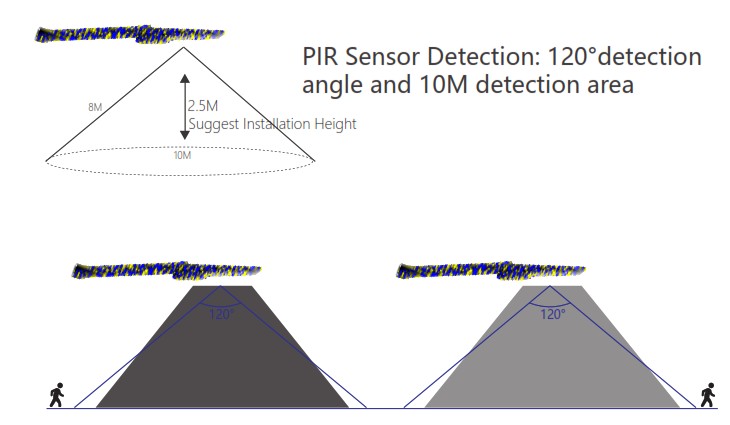
- Intelligent PIR sensor, 120°detection angle and 8-10M detection area, the light will turn on automatically when <8LUX.
- Support changing 2 working modes by switch, and 3 working modes by remote control to save energy.
- Free to tilt the lamp 20° up and 10° down to get the best sun exposure.
- Use high quality mono-crystalline silicon solar panel with tempered glass laminated, 23% photoelectric conversion rate.
- Use 32700 LiFePO 4 batteries, which have a large charge storage capacity during energy conversion, 2000 charge-discharge cycles, overcharge protection, over-discharge protection, short circuit protection, inflation & explosion protection.
- High quality ABS materials, anti-UV, long life span.
SPECIFICATIONS
| Product Model: | OC-SL-010A | OC-SL-015A | 40W |
| Power: | 10W | 15W | OC-SL-040A |
| Lumens: | 1500LM | 2700LM | 6200LM |
| LEDs: | SMD2835*40pcs | SMD2835*40pcs | SMD2835*96pcs |
| Solar Panel: | 5V/7.4Wp, mono-crystalline silicon solar panel | 9V/10Wp, mono-crystalline silicon solar panel | 13.5V/21Wp, mono-crystalline silicon solar panel |
| Battery: | 32700 LiFePO 4 batteries, 6000mAh/3.2V | 32700 LiFePO 4 batteries, 6000mAh/6.4V | 32700 LiFePO 4 batteries, 12000mAh/9.6V |
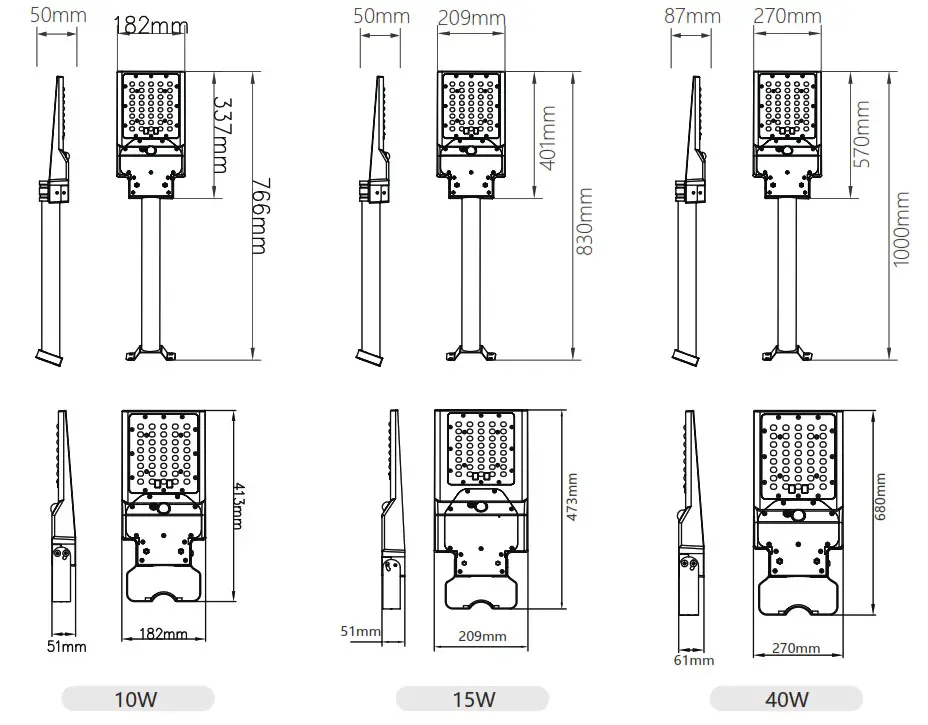
| Dimension: | 413*182*51mm | 473*209*51mm | 680*270*61mm |
| Weight: | 1.66Kg | 2.07Kg | 4.7Kg |
| Charging Time: | 4 hours | ||
| Run Time: | Up to 3 nights | ||
| Induction mode: | Light control+Motion sensor+Remote control | ||
| Working Modes: | 3 working modes | ||
| PIR Sensor Detection: | 120°detection angle and 8-10M detection area | ||
| Remote control Detection: | 10-15M | ||
| Beam Angle: | 70°x140° | ||
| IP Degree: | IP65 | ||
| Housing Color: | Black | ||
| Housing Material: | ABS+Iron | ||
| Working Temperature: | -20℃~45℃ | ||
| Storage Temperature: | -20℃~45℃ | ||
PRODUCT DIMENSION
OPERATION GUIDE
The default mode of the product is OFF mode. Press the back button to adjust modes when using the light:
- 1st press for Mode 1
- 2nd press for Mode 2
- 3rd press for Mode 3
- 4th press for OFF

Working mode1
The lamp flashing when 1st pressing the switch. Lamp turns into full light for human detection. 25 seconds after human left. lamps turn into half light until daytime.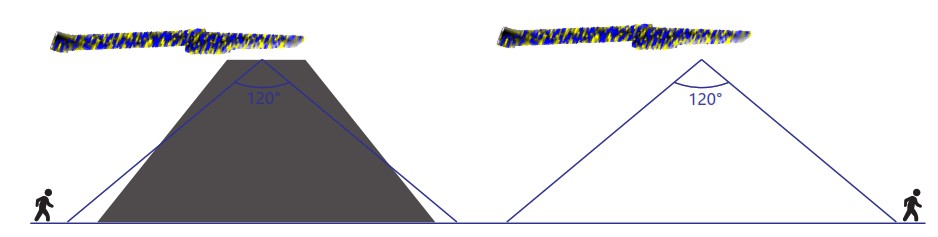
Working mode2
The lamp double flashing when 2nd pressing the switch. Lamp turns into full light for human detection. 25 seconds after human left. lamps turn off until daytime.
Working mode3
The lamp triple flashing when 3rd pressing the switch. Lamp turns into full light for 6 hours. 6 hours later, the lamp turns into Working Mode 1 automatically, lamps turn off until daytime.
INSTALLATION
Press the button and select a desired mode then choose a place that can get enough sunshine to install the light, the more sunshine it gets the longer it can illuminate.
LED SOLAR STREET LIGHT WITH LAMP-POST Step 1 : Drill a hole with an 8MM hammer drill, and hammer the expansion screw into the hole with a hammer. Recommended installation height ( 2.5-3 meters above theground).
Step 3 : The expansion screw to fix the bracket; Press the switch.
select the function you need, the installation is complete.
If it needs to be installed on the pole, insert the hoop into the hole of the light pole and then onto the electric pole. Finally, use a screwdriver to lock the hoop.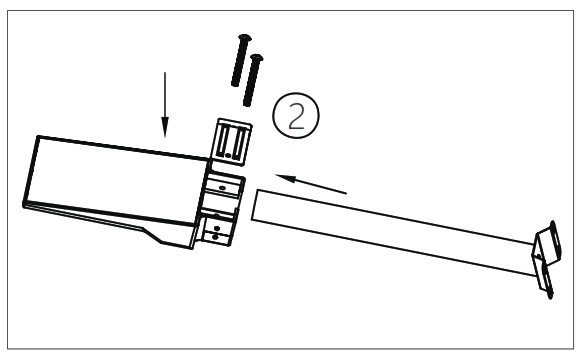 Step 2 : Insert the cross arm of the lamp pole into the hole of the tail cover of the lamp, and fix the outer collar tightly with 2 bolts.
 LED SOLAR STREET LIGHT WITH U-SHAPE BRACKET
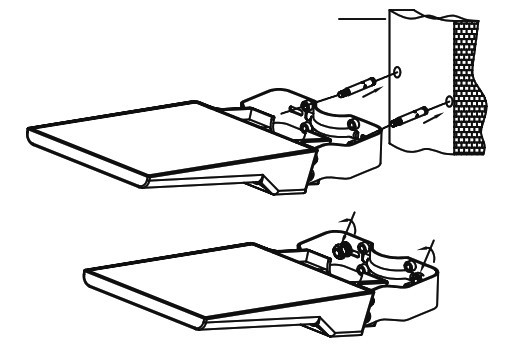
Wall Mounted
Drill holes with a 6mm impact drill, then hammer the expansion screws into the hole with a hammer, then fix the lamp on the expansion screw and lock it; Press the switch key to make the light entering the power-on status, and select the desired working mode with the switch button or the remote control, then the installation is completed. Suggested installation height(10W/15W:3m-5m above the ground) (40W:4m-6m above the ground)
Pole Mounted
Step 1: Use a 6-angle wrench to fasten the hoop to the U-shaped bracket with 4 bolts;
Step2: Adjust the lamp to the desired angle and fix the left and right sides with locking the 4 screws;
Press the red switch key to make the light entering the power-on status.
Then select the desired working mode with the switch button or the remote controland, the installation is complete. Recommended installation height (10W/15W:3m-5m above the ground) (40W: 4m-6m above the ground)
PACKAGE
| Product Model | PCS/BOX | G.W./BOX(Kg) | BOX Size(mm) | PCS/CTN | G.W./CTN(Kg) | CTN Size(mm) |
| OC-SL-010A | 1 pack | 1.86 | 460*215*83 | 5 | 11.3 | 475*230*435 |
| OC-SL-015A | 1 pack | 2.24 | 510*235*83 | 5 | 13.2 | 525*250*435 |
| OC-SL-040A | 1 pack | 5 | 692*302*88 | 3 | 15 | 704*290*314 |
APPLICATION
Driveways, Patios, Backyards and Pool Areas, Landscapes and Gardens, Perimeter Walls, Streets around the house, Poles, Garage, Emergency exits, Entrances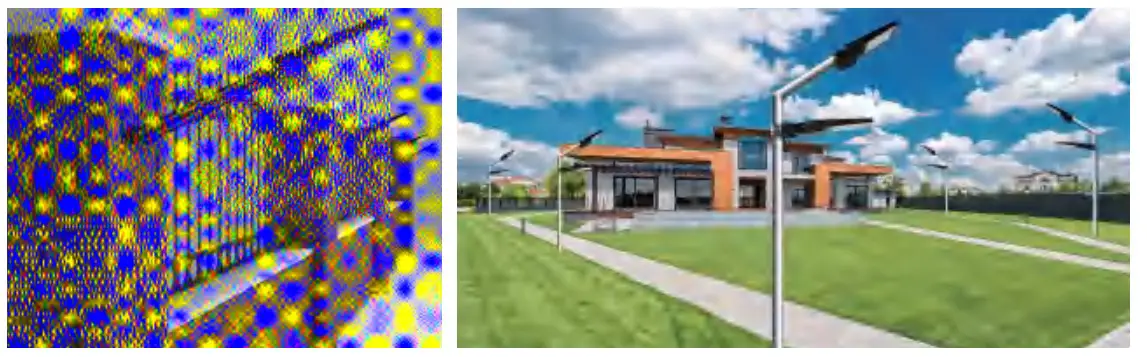 Tips
Tips
- It is recommended to turn off the light and charge it under direct sunlight for1-2 days before the first use. Make sure the product has enough power.
- During the installation, please make sure the landscape light is installed under direct sunlight where there is no shade or eave to shelter the solar panel. Otherwise, the lighting time will be shorter.
- Whether the solar landscape light can produce the best lighting effect or not depends on sunlight intensity, geographical location, weather conditions, seasons and other conditions.
- Please follow the installation instruction to operate correctly.
FCC warning
This device complies with Part 15 of the FCC Rules. Operation is subject to the following two conditions:
(1)This device may not cause harmful interference.
(2)This device must accept any interference received, including interference that may cause undesired operation.
Changes or modifications not expressly approved by the party responsible for compliance could void the user’s authority to operate the equipment.
Note: This equipment has been tested and found to comply with the limits for a class B digital device,pursuant to Part 15 of the FCC Rules. These limits are designed to provide reasonable protection against harmful interference in a residential installation.
This equipment has been tested and found to comply with the limits for a Class B digital device, pursuant to part 15 of the FCCRules. These limits are designed to provide reasonable protection against harmful interference in a residential installation. This
equipmentgenerates, uses and can radiate radio frequency energy and, if not installed and used in accordance with the instructions, may cause harmfulinterference to radio communications. However, there is no guarantee that interference will not occur in a
particular installation. If thisequipment does cause harmful interference to radio or television reception, which can be determined by turning the equipment off and on, theuser is encouraged to try to correct the interference by one or more of the following
measures:
—Reorient or relocate the receiving antenna.
—Increase the separation between the equipment and receiver.
—Connect the equipment into an outlet on a circuit different from that to which the receiver is connected.
—Consult the dealer or an experienced radio/TV technician for help.
Shenzhen OECO Technology Co.,Ltd
+86 755 28455752
www.oecotech.com
![]() Add: Building 5, Mashaxuda Hi-Tech Industrial Park, Pingdi Street, Longgang District, Shenzhen, China
Add: Building 5, Mashaxuda Hi-Tech Industrial Park, Pingdi Street, Longgang District, Shenzhen, China