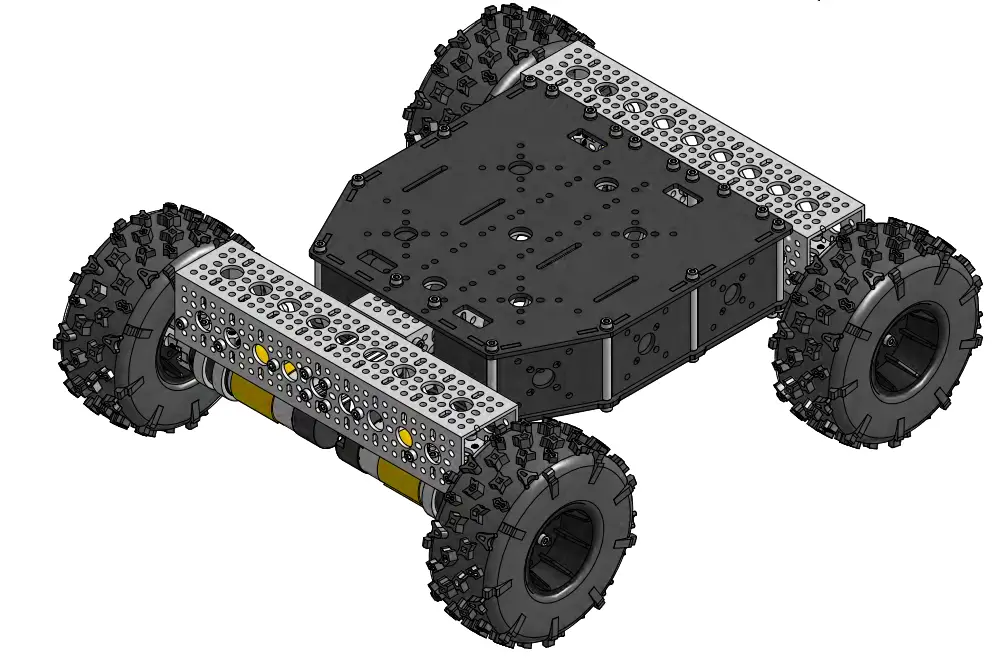
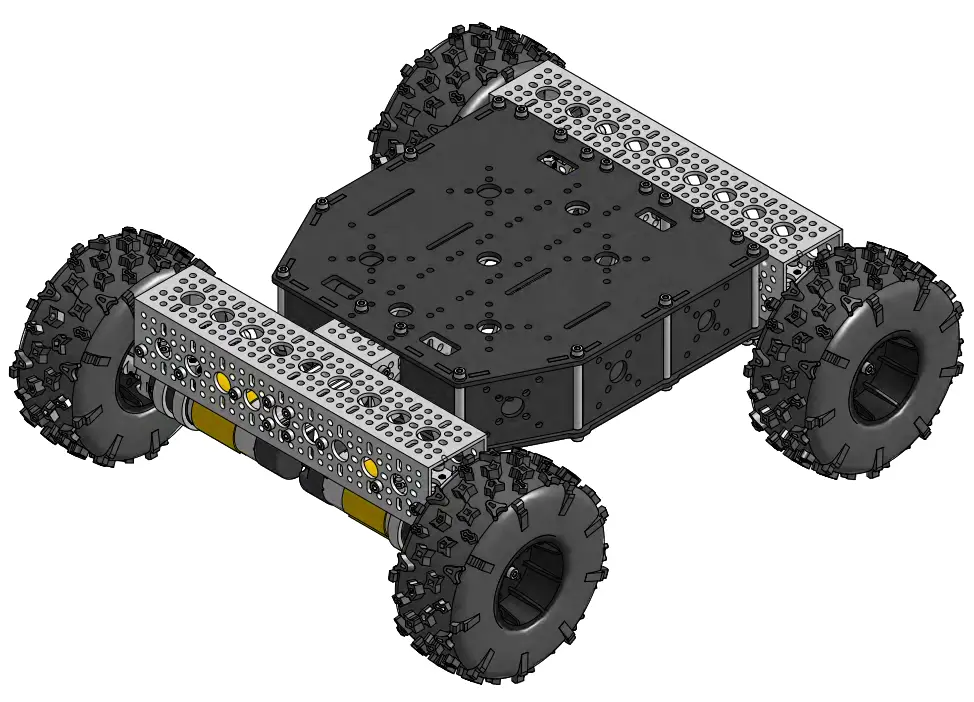
goBILDA 3209-0003-0001 Hammerhead Chassis
Contents
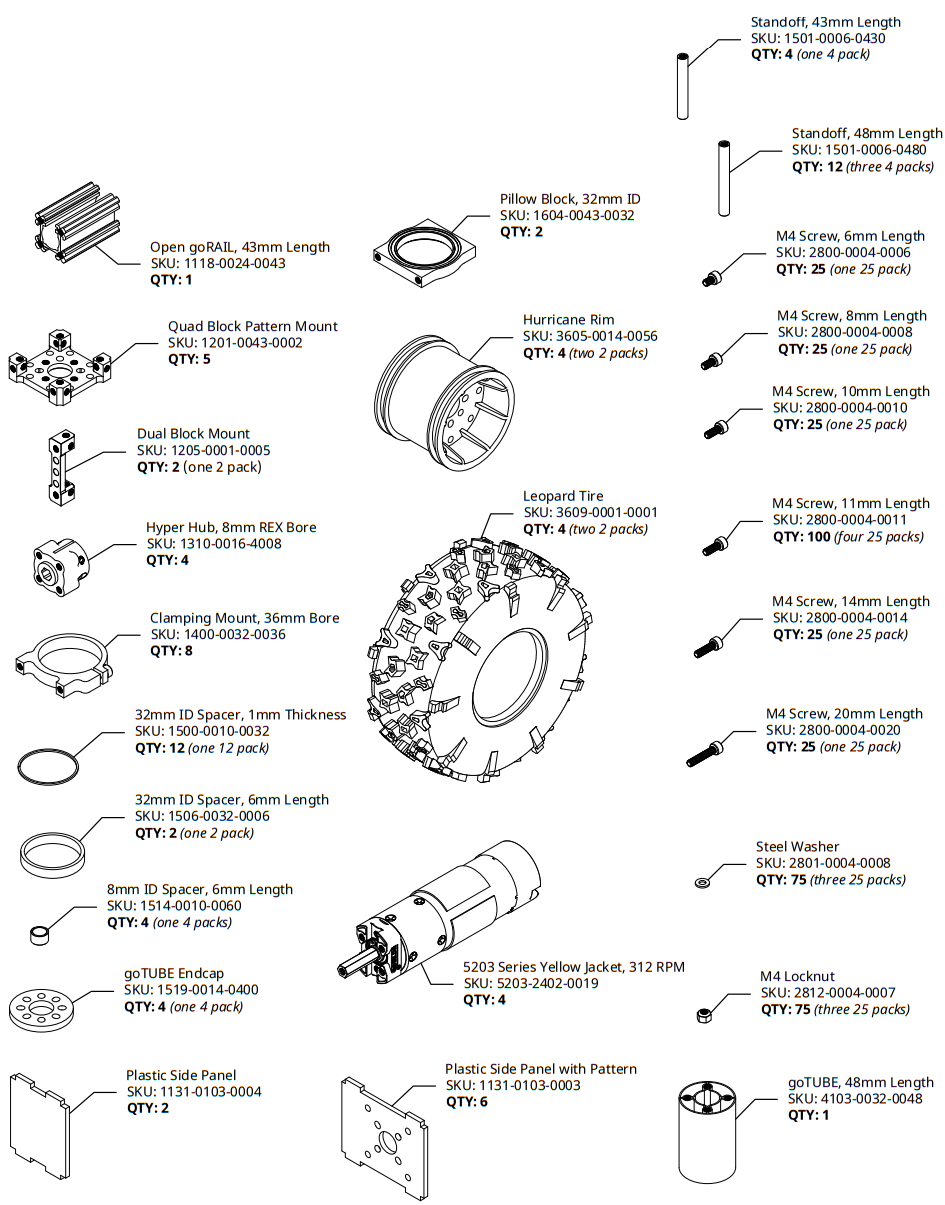
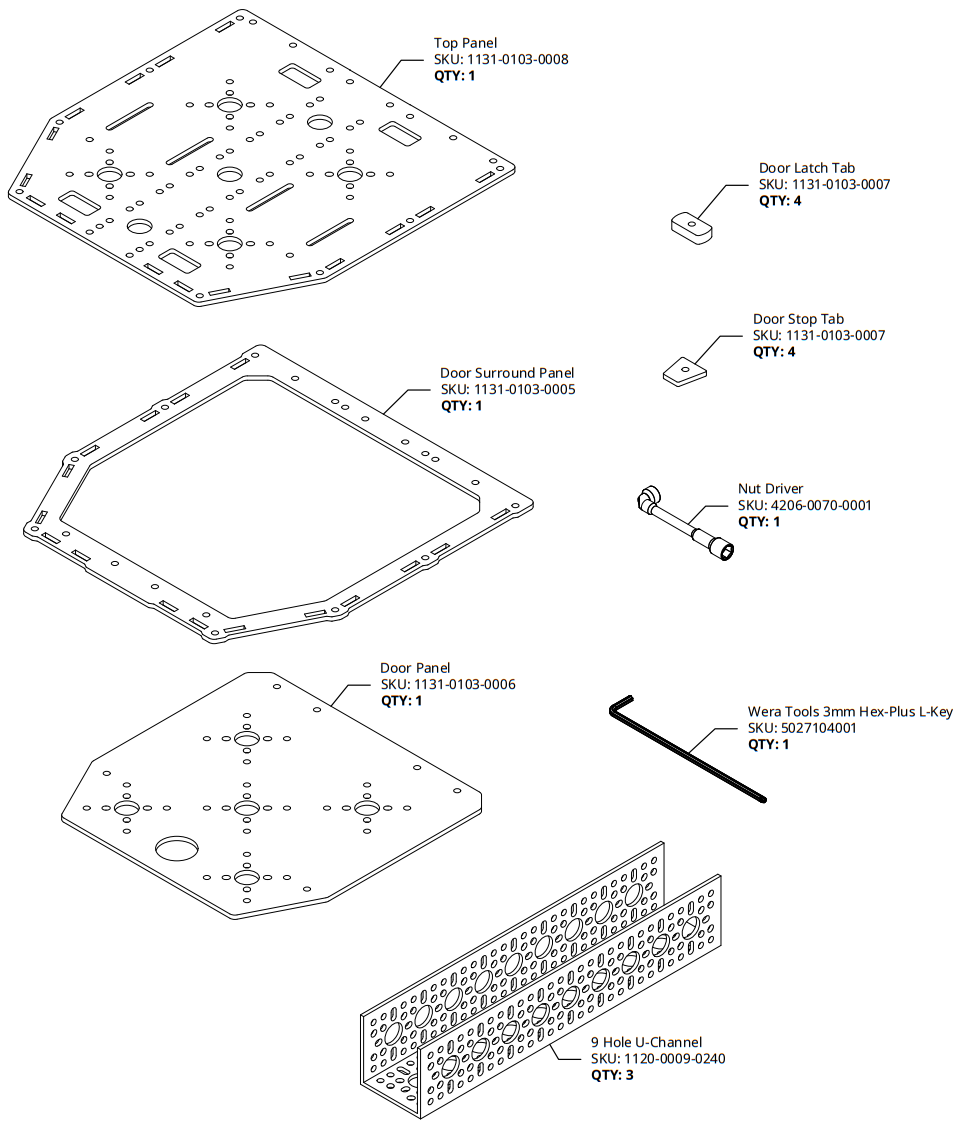
Kit Contents
Assembly Instructions
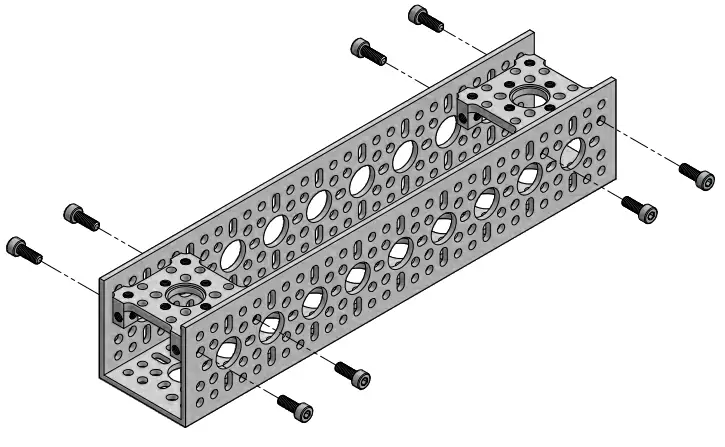
STEP 1
Use eight 11mm length screws to attach two Quad Block Pattern Mounts to a U-channel.
Note that they are mounted one hole down from the edge of the channel.
Repeat this step for a total of two of these assemblies. We will call these the “cross-bars”.
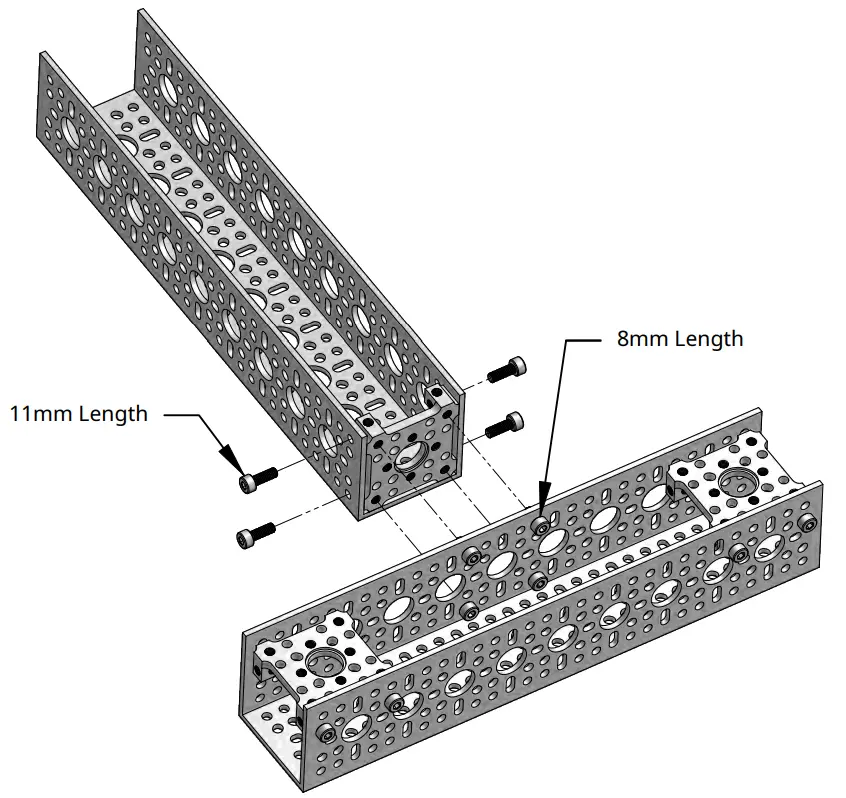
STEP 2
Use four 11mm length screws to attach a Quad Block Pattern Mount to the end of the unused U-channel.
Then attach that assembly to one of the cross-bars using four 8mm length screws.
This will be the frame of your chassis.
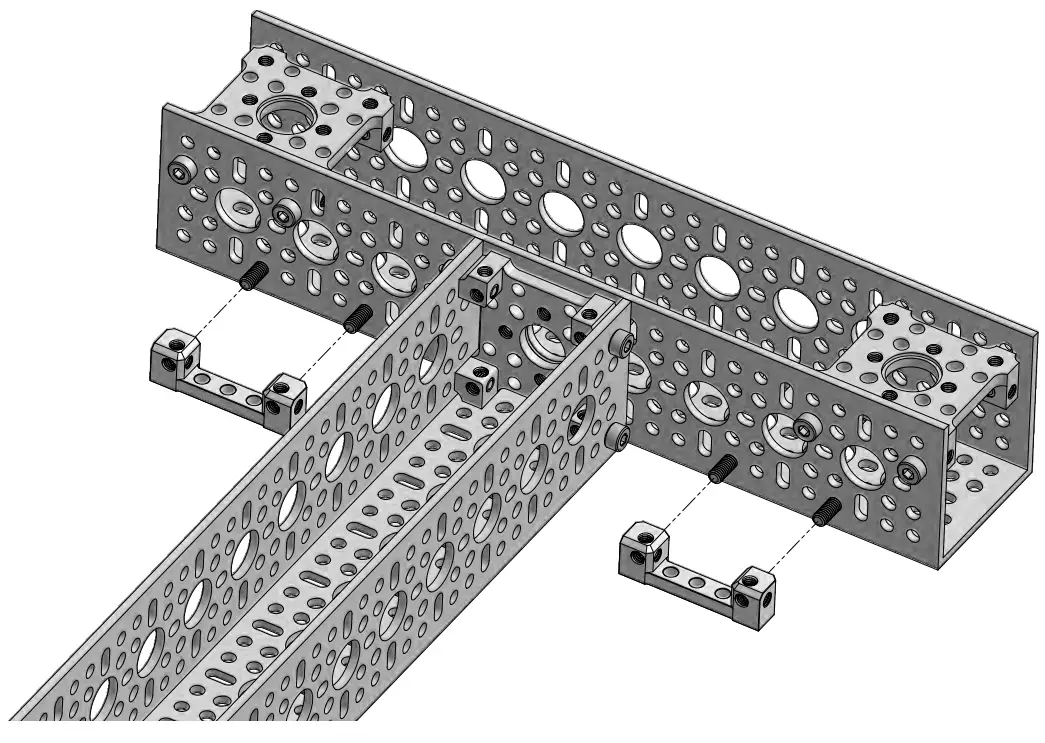
STEP 3
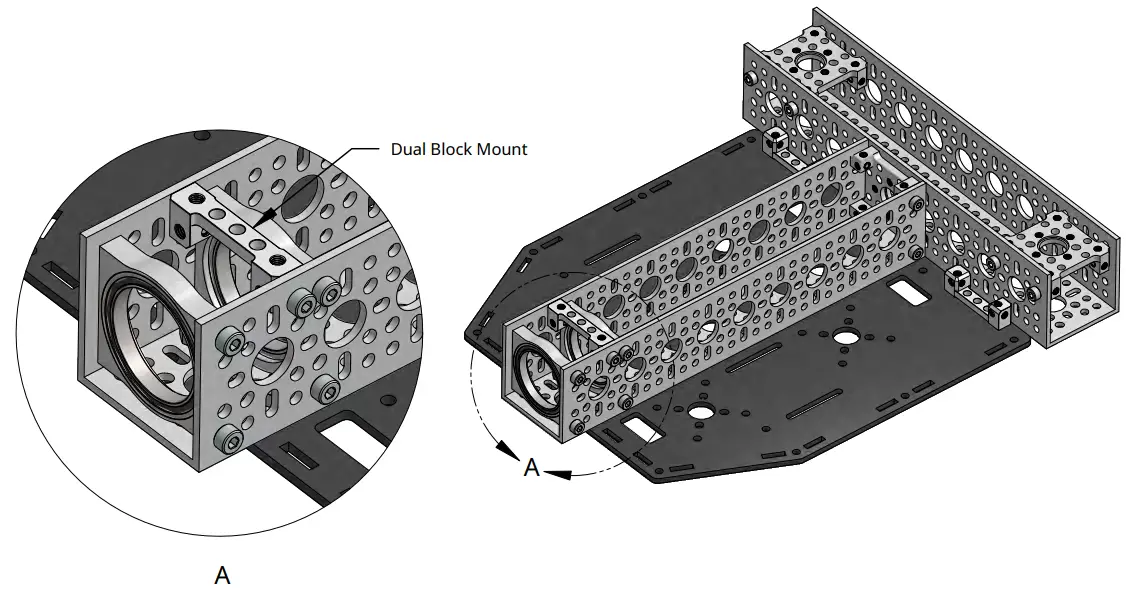
Attach two of the 1-2 style Dual Block Mounts to the frame with four 11mm length screws.
Pro Tip:
Take careful note of the orientation of the Dual Block Mounts.
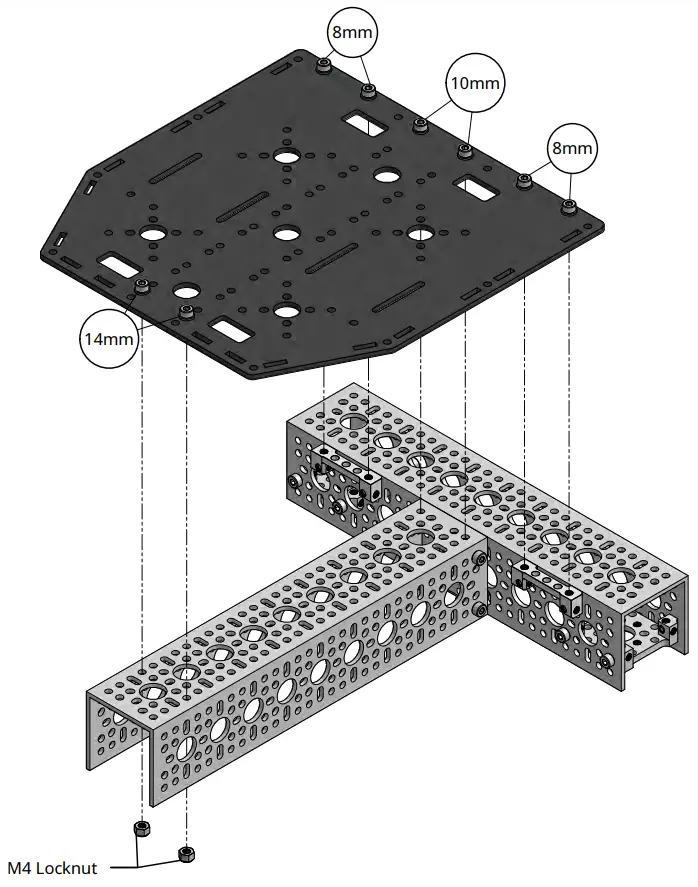
STEP 4
Use four 8mm length screws, two 10mm length screws and two 14mm length screws (each with a washer) to attach the top plate to the frame.
Pro Tip:
While it does not really matter we prefer to face the plastic so that the rough side is facing out (away from the channel).
STEP 5
Use eight 8mm length screws to mount the two 32mm bore pillow blocks. Ensure they are oriented so that the sides without the black ring are facing each other.
Then use two 11mm length screws to attach a Dual Block Mount.
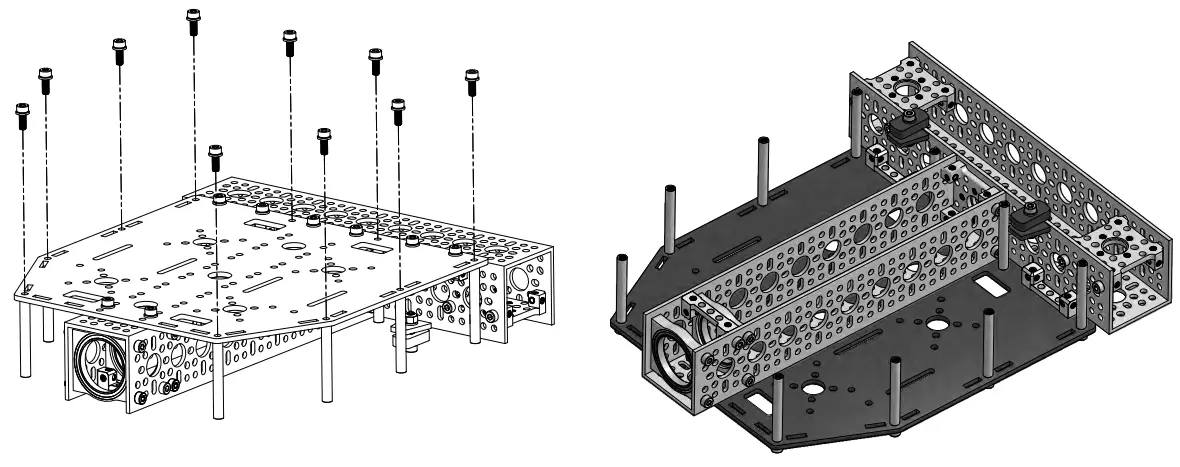
STEP 6
Use ten 11mm length screws (each with a washer) to attach the 48mm length standoffs to the top plate.
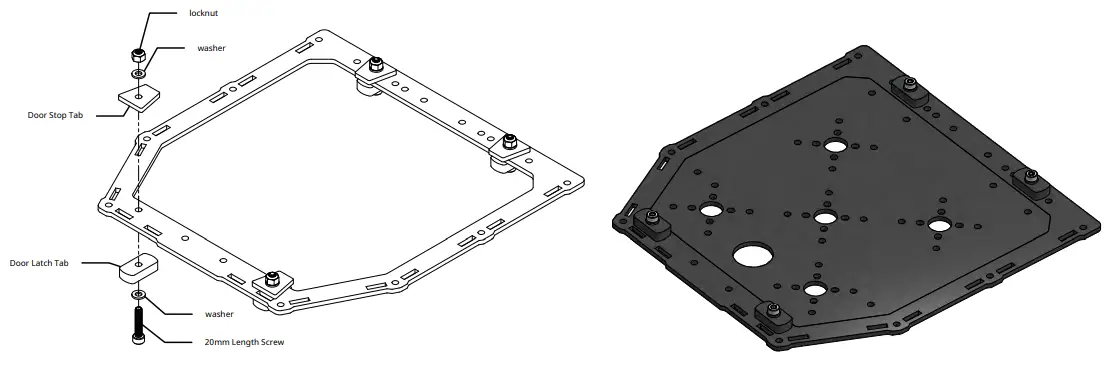
STEP 7
Attach four door latch assemblies using 20mm Length screws (each with a washer). You can then install the door into the door frame by rotating each door latch out of the way.
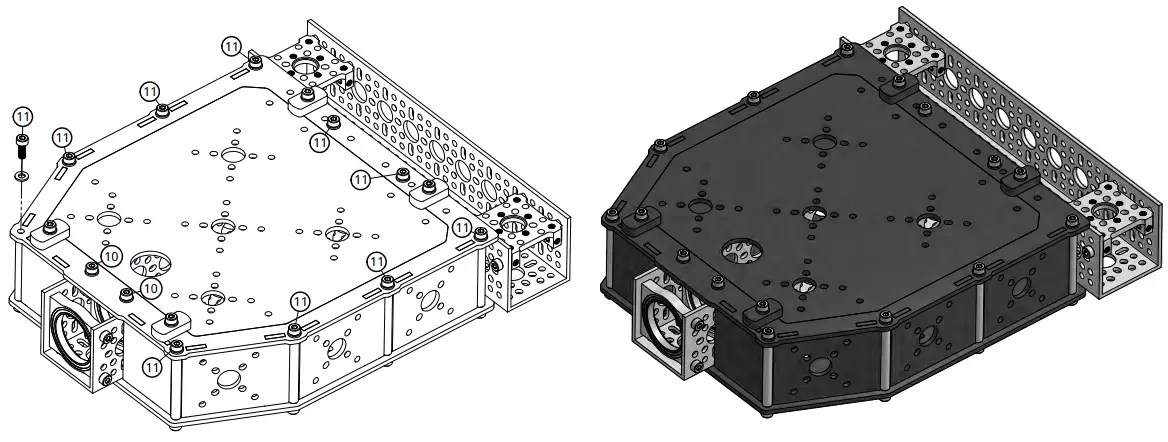
STEP 8
Use ten 11mm length screws and two 10mm length screws (each with a washer) to secure the bottom panel assembly to the chassis.
STEP 9
Use four 14mm length screws (each with a washer) to fasten the goTUBE Endcap to the end of the 48mm length goTUBE. Then slide three 32mm ID black plastic spacers onto the goTUBe.
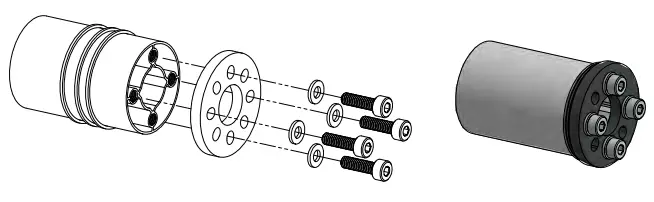
STEP 10
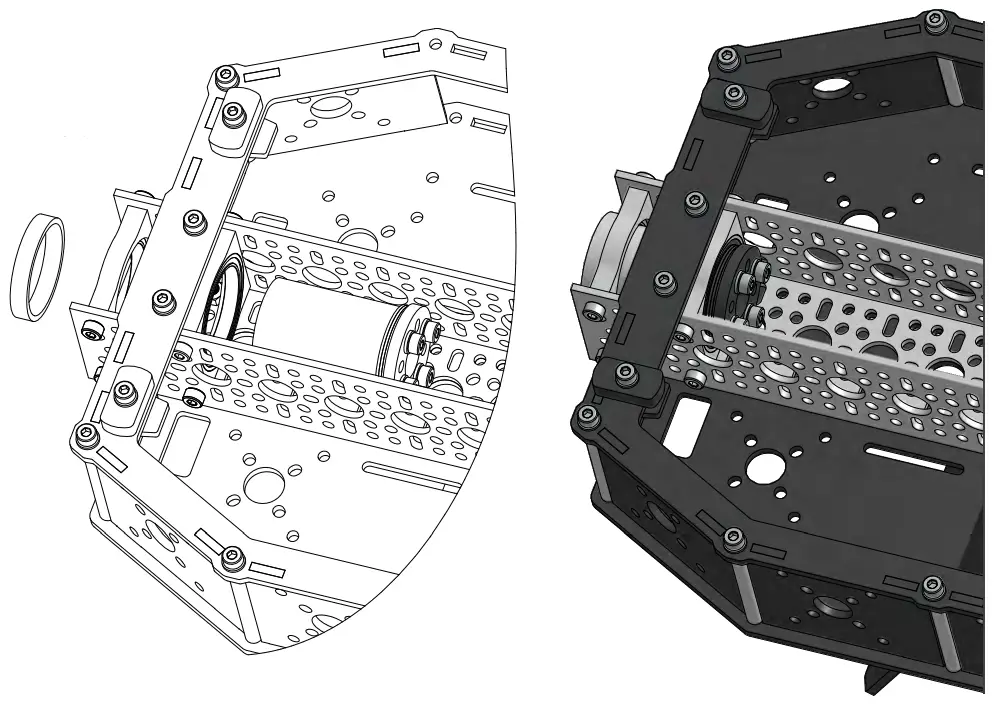
Insert the goTUBE assembly into the 32mm ID pillow blocks from within the chassis.
Slide the 32mm ID 6mm length aluminum spacer onto the protruding goTUBE end.
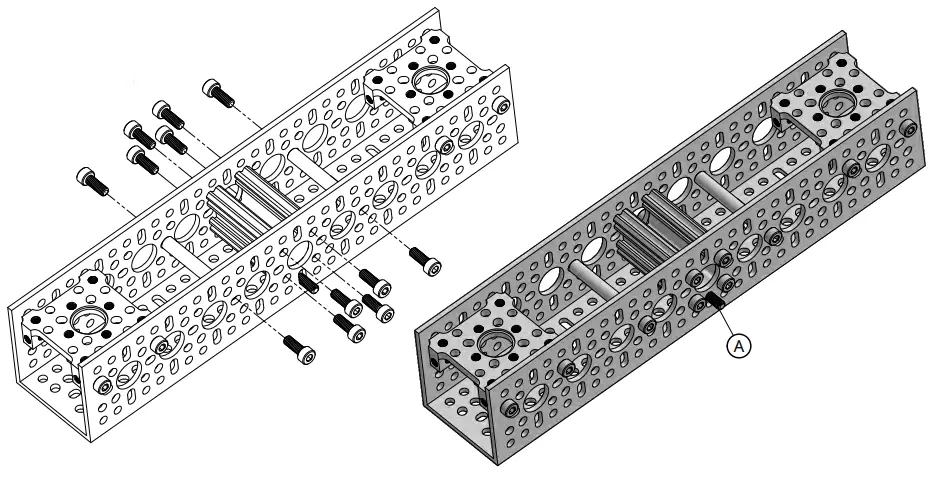
STEP 11
Attach two 43mm length standoffs in the unused cross-bar using four 11mm length screws.
Insert an 11mm length screw facing out in position “A” in the image to the far right. While this screw will not fasten to anything in this step, adding it here now will make the next step easier. Given the screw is loose be careful with this assembly until it is fastened.
Use eight more 11mm length screws to mount the 43mm length Open goRAIL inside the channel.
STEP 12
Attach the cross-bar from the previous step to the goTUBE assembly using four 11mm length screws. One of the screws (“Screw A” from the previous step) should already be in the channel.
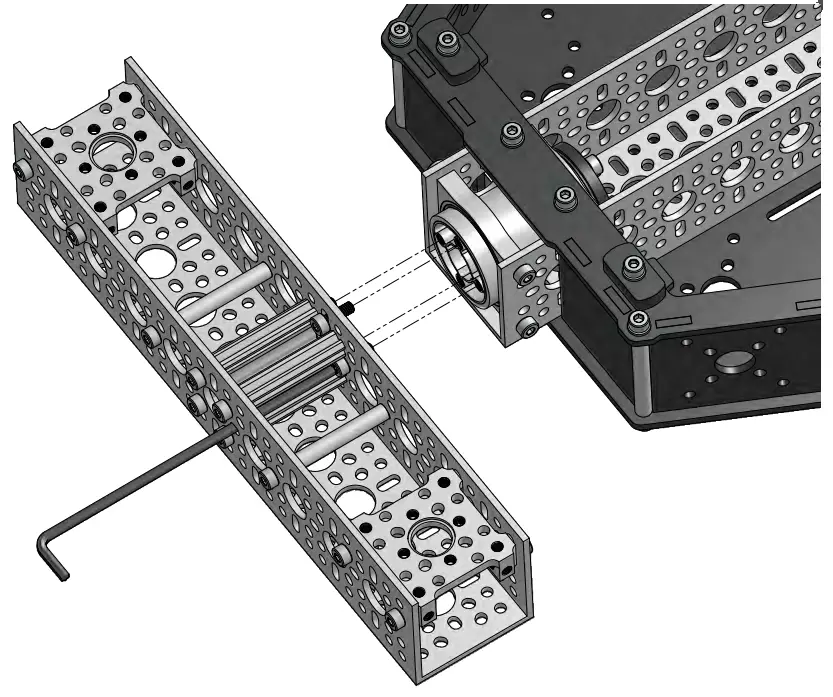
Tech Tip:
We’ve put the open side of the Open goRAIL facing the open side of the channel so you can run wires from the motors into the box.

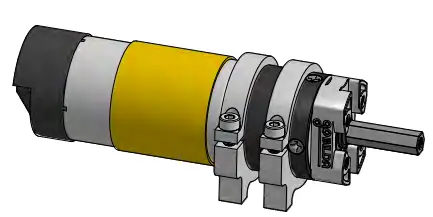
STEP 13
Slide two clamping mounts onto one of the gear motors. The first can be slid all the way until it bottoms out against the motor – its pinch bolt can be tightened now. The second can remain loose for now.
Do this for the other 3 motors as well.
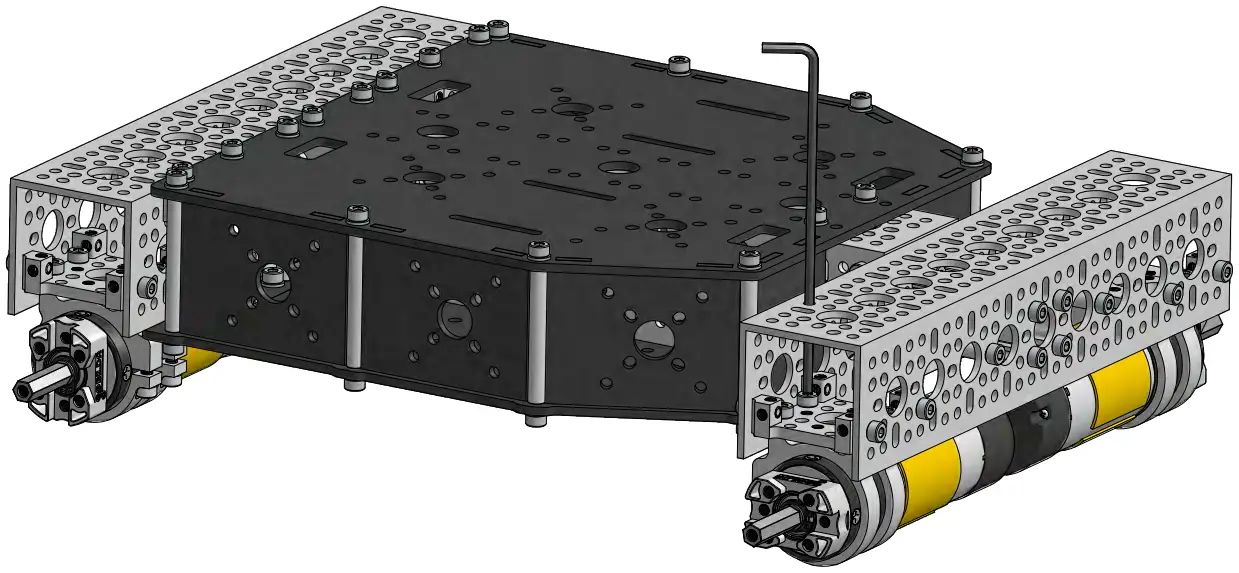
STEP 14
Using sixteen 11mm length screws, attach the motor assemblies to the Quad Block Pattern Mounts of the cross-bars. Then tighten the pinch bolt of the clamping mounts which had been left loose in the previous step.
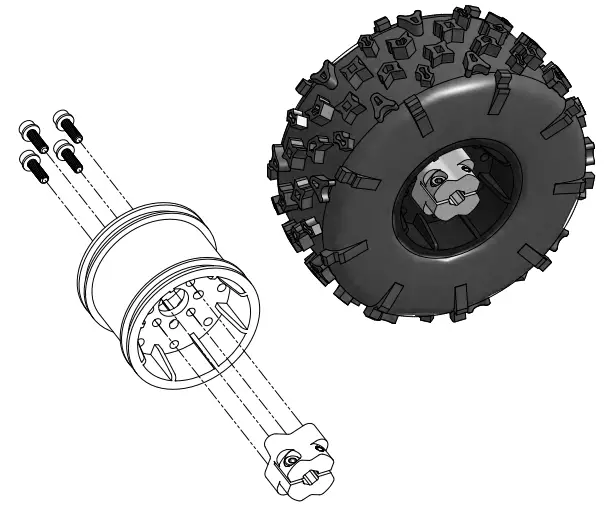
STEP 15
Use four 14mm length screws (each with a washer) to fasten a Hyper Hub to one of the Hurricane Wheels. Ensure the hub is on the more shallow side of the wheel. Then add a tire to the wheel. Do this 3 more times for a total of four wheel assemblies.
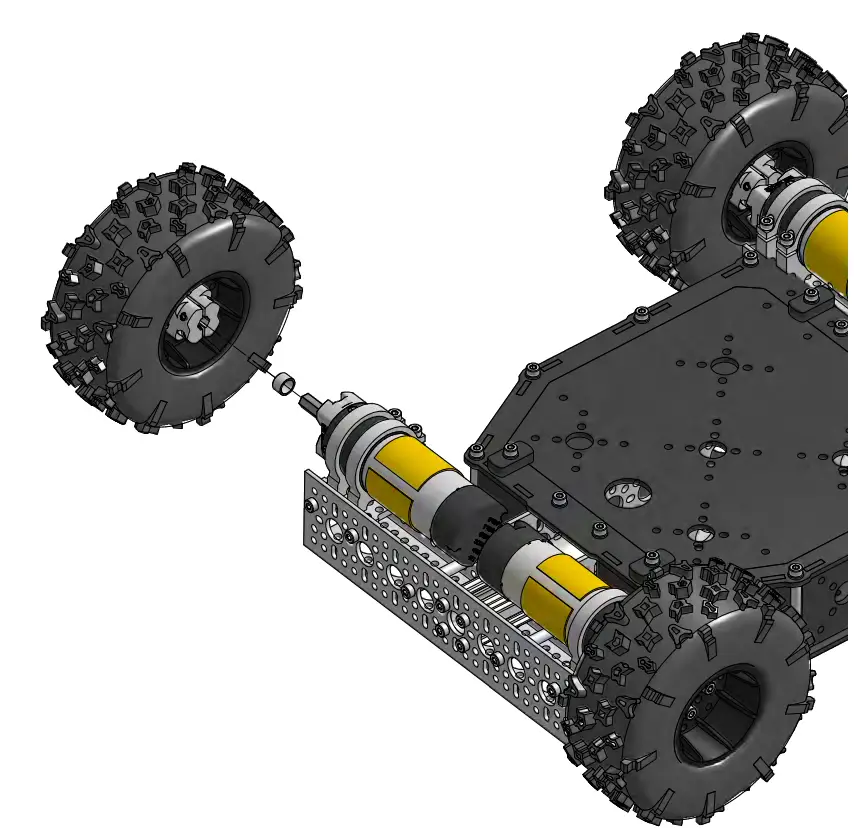
STEP 16
For each motor, slide one 8mm ID, 6mm length aluminum spacer onto the output shaft, then slide on one wheel assembly and tighten the pinch bolts of the Hyper Hub.
Pro Tip:
Now use the included glue to secure the tires to the Hurrican Wheel rims and wait 24 hours for the glue to fully cure.
CONGRATULATIONS!
Your Hammerhead Chassis Kit is assembled!