![]()
Contents
CV50 Laser Engraver Enclosure Sain Smart
User Guide
- Visit the official website https://lightburnsoftware.com/ to download LightBurn.
Notes: The free trial period of the software is 1 month. Visit https://lightburnsoftware.com/collections/frontpage/products/lightburn-gcode for permanent serial number. - Open LightBurn after installation. Click “OK” to close the License Page .

- Import the .lbdev configuration file in the TF card. There is a corresponding machine in your device list after importing the configuration file. Select the machine and click OK to configure successfully.

- Click “Edit-Settings”. Choose “mm/min” and click OK.

- Click “File-Import” to import the picture. Set the position, size and rotation angle of the picture.
Tips: Usually import .dxf or .svg, and set “Mode” to “Line” in the Cuts/Layers window for cutting.
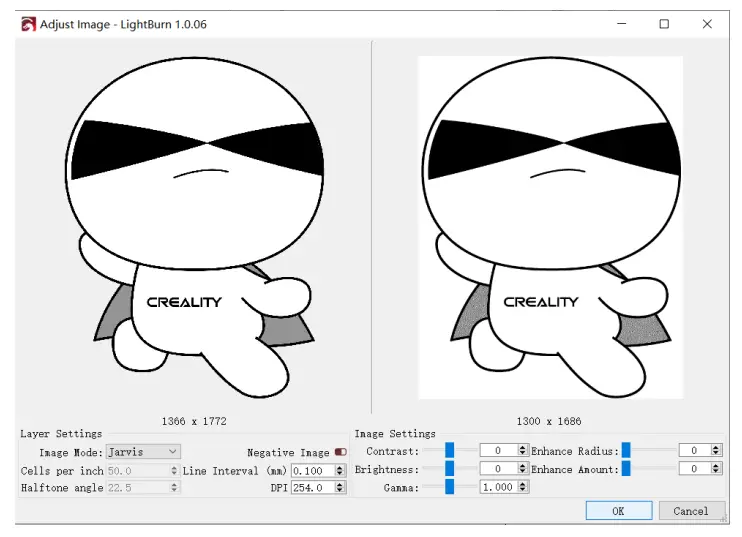
- Right click on the image. Adjust Image to set the effect and click OK.

- Set the appropriate Power %, Speed and Pass Count. Enable or disable “Air”.
 NOTES:
1. Higher power % or slower speed makes deeper effect; Lower power % or faster speed make shallower effect. Generally we just adjusted “Power Max” .Please refer to the TF card for recommended parameters.
2. Disable “Air” when engraving and enable ”Air” when cutting. - Finally, click “File-Save GCode” to save the gcode file to the root directory of TF card.
Note: Make sure the format of exported file is “.gcode”. If not, modify the suffix to “.gcode” manually.
- You can also connect the engraving machine through Type-C to engrave in real time and you should select the corresponding Com port.
 Notes: Hold down Shift and click “Frame” to preview the frame. You can set the power in “Move” (You need to “Enable laser fire button” in “Edit-Device Settings” and restart LightBurn first).
 Refer to the website https://lightburnsoftware.github.io/NewDocs/ for detailed software tutorials.
Others
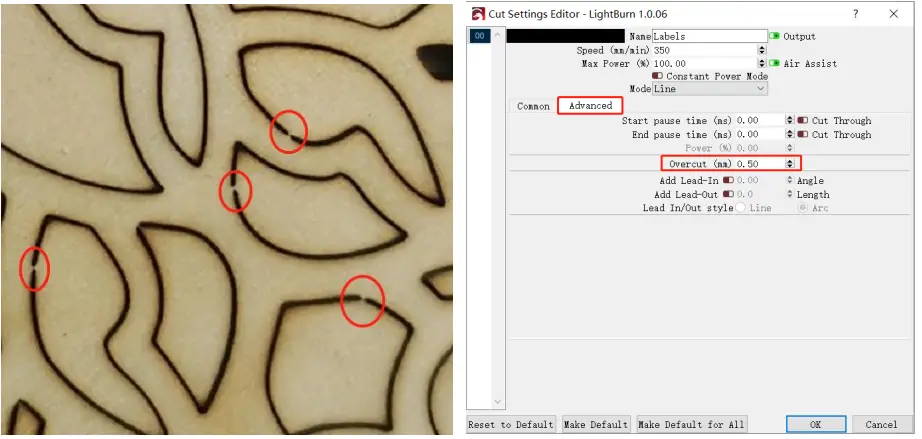
- If the line cannot be closed, you can set “Overcut” in Cut Settings Editor.
![]()