![]()
 INSTALLATION MANUAL
Contents
IMPORTANT SAFETY INSTRUCTIONS
When using an electrical furnishing, basic precautions should always be followed ,including the following:
WARNING:
To reduce the risk of burns,fire,electric shock or injury to persons.
Use this furnishing only for its intended use as described in these instructions. Do not use attachments not recommended by the manufacturer. Never drop or insert any object into any opening.Do not use outdoors.
WARNING:
Risk of electric shock.Connect this furnishing to a properly grounded circuit only. See grounding instructions.
ELECTRIC CONNECTIONS
ALL WIRING SHOULD BE DONE BY A QUALIFIED LICENCED ELECTRICIAN.
WARNING:
Shut off power before wiring.
Requires 120 VAC 20 Amp GFI protected Circuit.
GROUNDING INSTRUCTIONS:
CAUTION:
This product must be connected to a grounded metal permanent wiring system or an equipment-grounding conductor must be run with the circuit conductors and connected to the equipment grounding terminal or lead on the product.
WARNING:
An Electrical option mirror must be wired to a 20 Amp GFI(Ground Fault Interrupter) protected circuit when used in bathrooms and all other locations required by the National Electric Code.
HOW TO CONNECTIONS
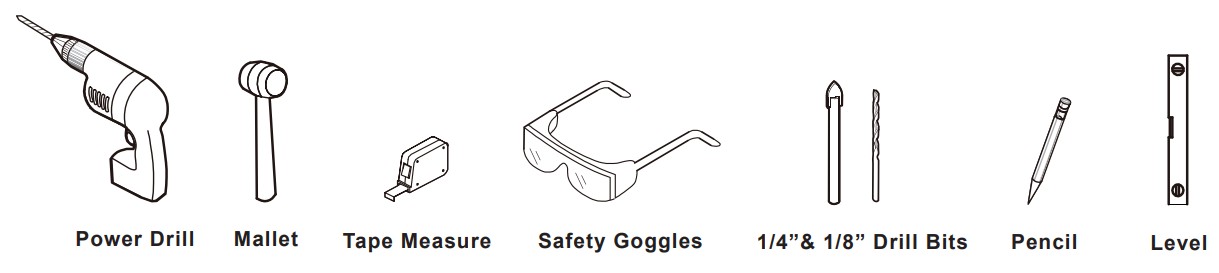
HARDWARE AND TOOLS ( Tools not included)
 HARDWARE LISTS
| ITEM | IMAGE | NAME |
| 1 |  |
Mounting Screw |
| 2 |  |
Wall Anchor |
INSTALLATIONINSTRUCTIONS
Please read carefully and save these instructions
Don’t discard any of the packaging until you are sure that you have all of the parts and the fitings
Make sure power to the junction box is off before commencing installation.
IMPORTANT
- Unpack LED cabinet. DO NOT lay cabinet on tiled or concrete surface prior to installation Cabinet must be on protected surface to prevent chipping of the corners
- Care must be taken before drilling pilot holes to avoid any existing wiring or pipe work that may be concealed.
- A certified electrician must perform all work.The mirror must be connected to a GFI
MAINTENANCE
Wipe clean with a soft damp cloth. Apply glass cleaner to cloth and do not apply directly to mirror
Never use abrasive cleaners as these could damage the finish or exposed LEDstrip 2
INSTALLATION
Please refer to below surface mount or recess mount method.
SURFACE MOUNT INSTRUCTION
Step 1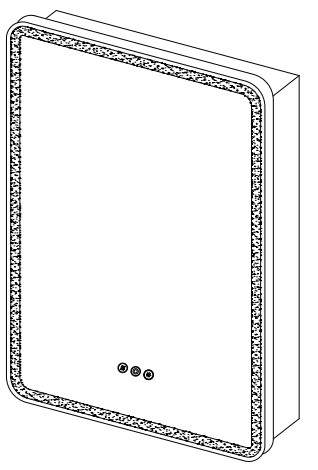 Unpack the LED medicine mirror and prepare tools needed.
Step 2
Measure and mark the back mounting holes on the wall.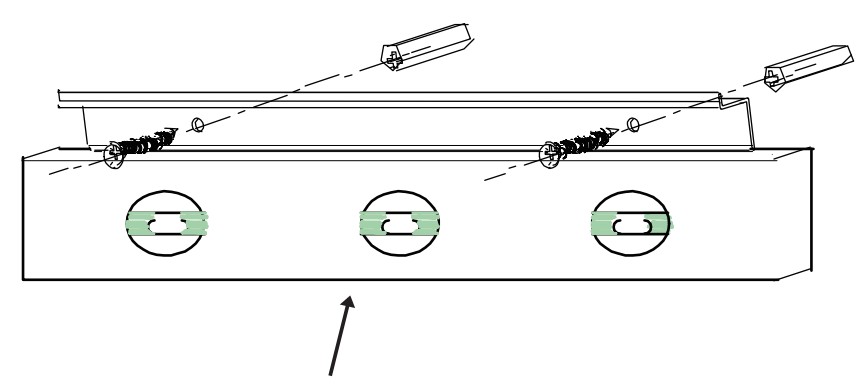 Draw horizontal line connecting the marked location.
The line should be level.
Adjust to level if necessary.
Step 3
Drill holes,and put in the plastic expansion bolt.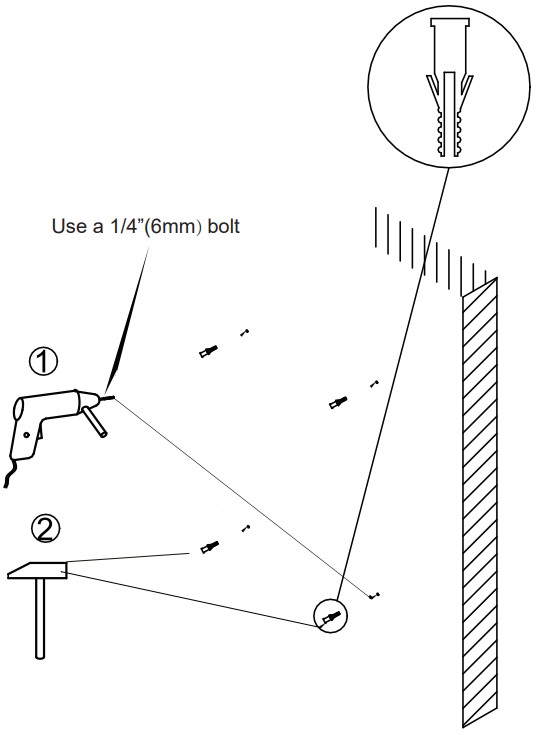 Step 4
Connect hardwire to power line.
Make sure the power off(Voltage:AC110-12V,50/60Hz)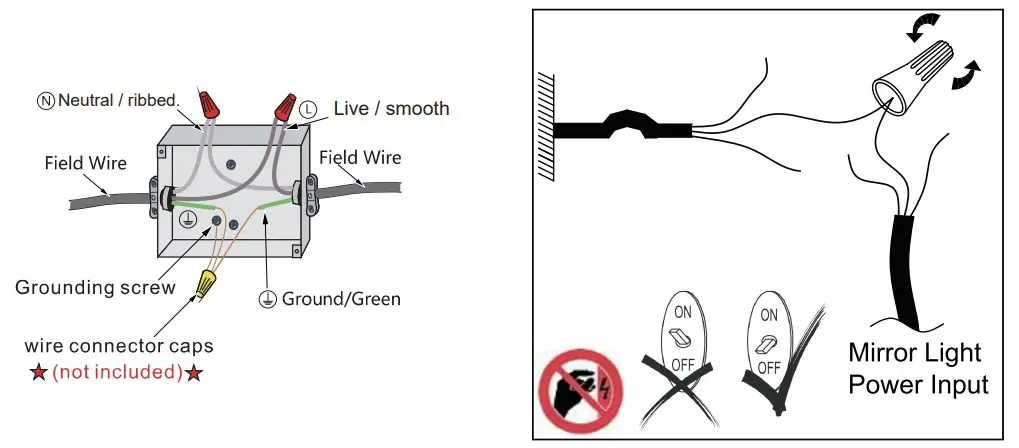 Step 5
Attach the cabinet to the wall with mountin screws from the hardware pack.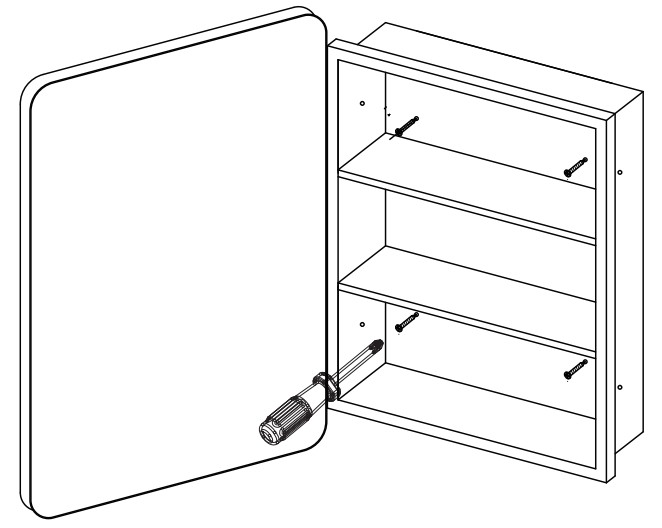
RECESS MOUNT INSTRUCTIONS
NOTE: Rough opening is not an exact measurement. The extra space allows cabinet to be inserted into the opening. Add shims to level and tighten space if necessary. Additional framing might be required.
Rough Wall Opening
| Overall Size | Rough Wall Opening |
| 20 in.(W) x 28 in.(H) x 4.8 in.(D) | 17-1/2 in.(W) x 22-114 in.(H) x 3-112 in.(D) |
Step 1
NOTE: Before cutting the rough opening,check for pipes, electrical cables, or heatingducts. If it is required to remove part of stud, make sure that the wall is not a load bearing wall.
Prepare the opening in the wall for the cabinet body. Make sure that there is support on both sides of the opening to attach the cabinet body , as shown.
NOTE: The cabinet height should be a minimum 2 in. above faucet. Step 2
Connect hardwire to power line.
Make sure the power off(Voltage:AC110-12V,50/60Hz)
Step 3
Position the cabinet body in the rough wall opening. Make sure that the cabinet body flange covers the wall opening uniformly.
Secure both sides of the cabinet body to the wall supports using mounting screws.
NOTE: The cabinet body must be level for the door to work properly.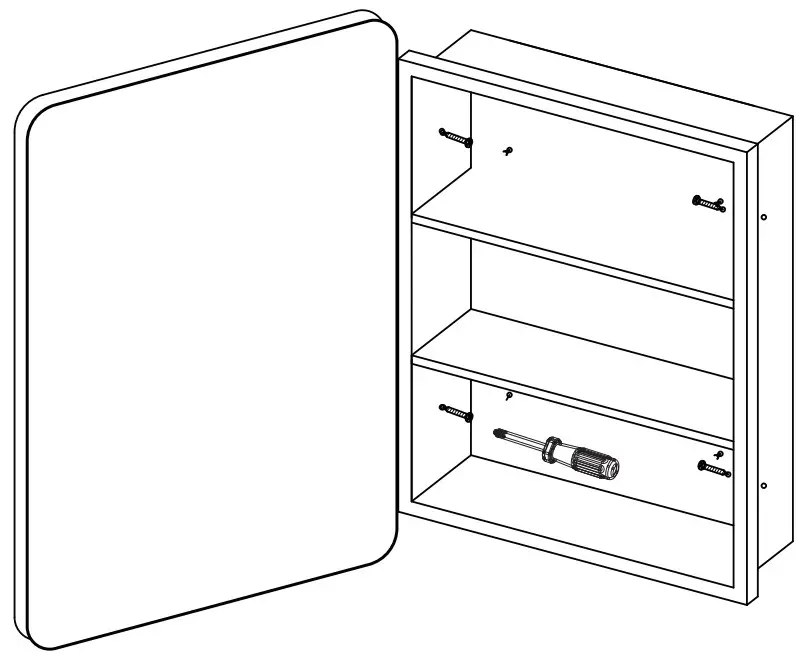
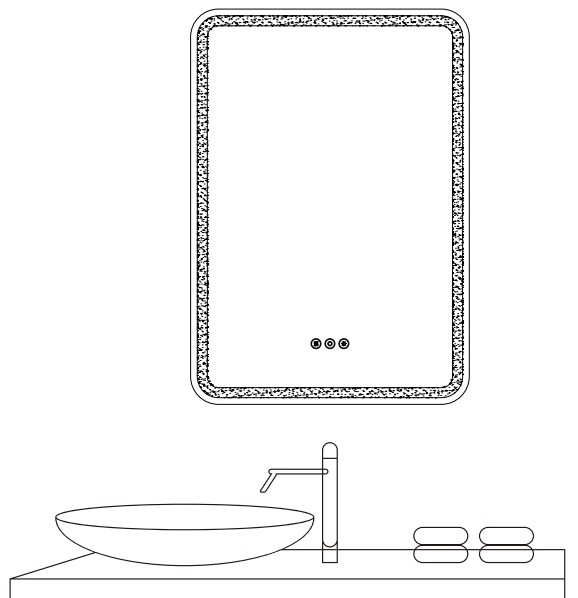
INTRODUCTION OF TOUCH FUNCTION
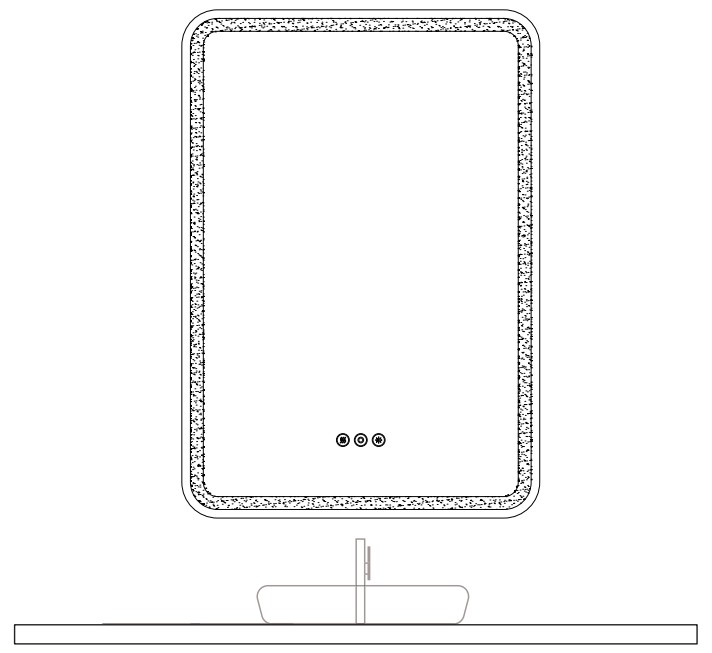
| Click this button to turn the light on or off. Yellow means on, white means off. |
|
| Long click the button to make the light gradually dims Click the button again and the light gradually brightens |
|
| After power on, the button shows white and it is in waiting state, click to turn on the defogging function and the button turn on yellow. Click again to turn off the defogging function and the button to turn to white. |
|
| After power on, the button shows white and it is in waiting state, click to turn on the light function and the white turn on yellow. Long press to switch the color temperature of light by 3k-yellow, 4k-natural or 6k-cold white |
 A – Width
B – Height
C – Depth
Unit: Inch
| SKU# | A | B | C |
| BA-0013MC-L | 20 | 28 | 4.8 |
| BA-0014MC-R | 20 | 48 | 4.8 |
Note: All dimensions & specifications are approximate and subject to change without notice.
![]() Customer Service:
Customer Service:
For any questions or queries regarding our products, please contact our support team:
Email :[email protected]
Website:www.hbezon.com